This procedure is used to maintain customer information.
Select a customer by browsing the overview or by searching. Select the customer in question and click the orange arrow on the right in the screen.

This will open a screen with customer details. The screen may comprise the following tabs: Overview, Address, Invoicing, Bank, Remarks, Orders, Credit Sales, Receivables, Sale, Prices and Discounts.
It also gives you access to the “Register payment” and “New customer order” functions.
Click the “Customers” link at the top of the screen to return to the customer overview.
Overview
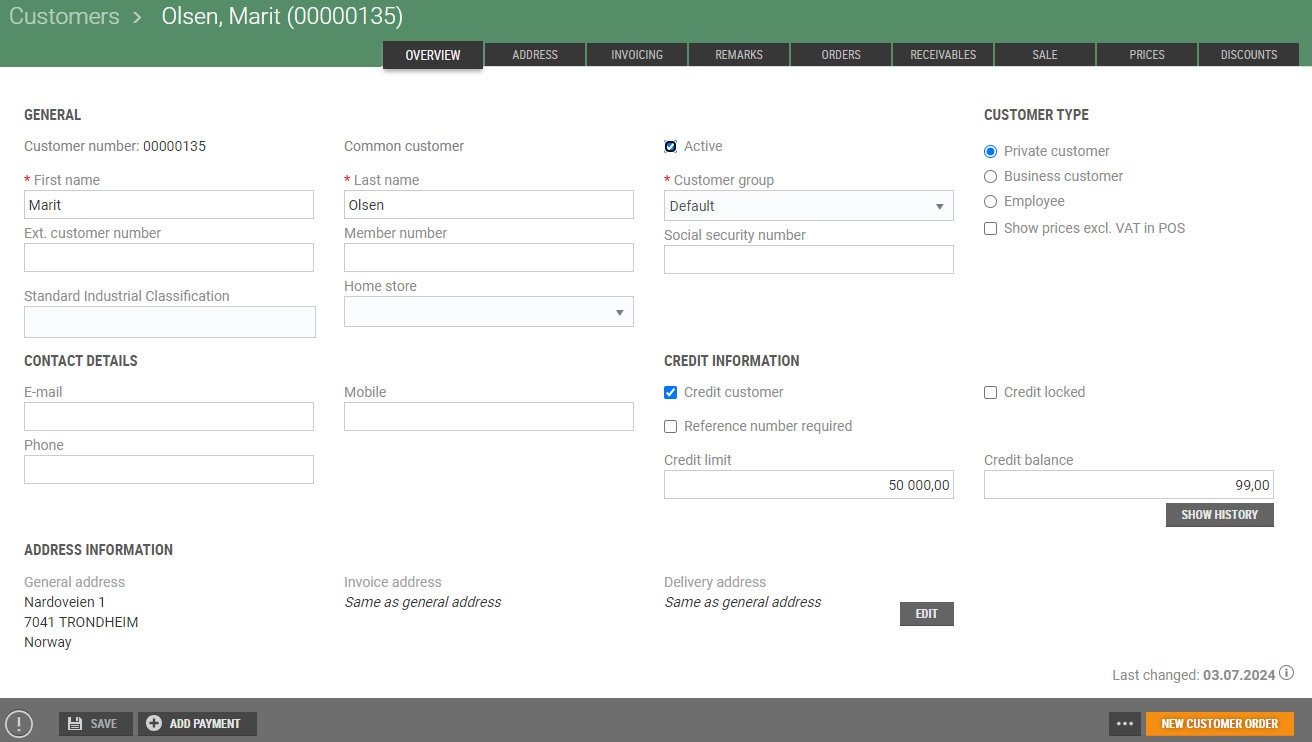
In this tab you can edit general customer information, address information, credit information and other details.
Show history
There is a function for showing balance history under Credit Information.
Press the Show history button.
This will open the “Balance history” dialog. It shows an overview of the change in the customer balance.
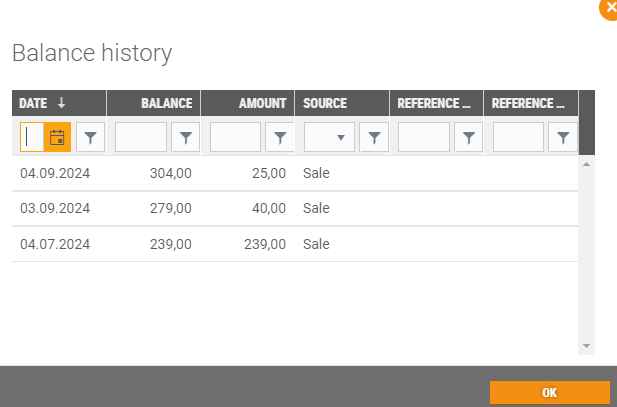
The source of change in the customer balance is displayed in the Source column:
Sales: the customer’s credit sales
Payment: the customer’s received/disbursed payments
System: system corrections of the customer balance
Press OK to close the dialog.
Address information
The address information shows information from the Address tab.
Click on the Edit button to change the address. This will open the Address tab.
Change the address, if applicable, and click Save.
See also description of the Overview tab under New customer.
Address
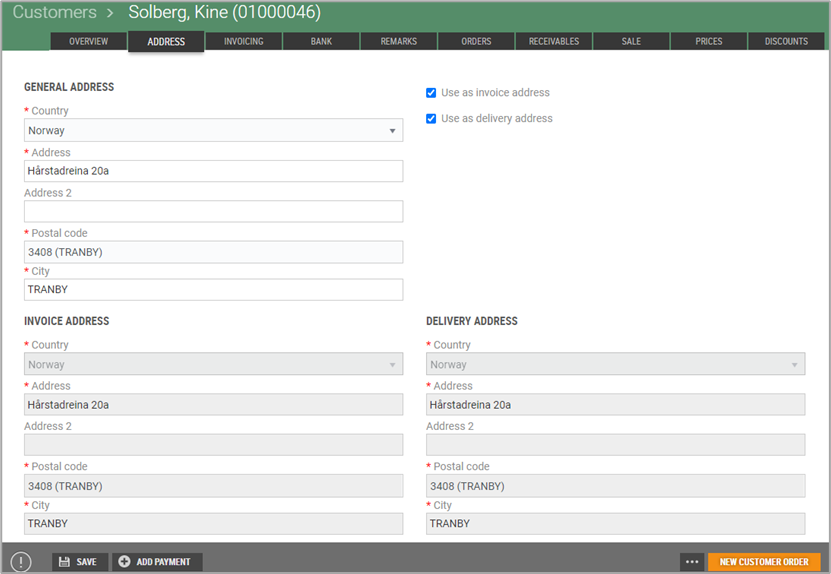
This is where you can maintain the general address, invoice address and delivery address. The use of a general address as the invoice address and delivery address is ticked as the default setting. You can remove the tick, which will make the fields active.
Click Save to save your changes.
Invoicing
This is where you can view/change invoicing information. The fields available will depends on the type of customer. See the description of fields in the Invoicing tab under New customer.

Remarks
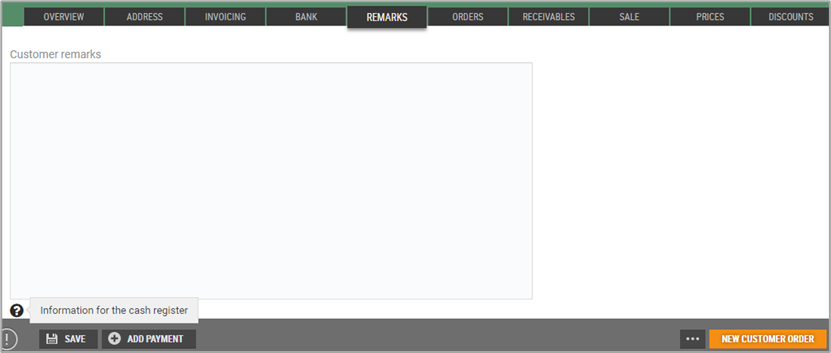
This is where you can enter a customer text, and this information will be sent to the cash register.
Orders
This is an overview of customer orders and offers registered under the customer.
You can view customer orders/offers details by selecting customer orders/offers and clicking the orange arrow on the right of the line. This will open the screen for maintaining customer orders /offers.
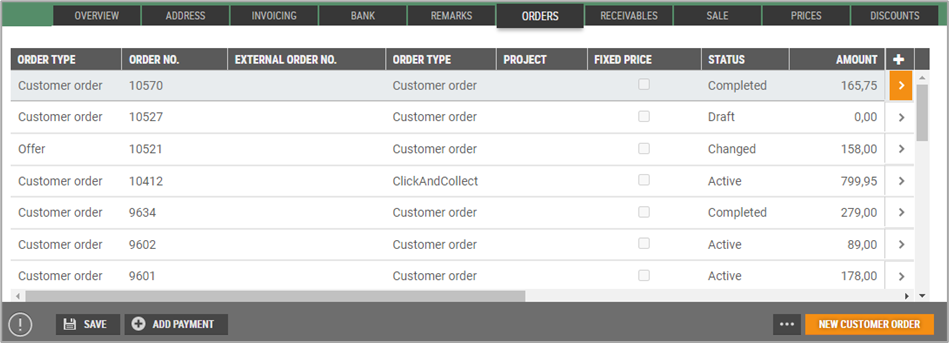
You can create a new customer order by clicking the New customer order button. This will open the “New customer order” screen. The customer will be automatically registered. Create customer orders in the usual way.
Receivables
The Receivables tab shows an overview of the customers’ invoices, reminder letters, credit notes and payments received from the customer.
You can preview these by selecting the desired line and clicking the orange arrow on the right of the line. This will open a preview in a new screen.
Click the Back button in your browser to return to the Receivables tab.
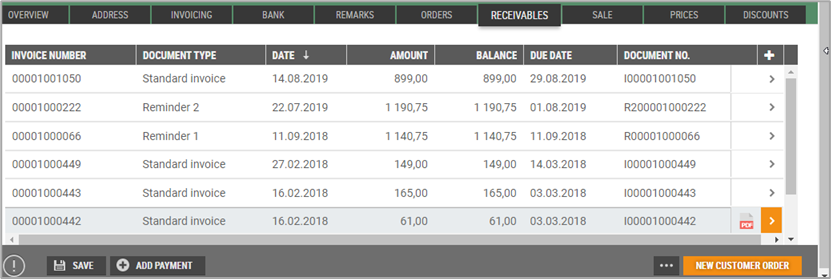
The “Payment source” column displays information about where the payments come from:
Cash register: payment received from cash register
Manual: manual payment
OCR: OCR import
Offset: offset against a credit note
Correction
When the “Register payment” function is used, a description/comment is entered for the payment. You can view this description by ticking the payment received and clicking . This will open a description in a “tooltip”.
Sales
The Sales tab shows an overview of credit sales for the customer, registered at receipt level. This is where you see receipts that are ready to be invoiced or have been invoiced.
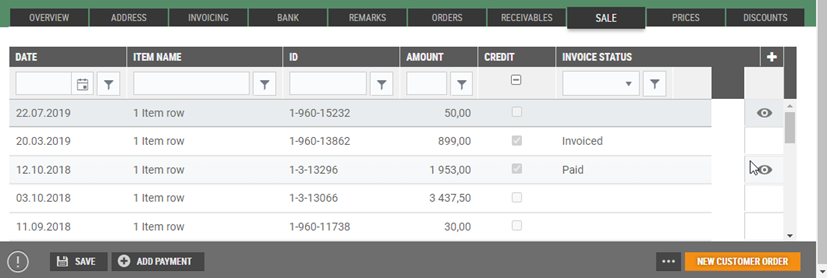
You can preview the credit sale by ticking the line for the credit sale and clicking the “eye” icon on the right. This will open a preview of the credit sale below the line for the credit sale selected.

Prices
The Prices tab shows an overview of the customer’s customer-specific prices.
The Prices tab is ONLY applicable to business customers.
There is a line for each item with a customer-specific price. You can edit item lines or create new customer-specific prices. Customer-specific pricing will override any item or item-category discounts.
It is only possible for a customer to have ONE active customer price per item.

Add new customer-specific price
1. Add an item by entering the EAN or an item text in the search box. When searching for an item text, you will receive a list of search results. Select the item concerned by clicking Enter on the item.
2. Specify a validity period. Date from and date to (today’s date is the default date from and to). Only items with a valid date get customer-specific prices when an item is registered in a customer order or credit sale.
3. Add customer-specific price.
4. Click Update to update changes or click Cancel to cancel.
Edit/delete a customer-specific price
Select the item concerned.
Click the “pencil” icon to edit the validity date and customer-price item line.
Click the “bin” icon to delete the item line.
Discounts
The Discounts tab shows an overview of customer-specific discounts. You can give a discount to a single item or an item group. There is one line per discount.
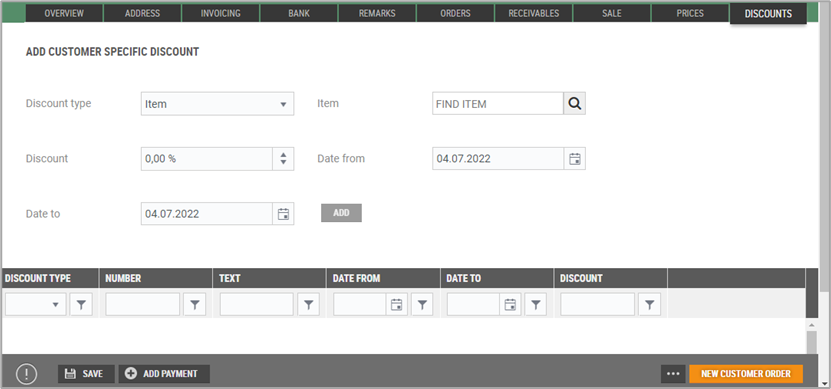
Add a new customer-specific discount
Select discount type: you can choose from Item or Item group.
Discount for item:
Select discount type Item.
Search for an item by entering the EAN or item text in the search box.
Search for EAN: enter an EAN number. Click Enter or the search button.
Search for item text: enter an item text. Click Enter or the search button. This will open a list of search results. Select an item by clicking the item or pressing Enter when the item is selected.
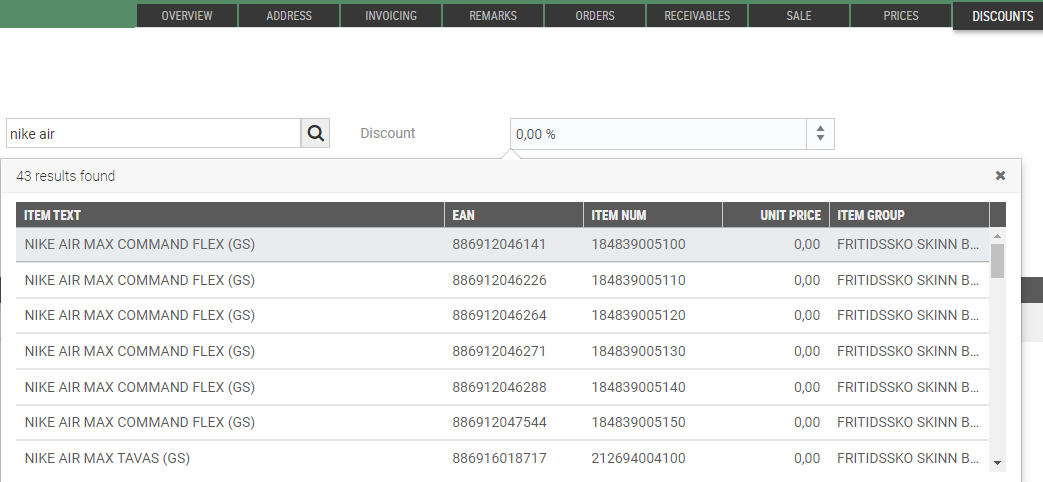
Specify a discount in the “Discounts” field.
Set a validity period by specifying the from and to dates (today’s date is the default).
Click Add, the item is added to the screen.

Discount for item group:
Select discount type Item group.
Search for item group by entering the entire or part of the item group’s name in the search field. This will open a list of search results.

Select an item group by clicking the item or pressing Enter when the item is selected.
Specify a discount in the “Discounts” field.
Set a validity period by specifying the from and to dates (today’s date is the default).
Click Add, the item group is added at the table.
Save customer specific discount
When you have added a customer specific discount you must click Save to save the changes.
The "Update customer orders and invoice bases" dialog opens. You must confirm if active customer orders and invoice bases that are ready for invoicing should be updated with the new customer details.

Click on the Update orders and invoice bases button to update orders and invoice bases with the new customer details.
Click on the Save customer only button to save the changes only on the customer.
Edit customer specific discount
Select the item/item group concerned.
Click the “pencil” icon to edit the item/item group. You can edit validity date and discount.
Click Update to update changes or cancel to cancel changes.

Delete customer specific discount
Click the item/item group line you want to delete and click on the “bin” icon. Item/item group is deleted.

Add payment
In the customer details view there are a function to add payment of an invoice for the customer.
Click on the Add payment button.
This will open the “Manual Payment” dialog.
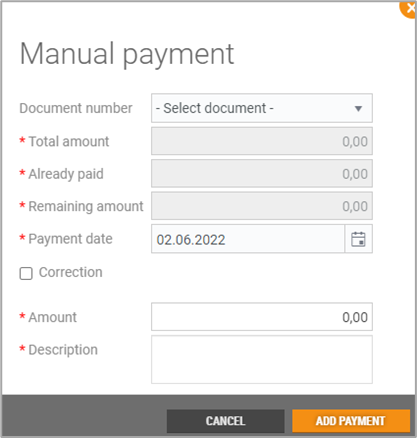
Select an invoice from the “Document number” field on the dropdown list.
This will give you an overview of the total amount, of what has already been paid and of the residual balance. Most fields are mandatory, and these are marked with *.
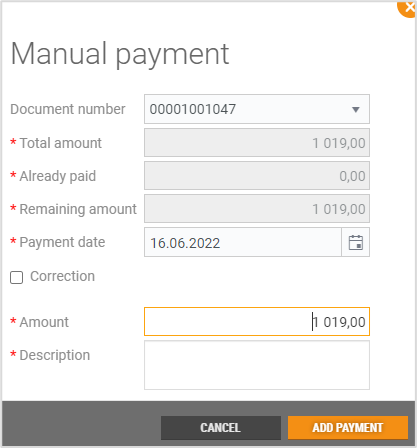
Payment Date: today’s date is suggested, but this can be changed.
Amount: Register paid-in amounts. The residual amount is suggested, but it can be changed.
Description: add a description/comment to the payment. This improves traceability and historical data.
Press Add payment to register the payment received.
New customer order
The “New Customer Order” function is used to create a new customer order for the customer. When you select this function, the “New customer order” view opens. Customer is already registered. See a description of how to create a new customer order under Customer order.