User documentation for Self Service Monitor App
- 03 May 2024
- 8 Minutes to read
- Contributors


- Print
- DarkLight
- PDF
User documentation for Self Service Monitor App
- Updated on 03 May 2024
- 8 Minutes to read
- Contributors
- Print
- DarkLight
- PDF
Article summary
Did you find this summary helpful?
Thank you for your feedback
User documentation
Log in
User will be able to login if they:
Have an Azure AD user.
User is invited to EGs Azure
User is added in User Management
User and cashier are added in Chain Web on prem (only applicable for cashier login)
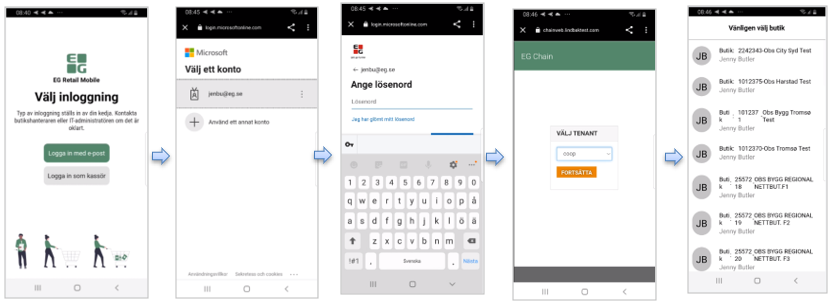
Following images show the log in process for Self Service Monitor.
Language in Self Service Monitor is based on what language is set to user in User Management.
Login with Azure AD (Email)
User selects if they would like to user email or cashier log in. If cashier login user will be asked for a QR code and the cashier number. QR code is found in app when user has logged in with an email the first time. If user chooses to log in with email, they use following flow:
User chooses/adds an account and types in the password.
If user has access to several tenants they can choose, if not this step is skipped.
User chooses store if they have access to several stores. The access to stores is set in User Management/Chain Web.
Login with cashier login
User needs the same setup as for login with Azure AD.
It is also needed:
TLS/SSL certificate.
Create own certificate and distribute certificate on servers for contact to test/prod environment.
Create own certificate and distribute certificate on devices that will use the certificate.
Use a Digital certificate provider that is trusted. E.g.: DigiCert and add this cert to the on-premise server. We recommend this solution.
EG will install certificate for Chain Web shell contact.
Devices needs to be on same network as stationary POS.
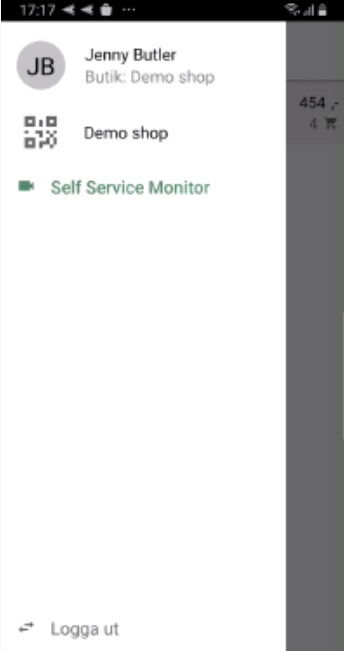
If cashier login is chosen user will be asked for a QR code and the cashier number. QR code is found in app when user has logged in with an email the first time. When pressing the QR code in the left side menu instructions for configuring other devices to the store (the login process) are described.
Introduction to Self-Service Monitor
Self Service Monitor is an app available on iOS and Android that provides the employees in the store with a tool to get better control over the self-checkout area. The app will show all active sales taking place in EG Self-checkout and allow the employee to trigger controls, respond to alarms and be notified about significant events happening in the self-checkout registers. It also means employees can handle events in self-checkout registers from a distance, without having to interrupt the customer's sale.
Control actions and notification information
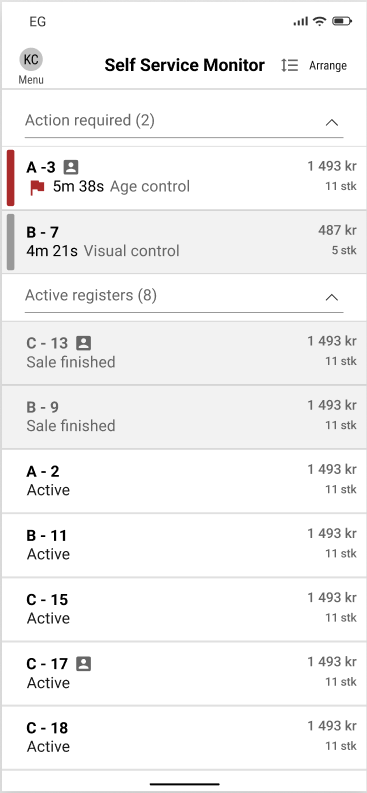
When user has logged in and there are no ongoing transactions the list will be empty.
When active registers are starting up (sale is started), they will be presented in the list.
Controls and Notifications Definition
In Self Service Monitor there are both control actions and notifications. The control actions are actions where staff is required to intervene, and this is communicated between the POS and Self-Service Monitor. Notifications are messages sent to Self Service Monitor, where user needs to perform a check in the app and with customers to ensure all is well, but no communication between POS and Self-Service Monitor is confirming the action and affects the messages in POS/Self Service Monitor.
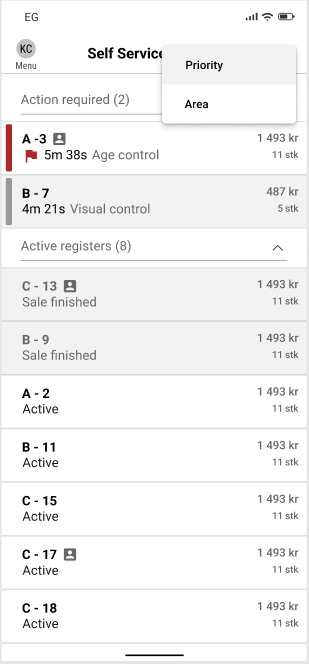
Priority and area
Controls and notifications are by default presented in a priority list. This means control actions and notifications are presented at the top, under the list of actions required. Open active cash registers without controls/notifications are presented under active area.
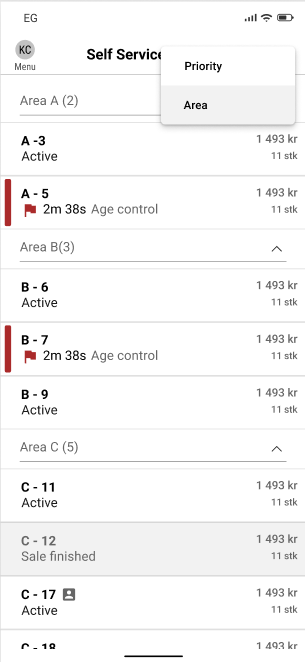
If user chooses to present it based by area all controls, notifications and active cash registers will instead be sorted based on areas in the store if this is used.
Both sections are separated with columns and present name of the section and how many receipts are ongoing in the section.
Presented on controls/notifications
On the control/notification a timer is presented showing how long time the customer has needed help/control items have been added to the receipt. On the row user also finds icons if a member is added to the receipt, the registers "name", a flag indicating there is an action to do and what type of control is needed.
Some sales can have two ongoing controls or notifications. Most of them needs to be handled separately, so just because one is approved does not mean the other one is checked and approved.
Handle controls and notifications
To handle a control or notification, press the row and then press the button with the controls name – then user will be able to complete an action on the control. Below all controls and notifications are presented of how they will work when the complete version is delivered.
Commonly on all controls/notifications is also the "cancel" button. This moves user back to the previous view. It does not cancel anything else but the opportunity to make an action on the control for the moment.
When opening a control/notification the type of control is presented, a member if there is one added and, in some cases, when relative what items are related to the control.
Controls and Notifications
Age control – Control Action
When opening an age control action user is presented with different opportunities. The user is both presented with the age limit of the item, but also what date they need to be born before to purchase the item.
If user presses enter date, they can manually type in a date and Self-Service Monitor will calculate if the date is valid for purchase or not. If user presses "Above 25" the purchase is automatically approved.
If a user has entered a date that is below the age limit Self Service Monitor shows this. The user has then the option to press cancel – and move back with an unhandled control or to choose that the customer has been assisted.
The age-controlled item that needs checked is presented, as well as image, pcs, and price.

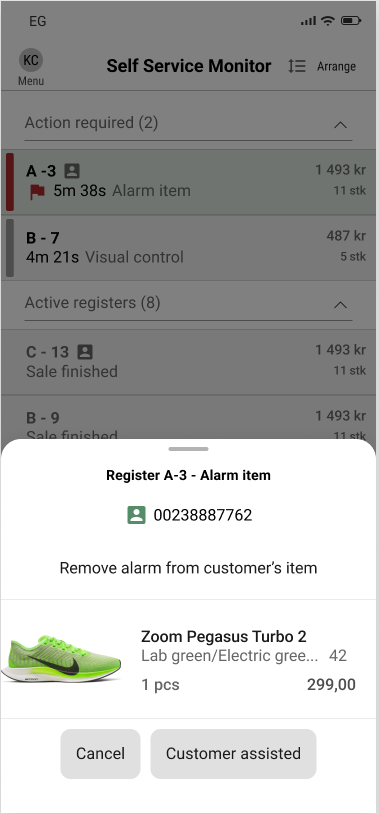
Alarm item - Notification
For alarmed items user is shown what item is alarmed. User can choose "Customer assisted" to confirm they have checked the customer or cancel to let the notification be shown.
(See image below)
Substance item - Notification
When one substance item is added, it will trigger an age control if there is an age limit on the item. When the amount of packages customer has added exceeds the limit customer can purchase a message is shown in Self Service Monitor.
The items that exceed the limit are presented in the message.
If user presses "Customer assisted" the notification is removed.
(See image below)

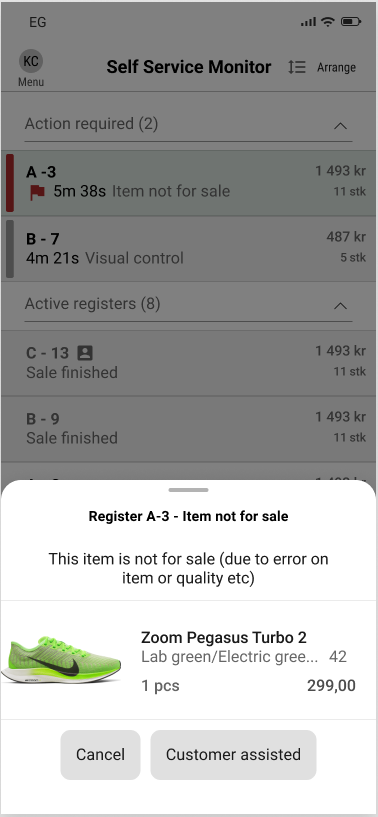
Item not for sale – Notification
When user tries to add an item not for sale Self Service Monitor gets a message about this.
User can then choose to press "customer assisted" to remove the message and check the customer does not take the item with them.
The item is presented in the control.
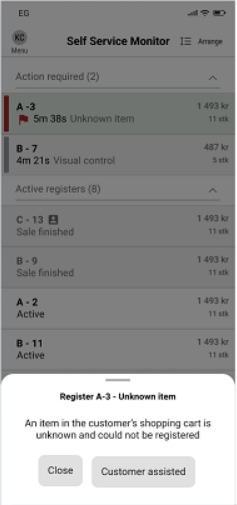
Unknown item – Notification
Sometimes a customer can try, in different ways, adding items that are not in the system.
If this happens user of Self-Service Monitor is notified and can choose "Customer assisted" to remove the notification in the app.
Since no item is added or POS can identify the item, no item or typed in EAN is shown.
(See image below)
Assistance required by customer – Control action
When a user presses, they need help in a self-checkout the control "Assistance required" is shown in Self-Service Monitor.
If user chooses "Customer assisted" the control is removed, and the action is removed from the Self-Service Monitor.
Since the source of assistance required is unknown, no extra information is given.
(See image below)
 Unknown item Assistance required by customer
Offline bank – Notification
Information if the bank terminal is offline is also shown in Self Service Monitor and if user presses "Remove notification" the notification in Self Service Monitor is removed.
(See image below)
Empty paper - Notification
When the paper is empty in the receipt printer a notification is shown in Self Service Monitor. This is only a notification, so even if the staff refills the paper the notification will still be shown in Self Service Monitor.
(See image below)
Offline bank  | Empty paper  |
Specific item – Notification
When a customer has scanned a specific item, the item needs to be approved for purchase.
User can choose the "customer assisted", and the control action will be gone in Self Service Monitor.
The item is presented in Self Service Monitor.
(See image below)
Low sales total- Notification
When a purchase is moved to payment in the SCO and the total amount to pay is alarmingly low a notification will be shown in Self Service Monitor.
When pressing "Customer assisted" the user probably has done a visual control and allows the customer to complete the purchase. The low sales total is approved and the control in app is deleted.
Specific item  | Low sales total  |
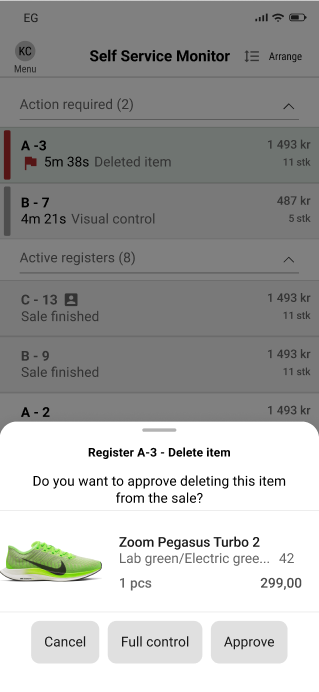
Delete item – Notifications
If a customer chooses to delete an item in the SCO this is notified to Self Service Monitor.
User has then the option to choose "Customer assisted" and that will delete the notification in Self Service Monitor.
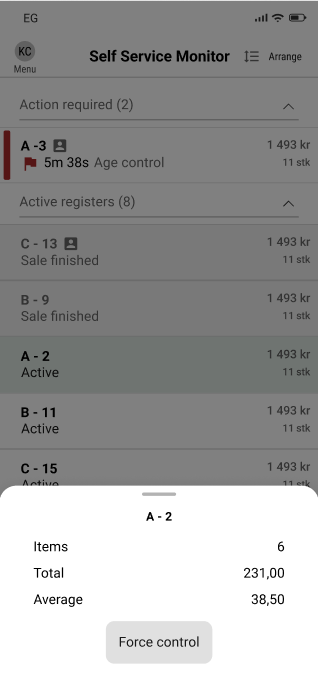
Force control/Visual control - Control
A forced control is a control the user takes initiative to make as an action. This forced control creates a visual control on the receipt. At any time, any active receipt can be marked, and user can force a visual control. Even receipts with other controls can be chosen for a visual control.
This stopes the customer to complete the purchase in SCO and user (staff) can check the shopping visually. When user is satisfied with the visual control they can press "Approve" and the control is complete and removed from SCO and Self-Service Monitor.
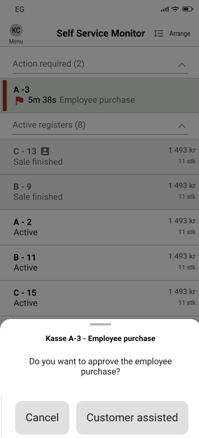
Employee purchase – approve - notification
When a sale is marked as an employee purchase Self Service Monitor shows this as a notification. If user chooses to approve the purchase the staff completes the purchase, and the notification is removed from Self Service Monitor.
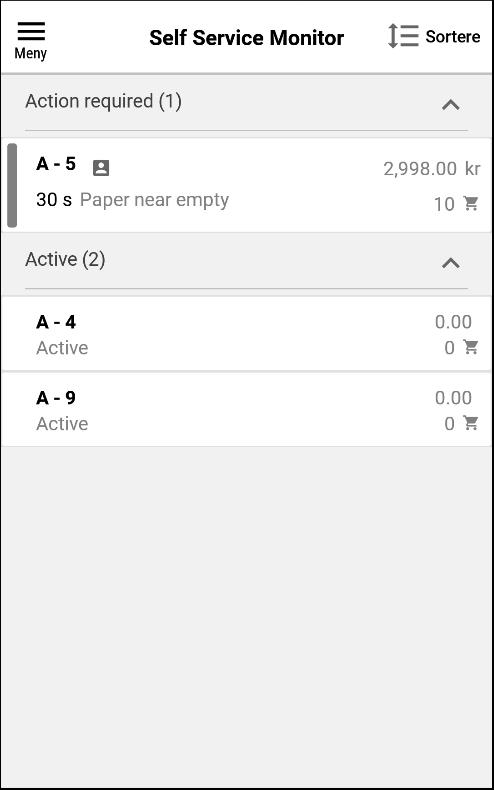
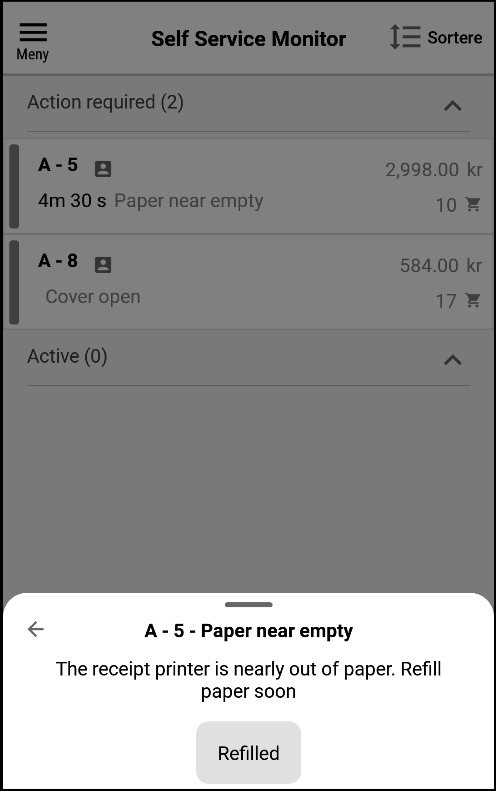
Paper near empty – notification
User will be notified when a printer in the self-checkout area is close to running out of paper. Notification be removed by confirming that the paper in the printer has been refilled.
Cover open – Notification
User will be notified when a printer cover is open in the self-checkout area. The notification will disappear on its own if printer cover is closed properly or the user clicks on the row and chooses "remove notification".

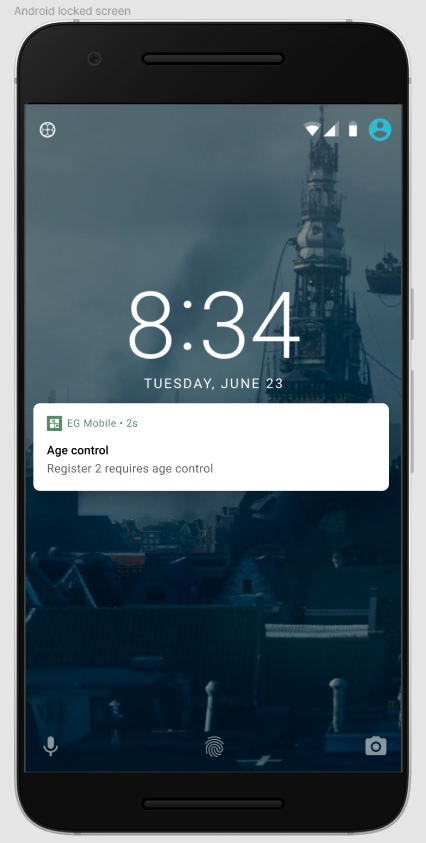
Notifications when device is locked
When Self Service Monitor is used, but device is locked the app will send notifications to user if controls are needed. This to ensure staff knows if something is going on even if they are not staring at the screen the whole time.
If user wants to turn off notifications, they need to use device settings for the application.
Was this article helpful?