The receipt journal is used for verifying and keeping track of transactions at cash register. It provides many selection options and enables filtering to find the desired receipts. This makes it easy to verify receipts. You can find the program under the Finances menu in Chain Web.
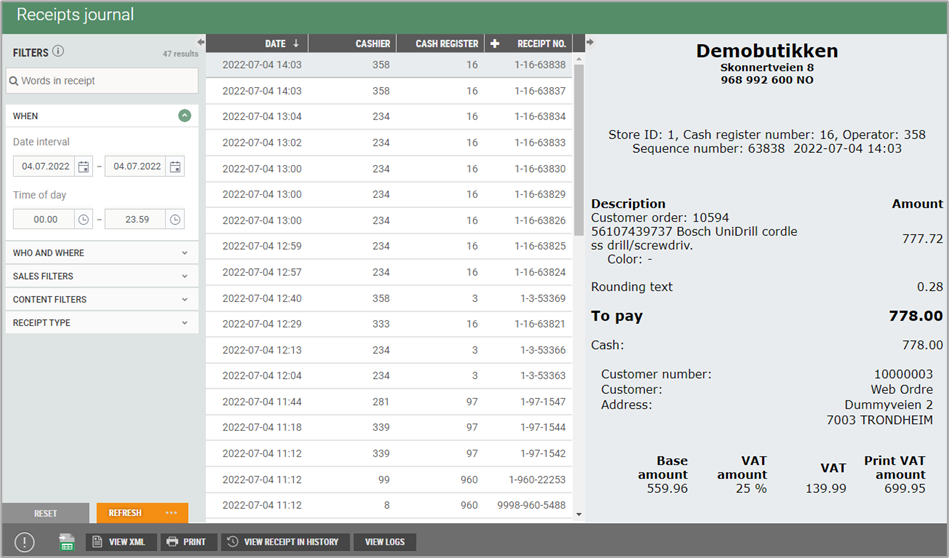
On the left of the screen, you will find various filters that can be used to find the desired receipts. It is possible to hide/open “Filter” by pressing the arrow at the top left of the filter field.
An overview of the search result appears in the middle of the screen, i.e., the receipts which match the specified filter. There is a receipt view on the right of the screen where the selected/marked receipt appears.
FILTERS
The number of hits (i.e., the number of receipts that match the specified filter) are shown at the top of the screen.
NB:
If the search has too many hits, this may cause an error situation where a user will get no hits. This can be resolved by adding one more filter.
Search bar: You can search the receipt on the search bar. Enter a search text and press the button Refresh to update the search. The results will be displayed in the receipt table in the center of the screenshot.
You can base your filter on the following:
When
Who and where
Sales filters
Content filters
Receipt type
Press the information on which to base your filter. This will open more filtering options. Below you will find an overview of the choices you have for the different filters.
Filtering options
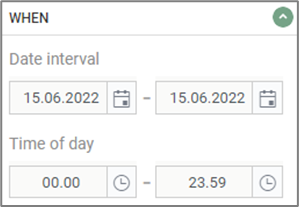
WHEN
Date range: You can specify a date range (from/to dates) by entering a date or selecting a date from the “calendar” icon.
Time: You can specify a from and to time by entering a time or selecting a time from the “clock” icon.
WHO AND WHERE
Stores: If the receipt log does not contain a store, the user will only see receipts from stores to which the user has access. If the user is an HK user, the store selected by the HK user will appear as the preselected store. But the HK user can choose to base a filter on multiple stores.
Cashiers: This is where you can base your filter on cashiers by selecting cashiers from a dropdown list on which you can select multiple cashiers. You need to choose a store before selecting cashiers.
POS units: This is where you can base your filter on POS units (e.g., cash register) and you can choose one or more.
Receipt No.: If the user searches for the “Receipt number”, the following filter will be applied: store, cashier, and POS units. All other filters will be ignored.
To find a specific receipt without entering a store/cash register, you can enter the receipt number in the following format: 1-3-46546 (store no.– cash register no. – receipt no.).
Sales channel: You can filter sales channels by ticking the desired selection; you can select more than one.
Self Checkout
Mobile Checkout
Webshop
Lindbak POS
SALES FILTERS
Sum between - You can filter a sum between a specified interval.
Payment methods - You can filter payment methods. Select a payment method from a dropdown list. You can choose one or more.
Member number - you can filter by member number. Enter a member number.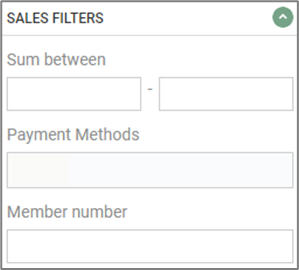
CONTENT FILTERS
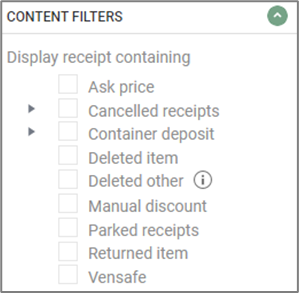
Under Content filter, you can choose to show receipts with a specific content. By ticking the type of content, you want to view.
For some of the choices it is possible to make multiple selections, these are marked with a triangle beside them. Then you can either tap the triangle to show the underlying selections, or tick this without making further selections. Then the underlying selections will also be selected.
NB:
Sales filters are available when the receipt type “Sale” is selected. If the receipt type “Sale” is not selected, the filter appears for “Cancelled receipts”, “Deleted Item”, and “Deleted, other”. Information about this is shown in the screenshot.
RECEIPT TYPE
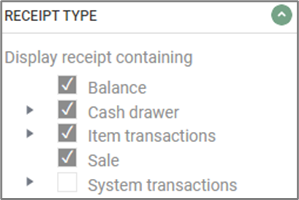
Under Receipt type, you can select receipts that contain a specific type of receipt.
Some receipt types are preselected, but you can choose to change the selection.
For some of the choices it is possible to make multiple selections, these are marked with a triangle beside them. You can tap the triangle to show the underlying options. Check the types of receipt you wish to display.
Buttons in the filter section
At the bottom of the Filter section are the “Reset”, “Update/Specify” and “More” buttons.
Reset - Pressing the Reset button resets the filters you have set for the default view. The receipts for today’s date will then be shown.
Refresh - The Refresh button is used to update the Receipt log after changing the filter. The search results appear in the middle of the screenshot.
More button - Pressing the More button (...) gives you two options (see image below).

Apply in new tab - If you want to show the results on a new tab, you can press the “more” button and select “Apply in new tab.” The search results will then be shown on a new tab.
Set as default filter - If you want the filter you have specified to be default (the filter that appears by default when you open the receipt log), you can press the “More” button and select “Set as default filters”. This opens the “Set as default filters” dialog and asks if you want to use these filters the next time you open the program. Press the Set as default filters button to confirm the selection or press Close to cancel.

Functions at the bottom of the view
Export to Excel
The search results can also be exported to Excel. Tap the “Excel” icon  at the bottom left of the view to export the results to an Excel file.
View XML
By pressing the View XML button, you can display the receipt in XML. This opens the XML file in the XML dialog.
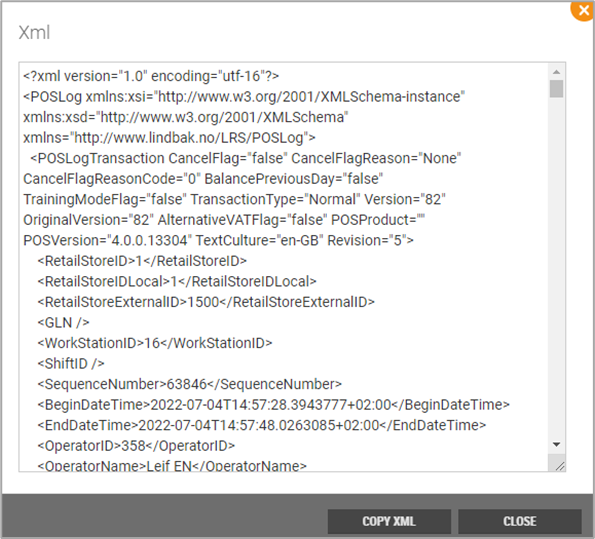
In addition to showing an XML file, you can copy it. Press the Copy XML button and paste the copy wherever you want.
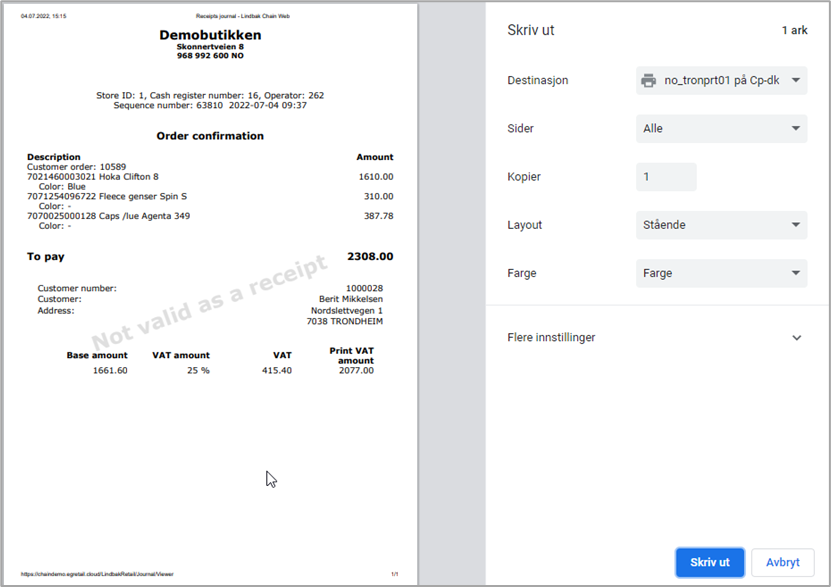
This function is used to print a receipt. Select/highlight the receipt you wish to print. Press the Print button. This will open a print dialog. It shows a preview of the receipt (it is not valid as a receipt). Make any changes to the print settings and select “Print” to print the receipt.
View receipt in history
The user can examine suspicious receipts by selecting a receipt the user wants to examine, select “View receipt in history” and select what you want to base your filter:
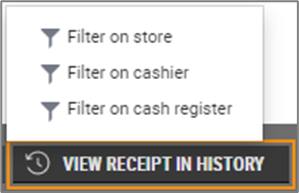
You have three options:
Filter on store: If you select store, you will see the receipts before and after the selected receipts at the same store.
Filter on cashier: If you select cashier, you will see the receipts before and after the selected receipt for the same cashier.
Filter on cash register: If you select cash register, you will see the receipts before and after the selected receipt for the same cash register.