Add member
You can add a member to the sale.
Tap on the Customer  button. However, if a retail chain does not have private or B2B customers available, the button will be called Member and the customer options will not be visible.
A screen to search for member/customer opens. It has two tabs: Member and Customer. For the purpose of this article, we will focus on members.
You can search for members using any identifier allowed by the loyalty system, e.g. phone or member number. What identifiers are possible to search for will be displayed as default text in the search bar.

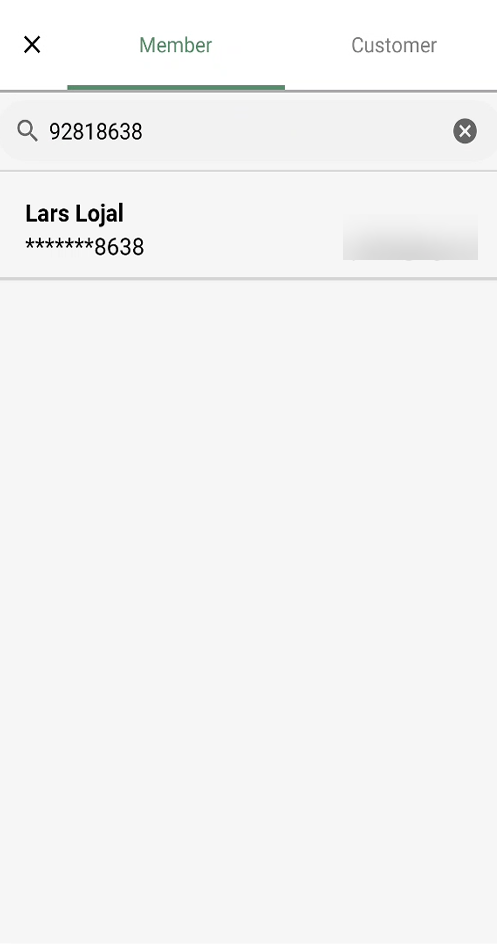
Search result is shown below the search text. Tap the relevant member.
The selected member is added to the sales view. In the top bar, you will be able to view available bonus and member rewards.

Additionally, it is possible to add members directly from the sales view without searching. This can be done by scanning a QR code or barcode containing a member identifier. For all norwegian customer clubs, it is possible to identify a member by scanning the customer’s Vipps QR code. Example:
Customer opens their vipps app and presses Show QR.


Scan the customer’s QR code with Mobile POS to add member.
Member coupons
If the member has coupons, stamp cards or other rewards you can tap on the Rewards to see the available coupons.
The "Rewards view" opens.
If there are coupons that must be activated manually, you can see a checkbox to the right on the coupon line.
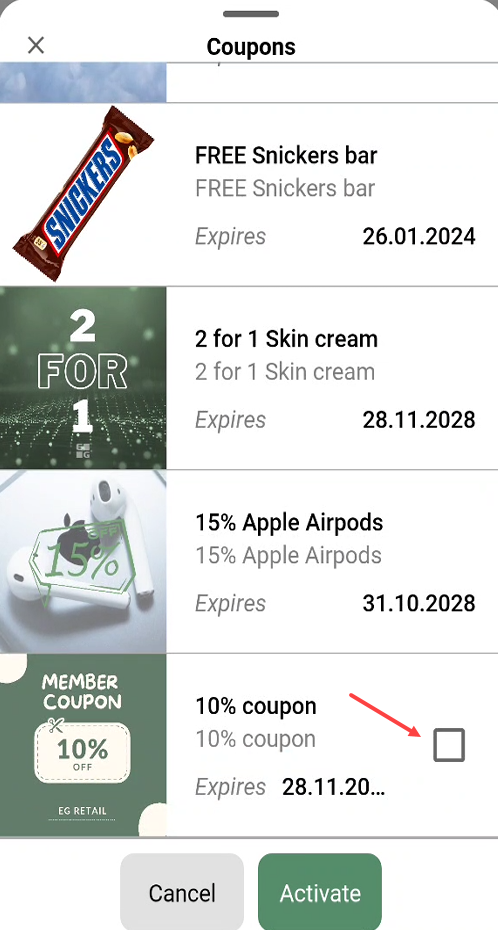
Check the checkbox if the member wants to use the coupon and tap on the Activate button.
The coupon is activated and added to the sale.
In this example it was a coupon for 10 % subtotal discount, marked with a coupon icon on the item lines.

Member details
It is possible to view member details.
Member details can be opened by tapping on the "Customer icon" and tapping on the member's name.
Member details can also be opened by tapping on the member's name at the top of the sales view.

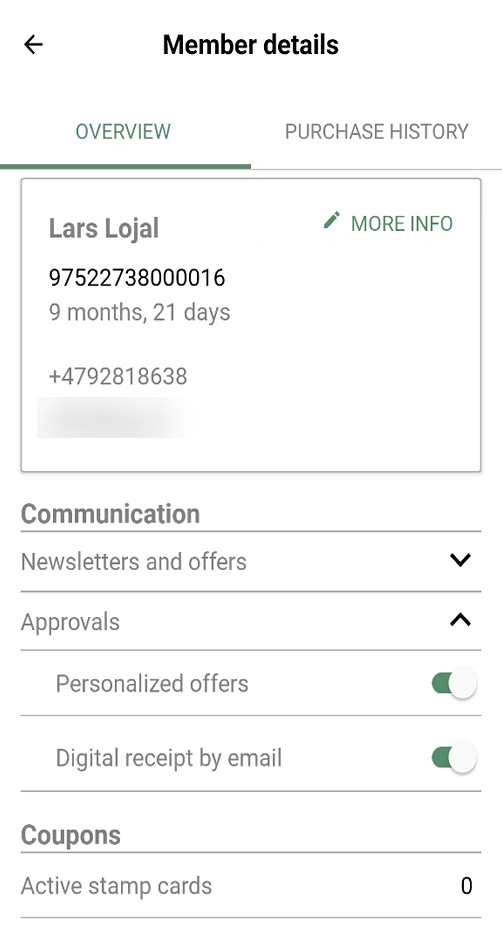
Member details opens.
There are two tabs: Overview and Purchase history.

Overview tab
The Overview tab shows general information about the member, Communication, and Rewards.
Tap on the Arrow at the top of the screen to go back to the sales view.
In the section at the top which highlights key information about the member, it will be clearly visualized if the member is missing key information, such as mobile number, email or approval of terms.

Change member communication
It is possible to expand "Newsletter and offers" and "Approvals" to view the options.
The options can also be changed by tapping on the "select icon" at the right to select/deselect the option.

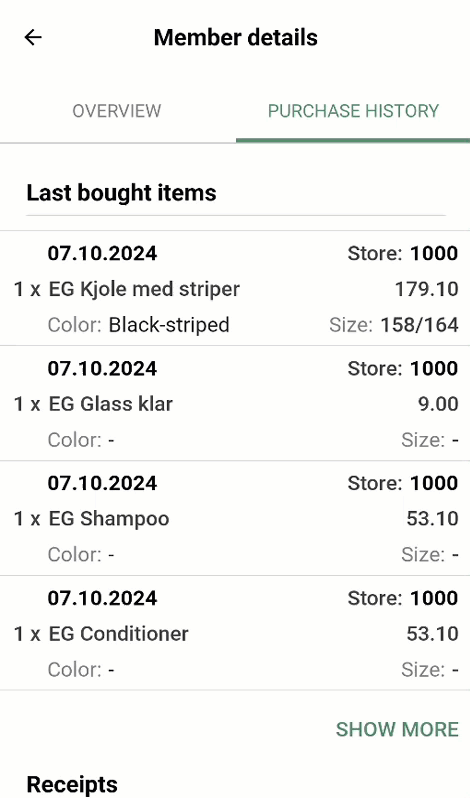
Purchase history tab
The Purchase history tab display the Last bought items, and you can scroll down to see Receipts. From a member’s receipt you are able to choose to directly perform an online return on the given receipt or print it.
Edit member
In order to edit member information, tap on More info and the “Edit member” screen opens.

Here you can edit member. You can scroll down to see more fields.
Edit relevant information. Tap Edit member to save changes or tap Cancel to go back to member details.

Remove member from sale
The member can be removed from the sale.
Tap on the "Customer icon". The "Member" dialog opens.

Tap Remove, the "Remove" dialog opens.
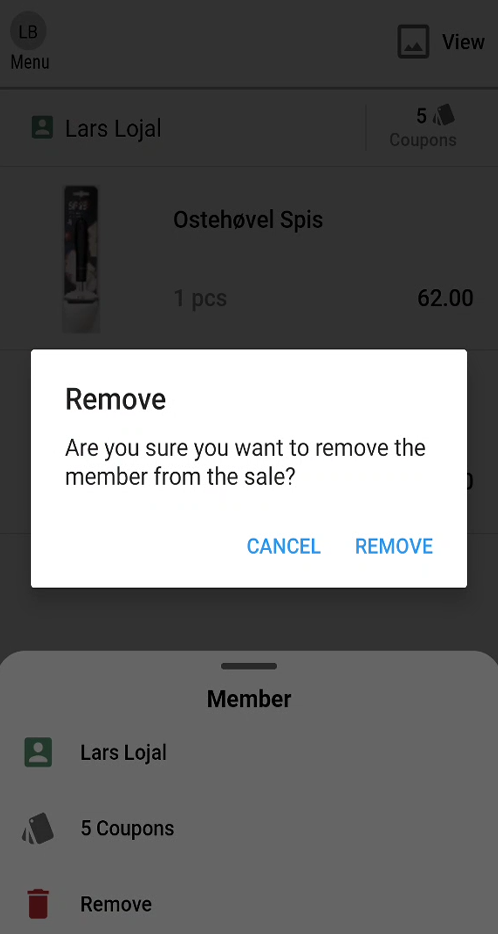
You must confirm that you want to remove the member. The member is removed from the sale.