When you have finished registering an event-driven campaign, it must be activated. Select the campaign concerned and double-click the line to open a view with campaign details.
We recommend setting today’s date as the starting date (the “valid from” date) before activating the campaign.
We recommend setting today’s date as the starting date (the “valid from” date) before activating the campaign.
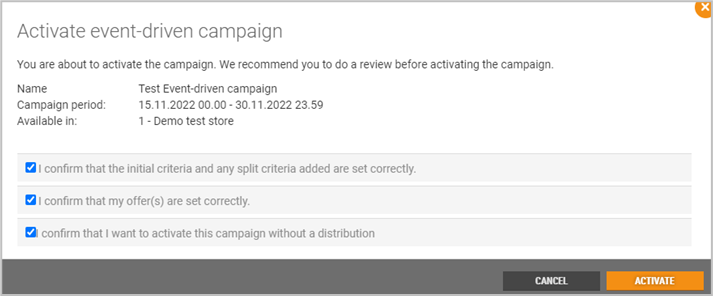
Click on the Activate button.
The “Activate event-driven campaign” dialog opens. The dialog asks you questions aimed at assisting with a quality check before the campaign is activated.
You must confirm that criteria, offers and distribution rules have been set up correctly.
You need to tick all the choices before you can activate. Then click on the Activate button, to activate, or press Cancel to cancel the activation.
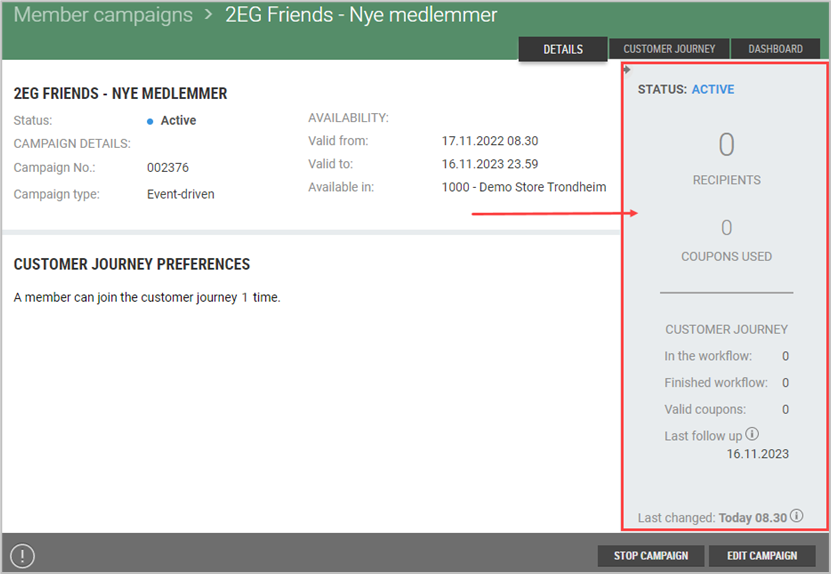
Information panel
An information panel is found on the right of the event-driven campaign details view. It provides the following information:
Status: campaign status, as described in the next section.
Recipients: the total number who have been added to the campaign.
In the event flow: the number of members who under way on the customer journey
Finished event flow: number of members who have completed the entire customer journey.
Latest follow-up: shows the “last theoretical date for when email can be sent”. This one is based on the setup made on the Customer journey tab
Status
The validity of the campaign will determine when a member can join the campaign.

Activating - “Activating” briefly appears when a campaign is activated, before moving on to “Planned” or “Active”, depending on whether you have set a future starting date or chosen that the campaign will begin today.
Planned -This status applies from the time a campaign is activated until the starting date of the campaign.
Active - The campaign is active between the campaign’s starting and end dates. New members may be added to an event-driven campaign during this period.
Only follow-up - New members will not be added to the campaign, but members who have already been added will complete the customer journey.
Completed - The campaign does not create new coupons and no more distributions from this campaign will be sent. Coupons from the campaign may still be valid if the validity date is outside the campaign period.
Cancelled - The campaign is stopped manually.
Timeline of an event-driven campaign
The example below shows how a customer journey can begin at different times for different members. Peter joins the campaign at the start of the campaign period, while Robert joins the campaign near the end of the campaign period and receives follow-up after the campaign changes its status to “Only follow-up”.

Example - Welcoming offer
This example shows common use for event-driven campaigns, a Welcoming offer.
It must meet the following needs:
When a new member joins the customer club, I want them to receive a welcoming offer to give them a reason to join the club.
SETUP EXAMPLE - WELCOMING OFFER
Step 1 - Campaign setup
Create and configure an event-driven campaign as shown below: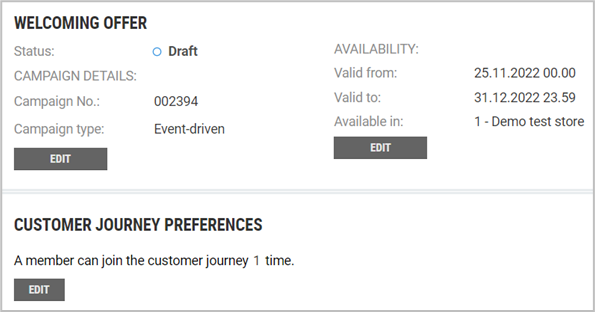
Step 2 - First criteria
Click in the First criteria frame. Select New members. Click Confirm to add New members as First criteria.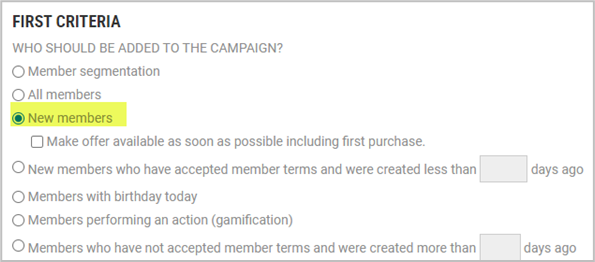
Step 3 - First distribution
This is where the distribution and offer is configured. Click in the First distribution frame, configuration view for Distribution opens.
DISTRIBUTION
Select "Email" as channel, add "Email subject" and Preview text. Select a template.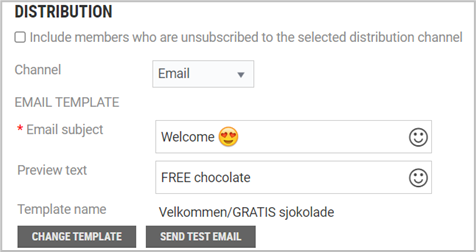
OFFERS
Click New offer. This will open the “New Offer” view. Create the campaign offer in the same way as for other campaigns.
Campaign offers: Offer details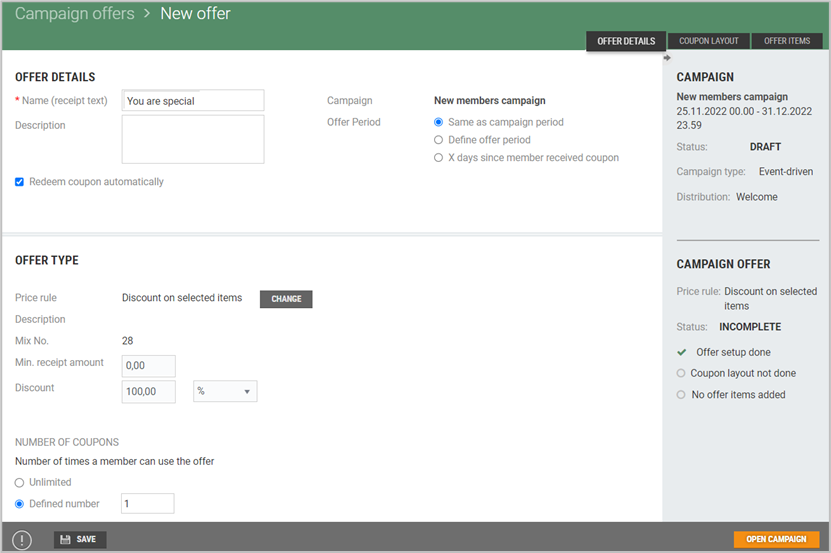
Coupon layout: define the coupon’s appearance.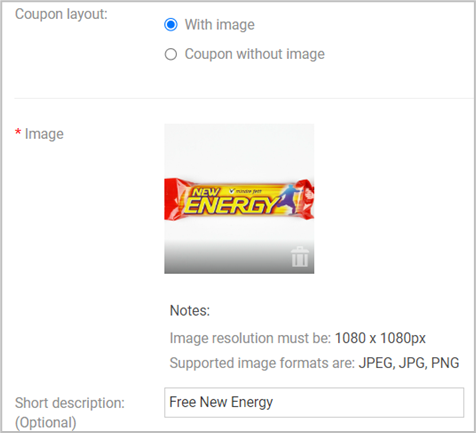
Offer items: Add offer item.
Select Open campaign after the offer has been set up. The offer has now been added under “First Distribution”.
Keep "As soon as possible" as distribution time.
Click Confirm to save the setup.
Step 4 - Activate a campaign
Customer journey:
This is how the customer journey should appear in Chain Web before activation: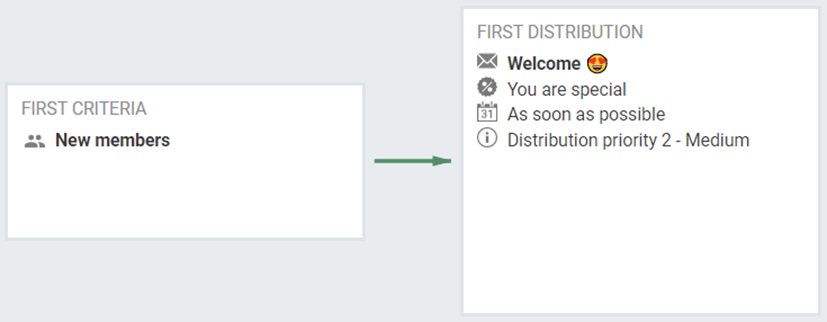
Step 5 - Expected customer journey:
This is what the customer journey will look like for a member who signs up for the customer club:
Register a new member and confirm email validation.
You should receive an email.
The offer should appear in My Page.
If the member chooses to take advantage of the offer, the rest of the customer journey will be as follows:
Start a sale at the cash register.
Register member.
Add the special offer.
The member get a chocolate for free.
End the sale
NB:
The offer will not be available if the member makes his/her first purchase at checkout at the same time as the member signs up.