To create a new user, click the New user button. It is required to add User details and Preferences to create a new user. Store and Cashier can be edited later. See User details for more information.
User details
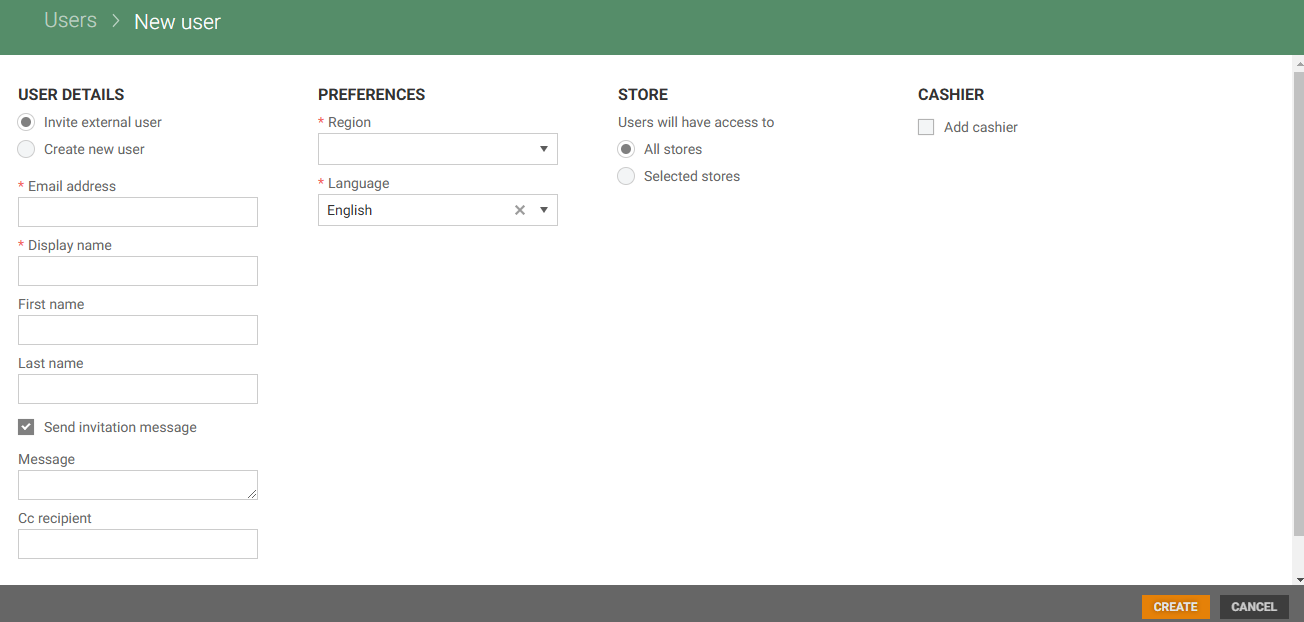
User can be invited in User Management and are automatically added to Azure AD with “Guest” status. A radio button provides two options: “Invite external user” (default selected) and “Create new user”.
Invite external user
Add Email address and Display name.
Optionally you can add a First name, Last name, Message and add a Cc recipient.
By default “Send invitation message” is checked, if you uncheck it, the Message and Cc recipient fields are hidden. If a message and an email are provided in the Cc recipient field , an invitation message is sent to the specified user.
Selecting “Invite external user” and filling in the required the required fields invites the user to both User Management and Azure AD. Users who already exist in the database cannot be invited, and an error message is displayed in Azure AD. If the user exist only in Azure AD but not in the database, they are created in User Management. If they are disabled in Azure AD , their account is activated
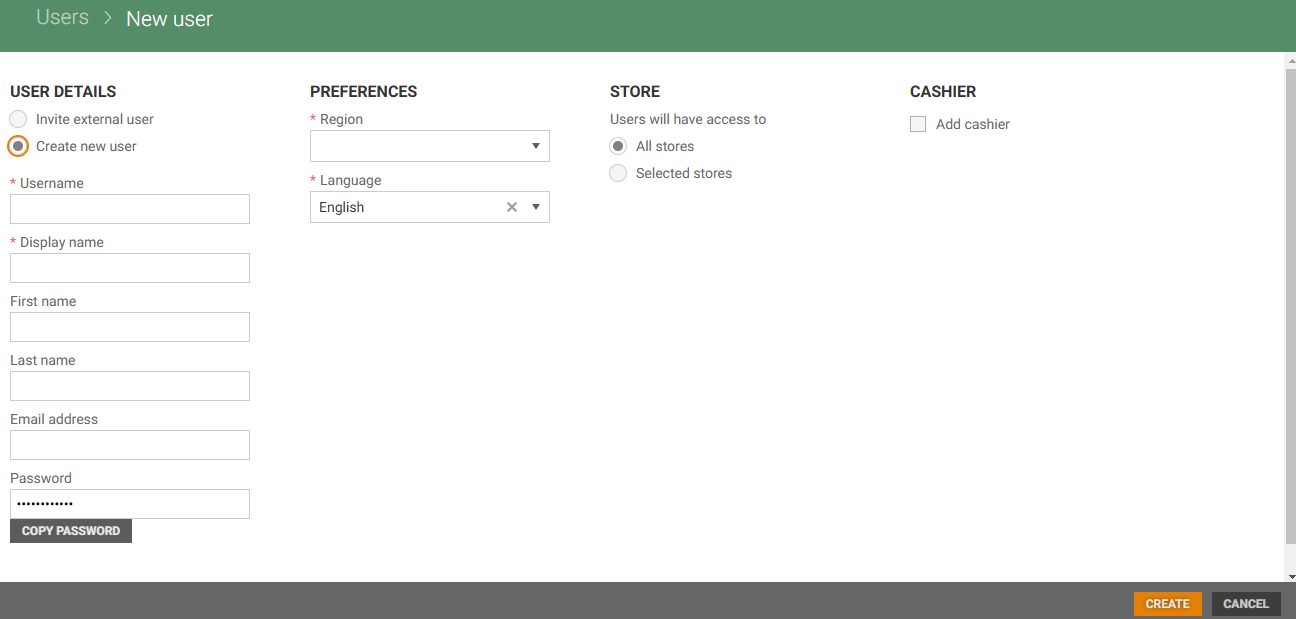
Create new user
Add Username and Display name.
Optionally you can add First name, Last name, and Email address.
Password field is prefilled with an Auto-generated password. It is used to login for the first time into Cloud. You can copy the password by clicking on the Copy password button.
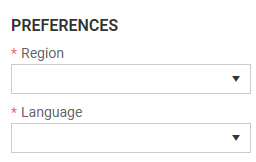
Preferences
Select Region and Language from the drop-down list.
When you have added User details and Preferences you can create the user by clicking on the Create button.
Store
In the store section you can select the store(s) the user will have access to. There are 2 options All stores (default) or Selected stores.
All stores
Select the stores the user should have access to. The default option is "All stores". It gives user access to all stores.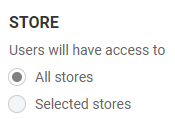
Store level
It is also possible to give the user access on store level.
Tick Selected stores; store level fields open.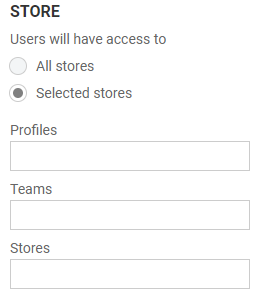
You can limit the users access to specific profiles, teams, or stores. It is possible to select more than one.
Cashier
It is possible to add a cashier to the user by ticking “Add cashier”. 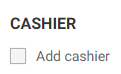
The "Cashier number" field opens.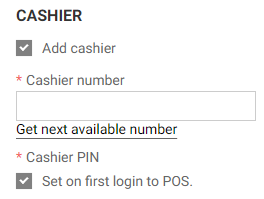
Enter the cashier number or click on the "Get next available number" link, then the next available number is added.
Cashier PIN must be set. By default "Set on first login to POS" is checked. Then the cashier PIN must be set the first time the user login to POS.
If you uncheck this option, then the “Cashier PIN” field opens. Enter cashier PIN.
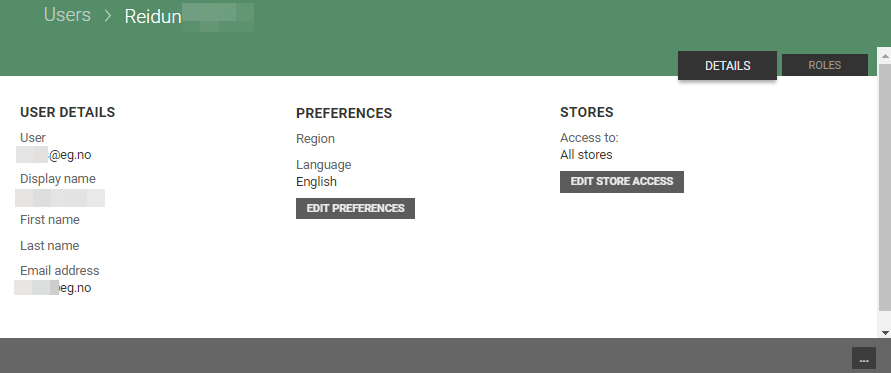
Click on the Create button when you have added information about the new user. The new user is created, and the name of the user is shown at the top of the page. See User details for more information.
Copy user settings
When you are creating a new user, it might be faster to copy settings/roles from an existing user. All properties of the existing user will be copied apart from user details. 
Click the more button ('...') in the bottom right in the user details view and select "Create copy of the user". The "Create a copy" dialog opens.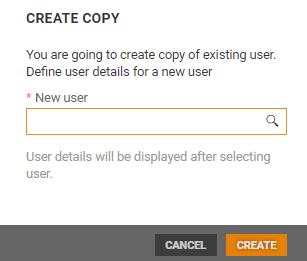
Start writing the name of the new user in the "New user" field. Search result are displayed. 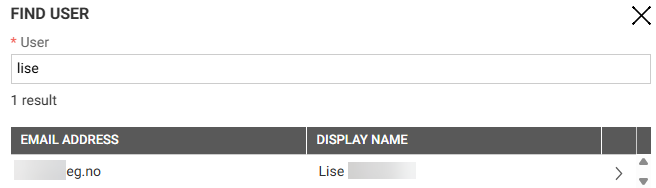
Select the wanted user from the search result by clicking on the arrow to the right. "Create copy" dialog opens. 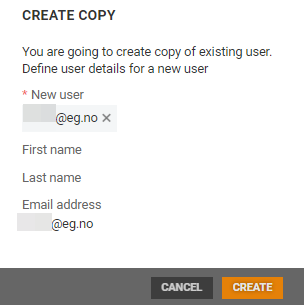
Click on the Create button to create a new user from a copy of the existing user and the users properties. A new user is created, and the user details screen opens.
Copy user settings are only available for users with permission "Create new user".