View dispatch rule details
You can view dispatch rule details by double-clicking at the line for the wanted profile, or click on the orange arrow.
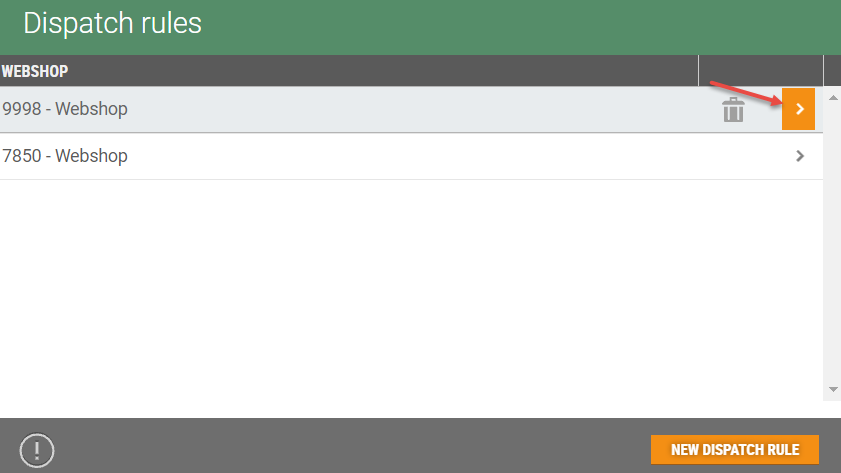
The view for configuring dispatch rule details for the web shop opens. The view has 4 tabs; Overview, Delivery rules, Item availability and Confirmation messages.
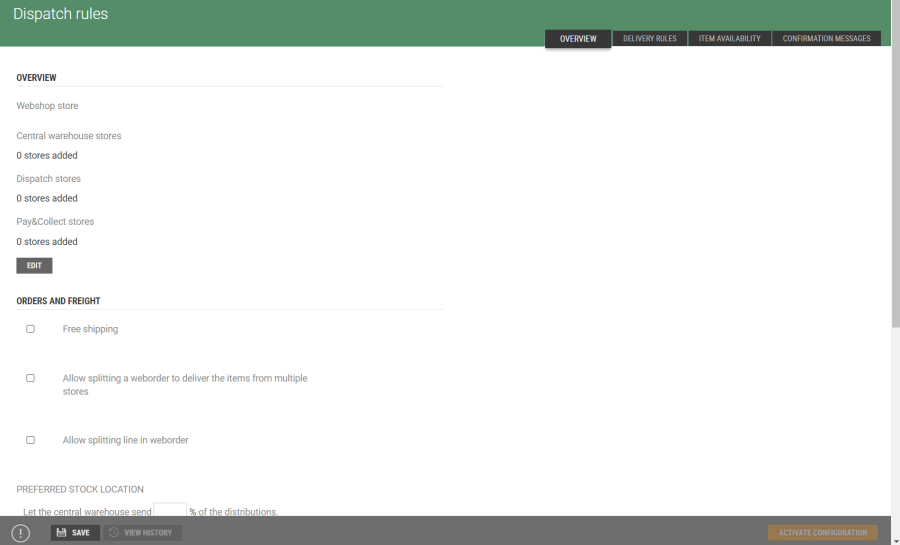
Overview tab
In the Overview tab you configure general dispatch rules for the web shop. The tab contains the fields Overview, Orders and freight, Maximum number of open order per store, Delivery methods and Reassign order.

Overview
Click on the Edit button to configure store type for the stores. See Edit store type description.
Web shop: Store number for the web shop.
Central warehouse stores: Number of Central warehouse stores.
Dispatch stores: Number of Dispatch stores.
Pay&Collect: Number of Pay&Collect stores.
Orders and freight
Free shipping: Tick “Free Shipping” if free freight should be possible. The “Free Shipping from (NOK)” field opens.

Free shipping from (NOK): Add the minimum amount the customer must shop for to get free freight.
Allow splitting a web order to deliver the items from multiple stores: Tick this if it should be allowed for web orders to be split to deliver from different stores. Select max number of stores a web order can be delivered from.

Allow splitting line in web order: Tick this if splitting order line in web order should be allowed.
Preferred stock location: Specify the percentage share of the dispatch to be sent from the central warehouse.

Maximum number of open order per store
Default limit: Specify default limit for maximum number of open prepaid orders per store (possible to override on store level).
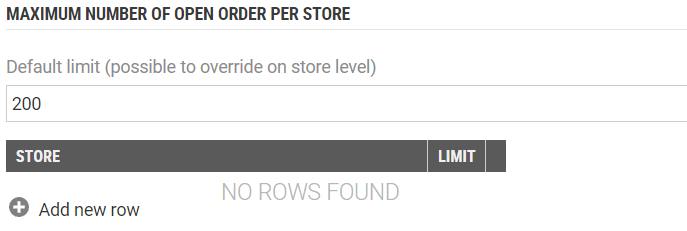
The default limit at the store level is overriden by configuring a default limit that will apply for the selected store.
Click Add new row.
The “Add limit for open orders” dialog opens. Select store and specify the limit that should apply for the store.
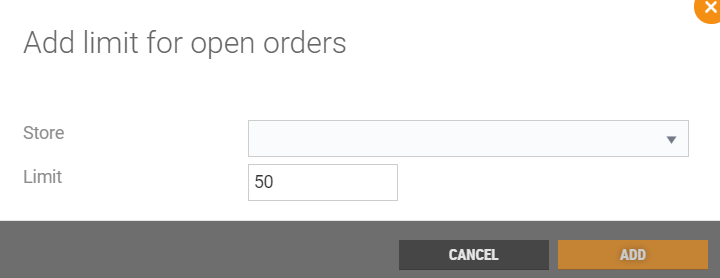
Click Add to add a standard limit for the store.
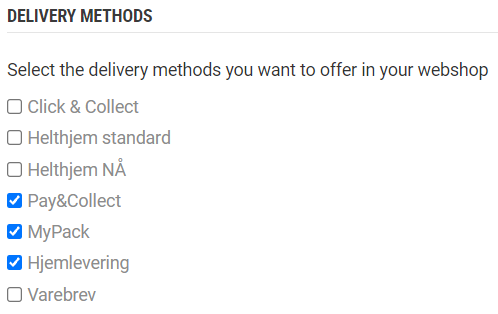
Delivery methods
Select the delivery methods you want to offer in your web shop.
Reassign order
The dispatch orders can be reassigned automatically if no picking store is available or maximum number of automatic reassigns has exceeded the set value.
The Reassign order configuration includes:
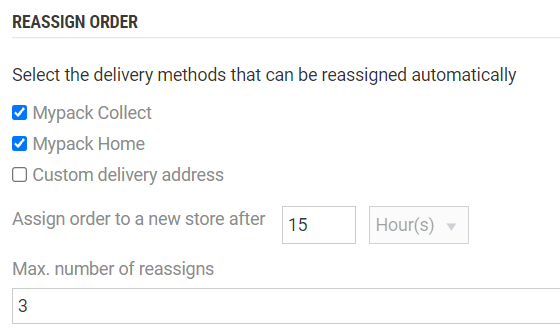
Select the delivery methods that can be reassigned automatically
Specify the default time before order is assigned to a new store
Limit the max number of reassigns - this number only applies to the number of automatic reassigns. Orders can be manually reassigned infinite times.
Click on the Save button to publish changes to Dispatch Service.
View history: Click on the View history button to show historical updates of the dispatch rules. The "History" dialog opens, it shows change history.

Amongst all it shows information about created date, activated date and which change is the Active change.
You can delete a line in the table by clicking on the "bin icon" on the line, or you can select one of the lines as active configuration by clicking on the "Update icon".
Activate configuration: When the dispatch rule is created or changed, the configuration must be activated. Click on Activate configuration after the dispatch rules are saved, to activate the configuration.
To the bottom right of the screen, information about date and time of the last activation is displayed. the latest activation date and time.
Edit store type
In top of the view of the Overview tab, you see an overview over number of stores that is a part of the different store types.
Click on the Edit button. An new view with a list of stores opens, there are one line per store.
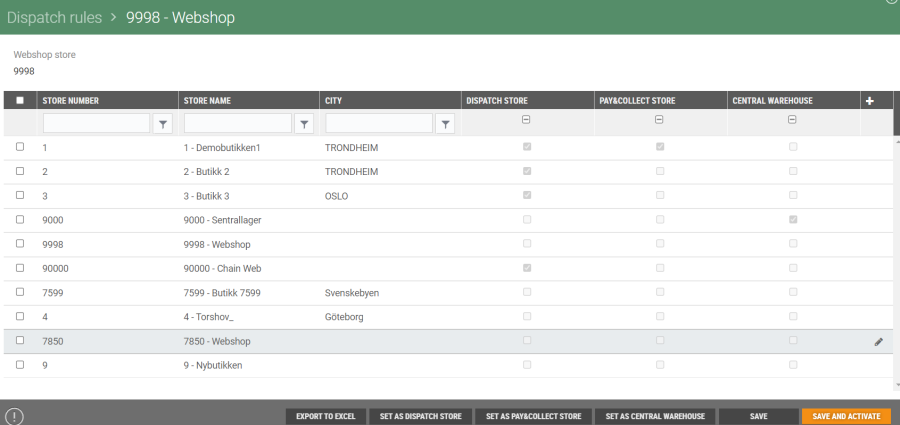
In this view you see an overview of which store types that is configured for each store, and you can select the store types that the stores should be a part of.
Select/remove store types for one store
You can select store types for one store by marking the line for the relevant store, and click on the "pencil icon".
A dialog displaying the stores store types opens.
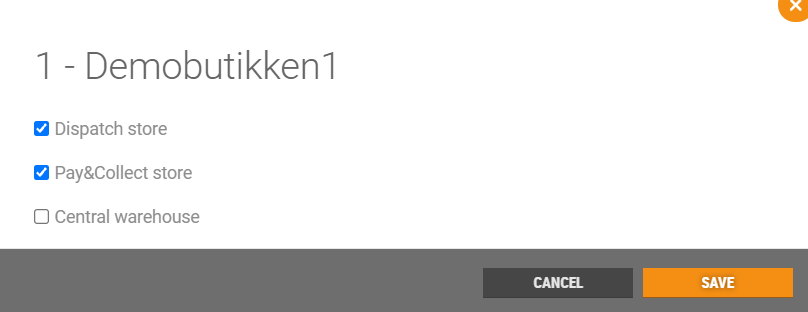
Select store types for the store by ticking the relevant store types. You can also remove store types by unticking store types.
Click on Save to save the changes.
Select store types for several stores
Tick the stores you want to select store types for. At the bottom of the view you have buttons to set the different store types.

Click on the buttons for the relevant store types. The selected store types is added to the ticked stores, and displayed in the overview.

Delivery rules tab
In the Delivery rules tab, you can configure delivery rules for the web shop.
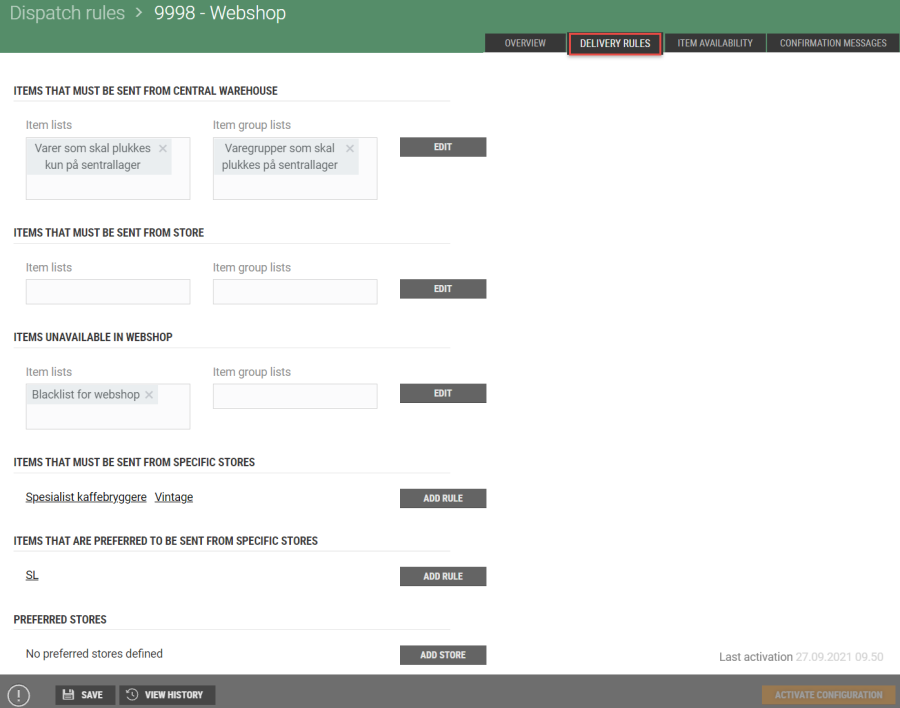
Delivery rules that can be configured:
Items that must be sent from central warehouse
Items that must be sent from store
Items unavailable in web shop
Items that must be sent from specific stores - Override the Preferred stock location value by requiring the item to be sent from specific stores. If not, it is not available for HomeDelivery but only for ReserveInStore
Items that are preferred to be sent from specific stores - override the Preferred stock location value by preferring the item to be sent from specific stores. The given stores will be prioritized if they have enough stock.
Preferred stores - Limits preferred stores to given postal codes.
Some of the rules are configured by selecting item lists or item group lists containing the wanted items.
Add item list/item group list
Click on Edit to add item lists/item group lists. A dialog to select item list/item group list opens (heading in the dialog show the selected rule).
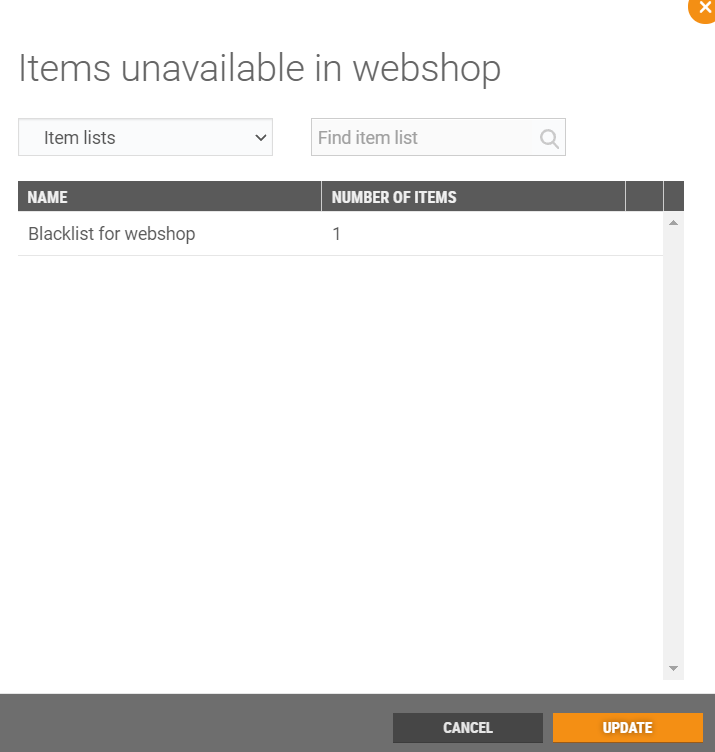
Items is added by searching for item lists or item group lists. Search the list by starting to type the name of the list. Click on the wanted list in the search result to add the list.
Click Update - the items in the lists is added to the rule.
Selected Item lists/item group lists is displayed in the delivery rules screen.

Delete item list/item group list
Item lists/item group lists can be deleted. Click on the Edit button, the dialog opens. Click on the list you want to delete, and click on the “bin icon” to delete the list.

Click on the Update button to delete the list from the rule.
Items that must be sent from specific store
You can select items that must be sent from specific store.
To define a new rule for items that must be sent from specific stores, you click on the Add rule button.
The "Add new rule" dialog opens.
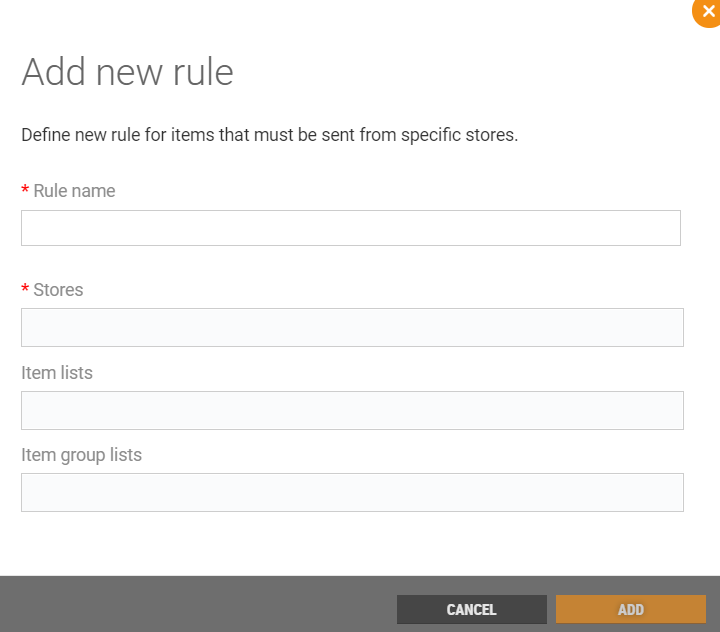
Enter rule name, select stores that the rule will apply to, and select Item list or Item group list with the relevant items.
Click on Add to create the rule.
Items that are preferred to be sent from specific store
You can select items that are preferred to be sent from specific stores.
To define a new rule for items that are preferred to be sent form specific stores, you click on the Add rule button.
The "Add new rule" dialog opens.
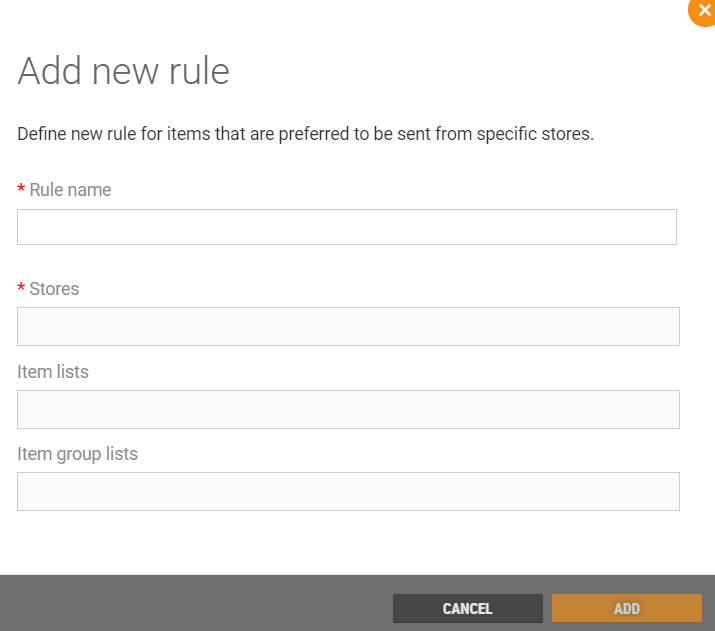
Enter rule name, select stores that the rule will apply to, and select Item list or Item group list with the relevant items.
Click on Add to create the rule.
Item availability tab
In the Item availability tab you can configure rules that determine whether an item is available in the web shop, and reduce the quantity of available items in the web shop.
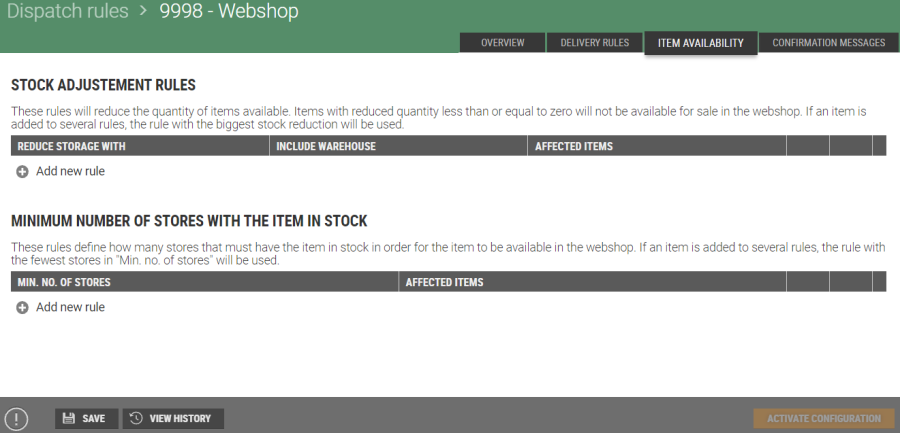
The screen is divided in two parts; Stock adjustment rules and Minimum number of stores with the item in stock. You can define rules for stock adjustment, and minimum number of stores that has the item in stock for the item to be available in the web shop.
Stock adjustment rules
These rules will reduce the quantity of items available. Item with reduced quantity less than or equal to zero will not be available in the web shop. If an item is added to several rules, the rule with the biggest reduction will be used.

Add new rule
Click on Add new rule, the "Update stock adjustment rule" dialog opens.
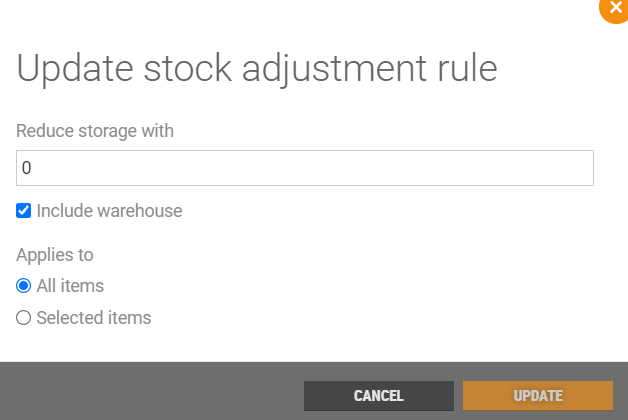
Reduce storage with: Enter the quantity that the stock should be reduced with when selling an item.
Include warehouse: Tick this if the rule also should include warehouse.
Applies to: Select if the rule should apply to all items or selected items.
If you select "Selected items", fields to select item lists or item group lists opens.

Select item list or item group lists with items which the rule should be applied by searching lists, and selecting relevant lists. The rule will be applied to the items in the selected lists.
Change rule
You can change the conditions to the rules. Click on the relevant rule, and click on the "pencil icon".

The “Update stock adjustment rule” dialog opens.
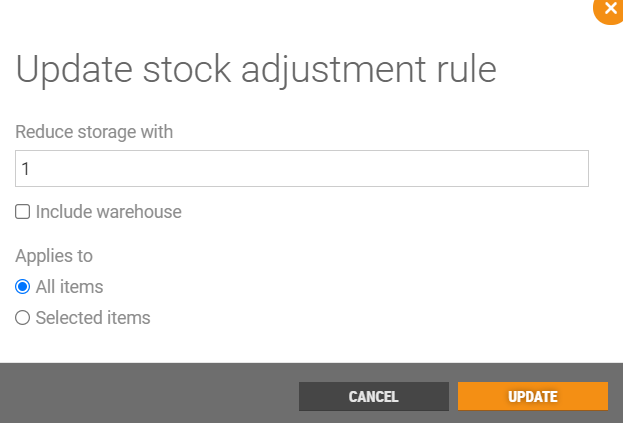
Change the rule and click on Update to update the changes. The rule is updated in the Item availability screen.
Minimum number of stores with the item in stock
These rules define how many stores that must have the item in stock in order for the item to be available in the webshop. If an item is added to several rules, the rule with the fewest stores in "Min.no. of stores" will be used.

Add new rule
Click on Add new rule, the "Update minimum number of stores with the item in stock" dialog opens.
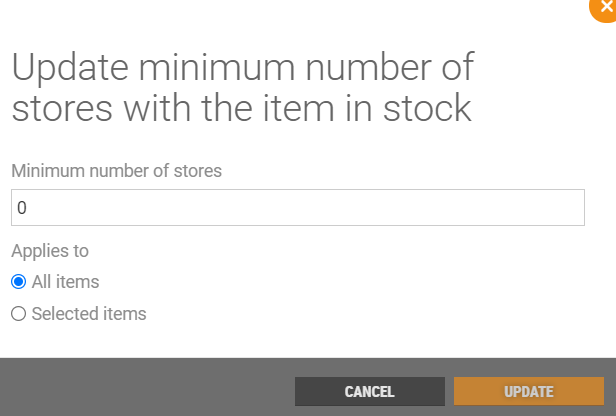
Minimum number of stores: Enter the minimum number of stores that must have the item in stock, for the item to be available in stock in the web shop.
Applies to: Select if the rule should be applied to all items or selected items.
If you select "Selected items", fields to select item lists or item group lists opens.

Select item list or item group lists with items which the rule should be applied by searching lists, and selecting relevant lists. The rule will be applied to the items in the selected lists.
Click on Update to update the configuration. The rule is added to the list of rules for stock adjustment. Or click on Cancel to cancel registration.
Click on Save to save the configuration.
Confirmation messages tab
Setting CommunicationChannel in the order determines if there should be sent SMS or Email or both.
Automatic emails templates are stored in code. We have a basic structure with what information that can be showed. Changes in the content is handled as COs.
Automatic emails are sent with MessageDistributionService.
Manual emails are stored in code. And are sent via Pos Services.
SMS
In the Confirmation messages tab you can define confirmation messages to customers. You can define different messages. For each confirmation message type you add the message that should be used. Max length on the message is 612 letters.

It is possible to customize messages by adding SMS variables. Click on Show SMS variables to show the variables you can use in the SMS message to send more customized messages. The SMS variables is used in the "Messages" field.

The use of variables in the text is validated. If a variable is written correct, the text is marked green. If the variable is written wrong, the text is marked red.
Confirmation messages will be sent to customer in following use cases:
Pay & Collect – When the Pay & Collect order is ready to be collected at Store A.
Shipping confirmation - When the order is picked (but not split), meaning the whole order is shipped as one package, the customer will be receive this message as a confirmation that the package is on its way.
Split order shipping confirmation - When Order is split and picked, this SMS will be sent to customer notifying them that package A or B is ready for shipment.
Split order message - When order is split and the items are dispatched in separate packages from e.g. Store A & B. The customer is notified via SMS that they should expect more than one package with different delivery dates.
Order confirmation
Credit note
Receipt
Confirmation message matrix
Shipping orders
Cancel order automatically | Order changed (MDS) | CREDIT NOTE (MDS) | |
Cancel order manually | ? | ? | |
Create order | Order confirmation (MDS) | Order confirmation (MDS) | |
Delete item automatically | Order changed (MDS) | NA | |
Delete item manually | Order confirmation manually (POS Services) | Order confirmation manually (POS Services) | |
Order sent on split delivery store with receipt | Order sent (MDS) | SHIPPING CONFIRMATION, RECEIPT | All order lines delivered and paid. |
Order sent single delivery store with receipt | Order sent (MDS) | SHIPPING CONFIRMATION, RECEIPT | |
Split delivery order | Split order delivery (MDS) | SPLIT ORDER SHIPPING CONFIRMATION | All order lines delivered and paid. |
Split order confirmation | Split order confirmation (MDS) | SPLIT ORDER MESSAGE | One message pr picking store |
Swap item manually | Order confirmation manually (POS Services) | Order confirmation manually (POS Services) |
Pay&Collect Orders
Create order | Order confirmation (MDS) | Order confirmation (MDS) | |
Swap item manually | ? | ? | |
Delete item manually | ? | ? | |
Delete item automatically | ? | ? | |
Cancel order manually | ? | ? | |
Cancel order automatically | ? | ? | |
Order ready to collect | Collect order (MDS) | PAY & COLLECT (MDS) |
Reserve & Collect Orders
Both emails and SMS is sent with POS Services and configured in POS Config.
Create order | ETradeMailTemplateOrderAdded | SmsENewCustomerOrderAddedTemplate |
Delete item manually | ETradeMailTemplateOrderUpdated | SmsENewCustomerOrderUpdateTemplate |
Cancel order manually | ETradeMailTemplateOrderDeleted | SmsENewCustomerOrderDeletedTemplate |
Cancel order automaticly | ETradeMailTemplateOrderDeleted | SmsENewCustomerOrderDeletedTemplate |
Pick up reminder | ETradeMailTemplateReminder | SmsENewCustomerOrderReminderTemplate |
Reservation expired | ETradeMailTemplateExpired | SmsENewCustomerOrderExpiredTemplate |
Order ready to collect | ETradeMailTemplaterOrderReadyToCollect | SmsENewCustomerOrderReadyToCollectTemplate |
After paid and collected (Upsale) | ETradeMailTemplateCompleted | SmsENewCustomerOrderCompletedTemplate |
Delete dispatch rule
It is possible to delete Dispatch rules. This is done in the “Dispatch rules” view. Mark the line for the dispatch rule to be deleted, and click on the "bin icon".

The "Delete dispatch rule" dialog opens. You will be asked if you are sure you want to delete dispatch rules for the selected profile.

Click Delete to delete the dispatch rule, or Cancel to cancel.