Purchase orders can be imported. You can use an exported Excel file as a template for the Excel import.
It is important that the column headers are correct based on definition. Make sure you do not copy any values into one of the column headers in the hidden row (row number 2). It is important that the hidden row is hidden in the Excel file when you run the Import, otherwise the import will fail.
Required identifiers in the Excel file:
At least one item identifier of the 3 is required: SKU, GTIN or Item number.
Quantity, Wholesale price, Supplier discount and Delivery date.
At least one supplier identifier of 2: Supplier no. or Supplier GLN.
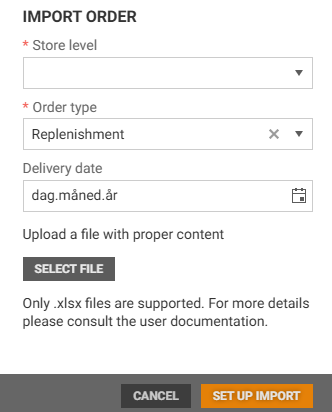
Click the Import order button to import an purchase order from Excel.

The "Import order" dialog opens.

Select Store level: "All stores", "Store", "Profile" or "Team". Which option you have is depending your user rights.
Select Order type: "Replenishment" or "Preorder".
Select Delivery date using the calendar icon or write the date.
Click on Select file to select a file to upload. This file must be in .xlsx format. Select a file and click on Open to upload the file.
Click on Set up import. The Import order page opens if you have selected store, profile or team as store level.
To the left on the import order page you see a list of active stores/teams/profiles depending on the store level you selected, and your user permission.
You can use search, or select wanted options from the list by ticking them. Your selection is displayed to the right. You must choose at least one from the list.
.png)
When you are finished with your selection you must click the Import button to import the orders.
You get a notification when the import is done with information how many Purchase orders and Purchase order lines have been imported, and if there are lines that have been skipped due to missing info in the Excel file.
If the file contains more than one supplier, then a Purchase order per supplier (and store if more than one store is selected) is created.
.png)
Order despatch advice import - validations
It is possible to import an order dispatch advice that includes items without an assortment code. Then information about that the order contains items that do not belong to store assortment is displayed at top of the order details page. The created order has status “Confirmed”.

Import of assortment codes
Assortment codes from the Assortment code register in Item Management are imported based on their unique code. If a code is changed in the register, it is treated as a new assortment code in Procurement. Statuses such as "Active" and "Default" are also imported and correctly assigned.
Assortment codes are imported on item level from Item Service if assortment code is added to item or edited. Not existing assortment codes are pushed into table with assortment codes.