PLU board or "Convenience sale" is an alternative sales view, that typically is in use by chains with a high level of sales via item buttons.
Items in the "Convenience sales" view are configured in "Simple setup" in POS Configuration. You can configure whether the PLU board opens automatically or not. It is configurable which PLU board is opened automatically if multiple boards have been created for the store. You can select from the following:
Open the PLU board when you log in.
Open the PLU board by tapping a PLU board button. Select the desired PLU board.
Below is an example of a PLU board containing several PLU pages (there is a tab/button for each PLU page).
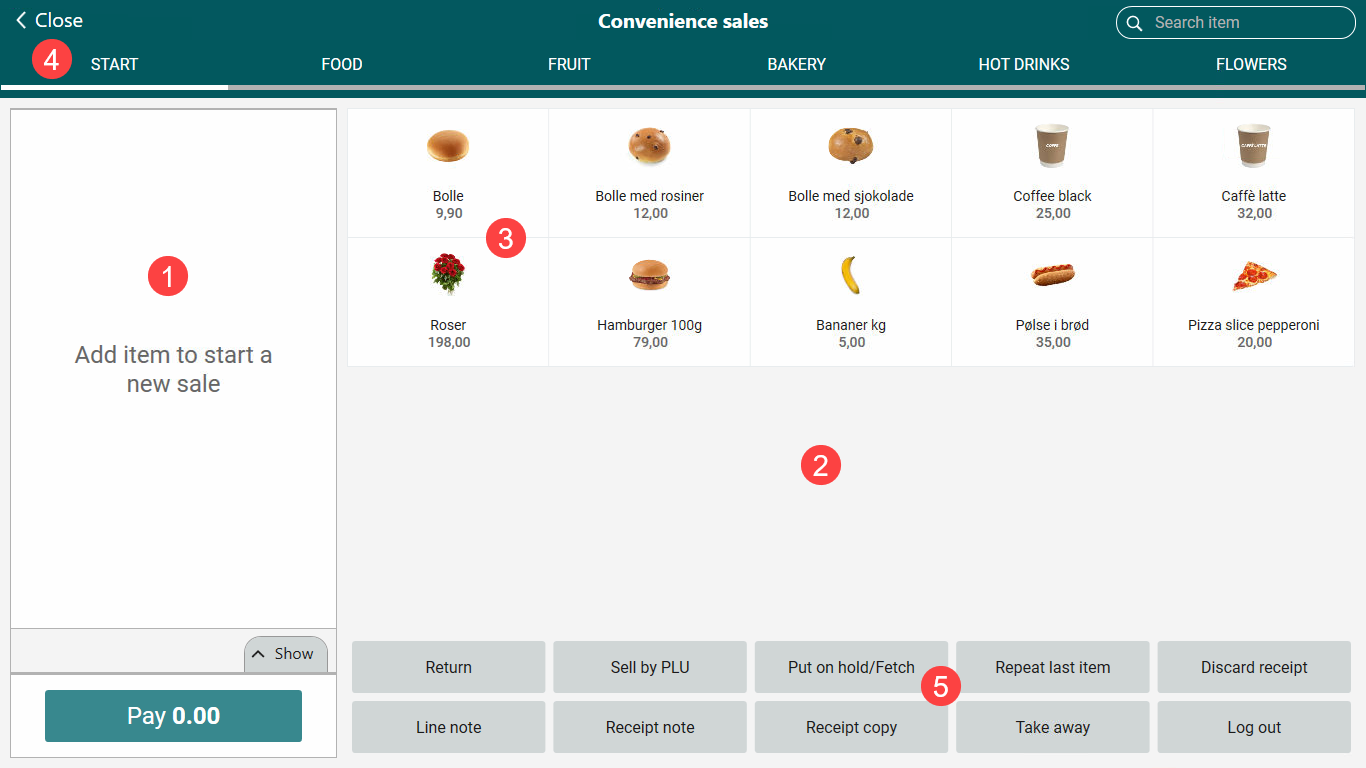
Receipt view – Displays the items added to the receipt.
PLU board/PLU page – A PLU board can contain several PLU pages. Each PLU page contains PLU buttons.
PLU button – A PLU button is linked to an item. When you click on a button, he item is entered on the receipt to the left.

PLU page tabs – Each PLU page is displayed as a tab in top of the convenience sales view. A PLU board can have multiple pages. When the PLU board opens, the first PLU page is displayed. To open a different PLU page, simply click the name of the PLU page you want. This opens the selected PLU page and displays the buttons (items) it contains.

5. Function buttons – There may be function buttons at the bottom of the PLU board (where this has been configured). These functions are displayed on all the PLU pages.

Submenus
It is possible to configure submenus in the PLU board. Submenus is configured as buttons in the PLU-board (see example).
 Submenu buttons
When you click on one of the buttons with submenu, a new PLU board opens with the items in the submenu. Items is added in the same way as in other PLU boards by clicking on the button for the wanted item. Click x Close at the upper right corner when you want to go back to the PLU page.
 Submenu example
Functions in the receipt viewer
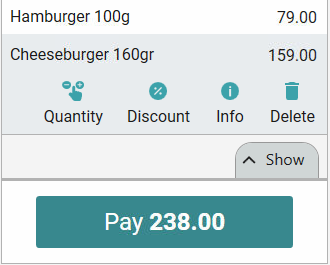
Items is added to the receipt viewer when you select item. The last added item is active. On the active item line you find the following functions: Edit quantity, Give line discount, Info and Delete item
You can select another item line by clicking on the relevant item line. Then the item line becomes active, and the functions are displayed bellow the item name.
Enter quantity
Select the item line.
Click on the "Quantity icon".
The “Enter quantity” dialog opens.
Enter the quantity and press OK/Enter.

5. The quantity is changed.
Give line discount
Select the item line.
Click on the "%-icon" to give a line discount. The “Line discount” dialog opens.
Select whether to give the line discount as a Percentage, Amount or Price. Then enter the value of the line discount.

The line discount is subtracted on the item line.
Item information
Select the item line.
Click on the "Info icon" to see the item information on the item. In addition to item information you can see stock information, price and price history.
Click on the < Back button to go back to "Convenience sale".

Delete item
Select the item line.
Click on the "Delete icon".
The item is deleted from the receipt and is displayed with a stroke through the deleted item.

Numpad
In the receipt view there is a numpad. By default it is hidden.
The following functionality is available:
Collapse/Expand: Select Show bellow the receipt view to open the numpad. Select Hide to hide the numpad. The numpad remain in selected mode until next logout/login.

Enter quantity using numpad and click on the item in the convenience board, or scan to sell desired number of items.
Enter quantity using numpad or click on the "Quantity icon" on item already in receipt to change quantity.
Enter EAN/PLU and click OK to sell the item.

Payment
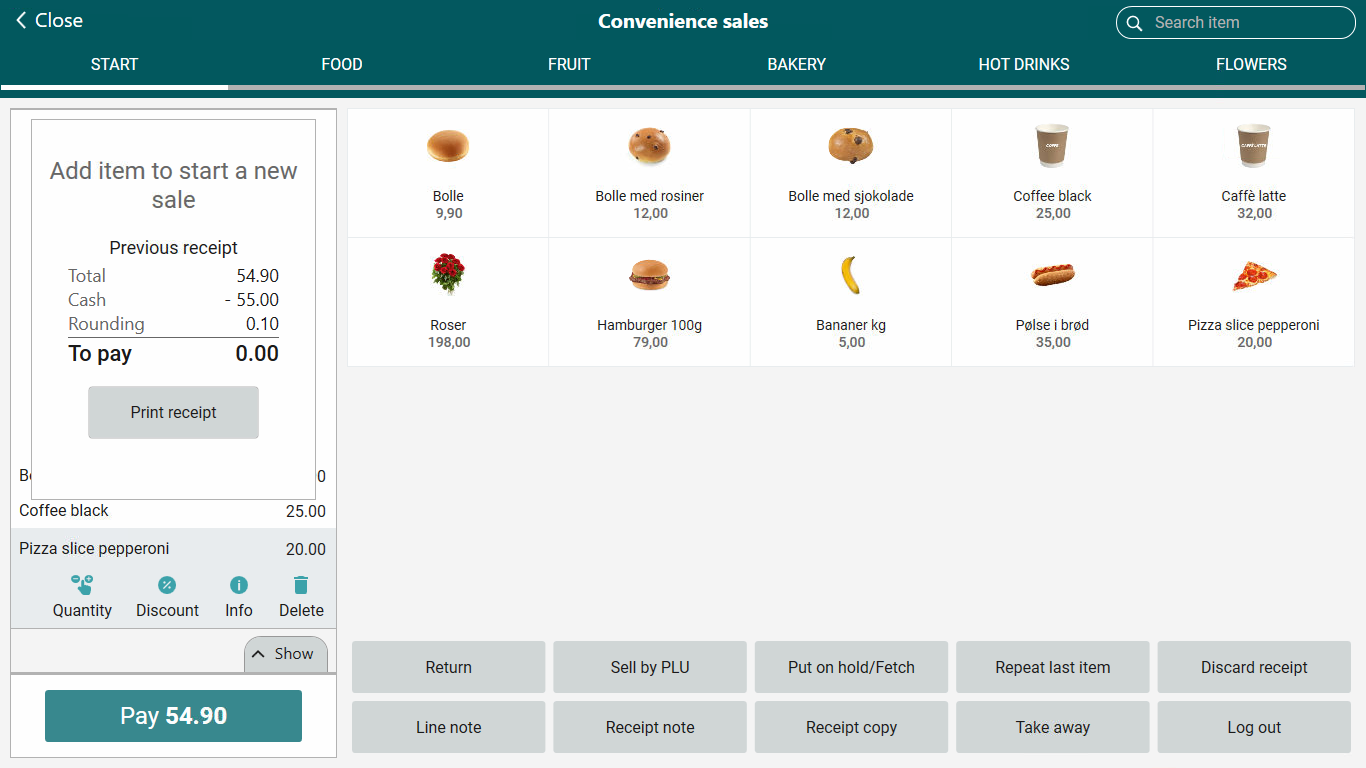
Click on the Pay button when all items is registered. The payment view opens (as in ordinary sale). Finish the sale in the usual way, with desired tender. When the payment is completed the "Convenience sales" opens again. Finished receipt is displayed in the receipt viewer (see picture).
You can finish "Convenience sale" and go to ordinary sale by clicking on the < Close button at the top left corner.