New purchase order
New purchase order can be created manually by clicking on the New purchase order button in the “Purchase orders” view.

The "New purchase order" dialog opens.
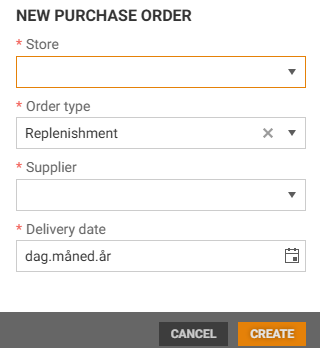
*Select the ordering "Store" if the user has access to more than one store.
*Select "Order type", you have three options: Replenishment, Preorder, and Internal transfer.
*Select "Supplier".
*Select "Delivery date" using the "Calendar icon" or write the date.
Click Create to create a new purchase order. The Purchase orders details view open, it has status "Draft".
View order details
Purchase orders are maintained via the purchase orders details page. You can view and edit details about the purchase order on this page. Which fields you can see and what you can do with the order depends on the order status.
Click on the order number for the relevant order line in the Order no. column to open the order. The purchase orders details page will then be displayed for the selected purchase order.

Purchase order details page have two tabs, Order lines (opens when the order is created) and the Overview tab.
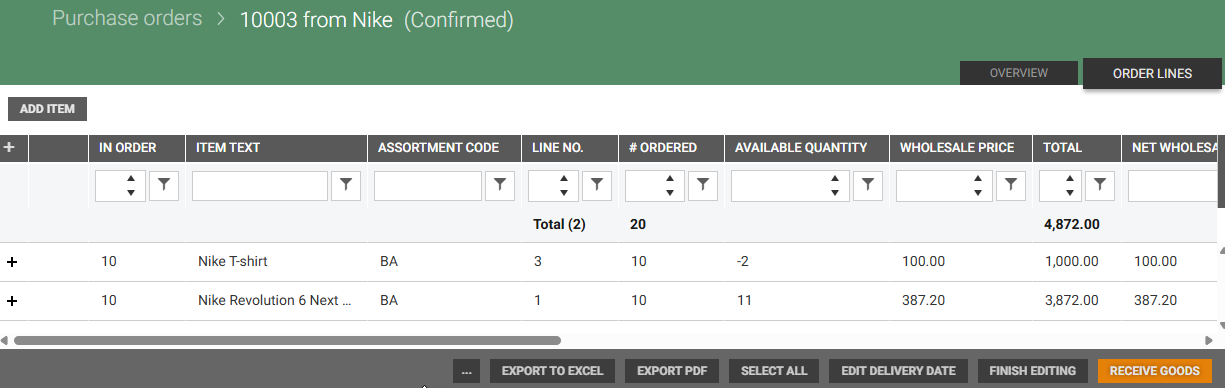
Order lines tab
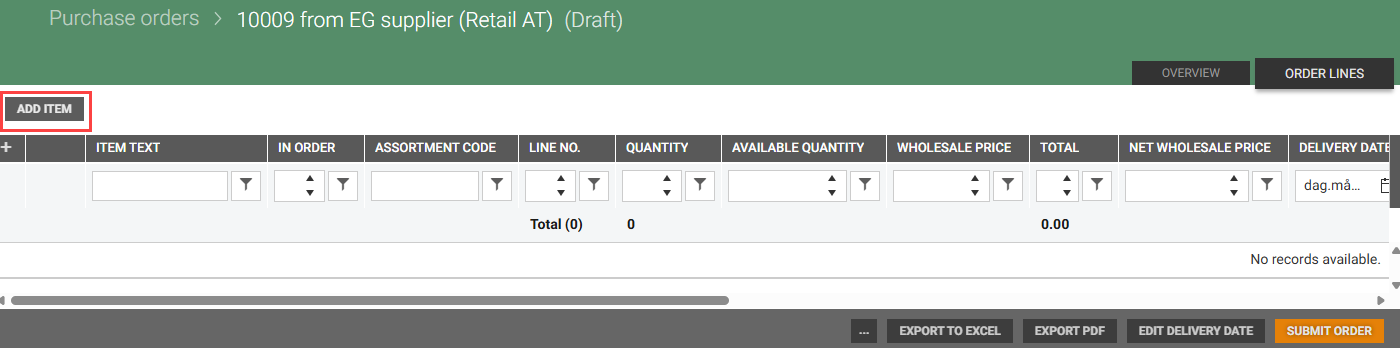
In the Order lines tab, you find an overview of the items in the purchase order. If you just have created a new purchase order it has no items. If it is an existing purchase order, you will see the items in the purchase order, if items are added.
Add item
Following item attributes are needed to create purchase order manually:
Supplier saved on the item needs to be the same as the supplier for which purchase order is created.
Item needs to have flag Can be ordered set to True and the flag Ordering blocked set to False.
Supplier sales start on the item must be empty or earlier than now.
Supplier sales end on the item must be empty or later than now.
Assortment code of the store for which purchase order is created, must match the assortment code on the item. If the item has another assortment code than the store, it will not be visible in the item search!
Items can be added to the purchase order by searching for the item. Only items that are active for the store and the supplier, and have the same assortment code can be found in the item search. If order line or order contains item that does not belong to store assortment, then a warning is displayed.
Click the Add item button at the top left above the table. The "Find item" dialog opens. You can search for the item e.g., by item text or GTIN in the search field.
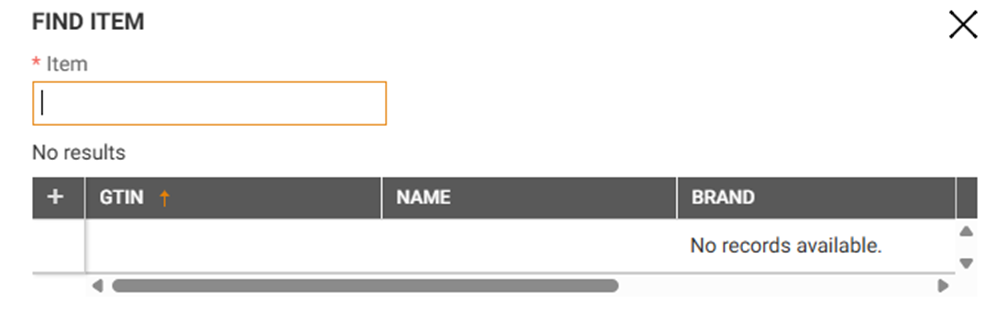
Search result is displayed:
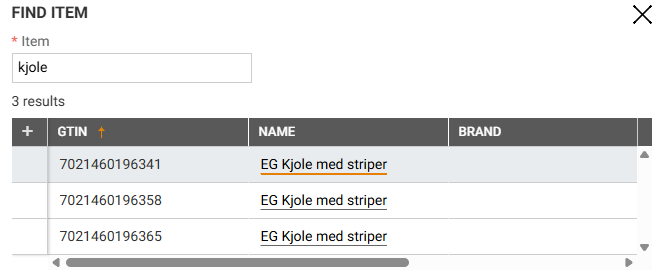
Select relevant item. The item is added and expanded. Information about the item is displayed.
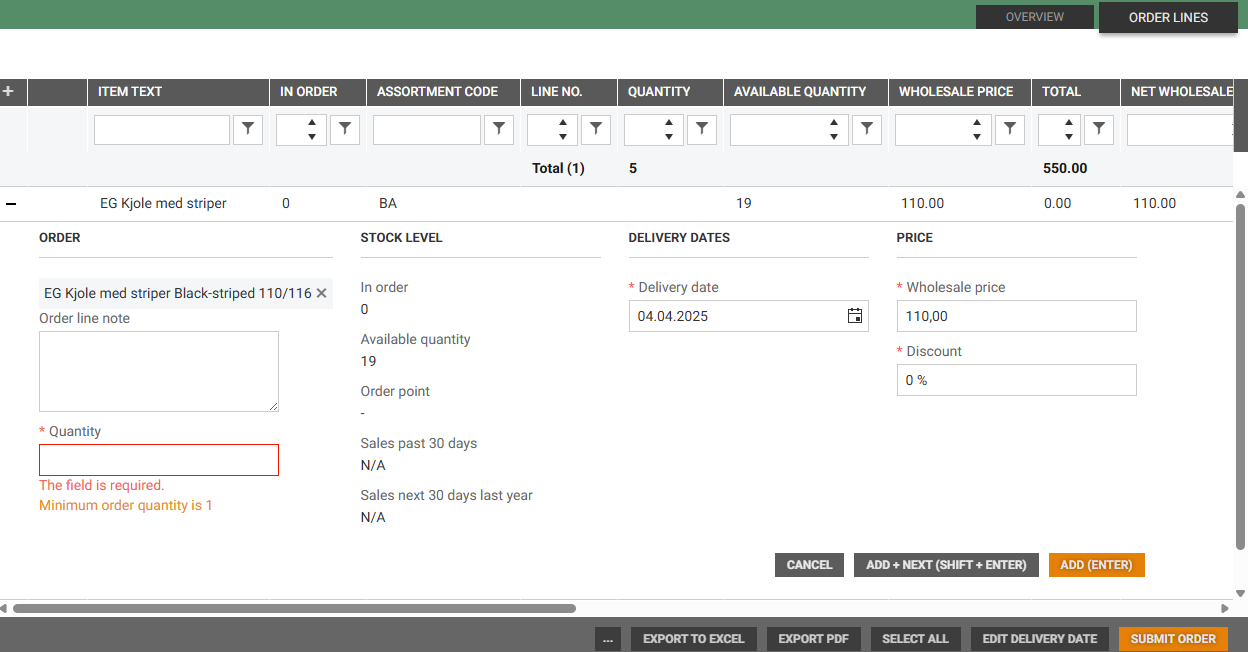
Active wholesale price for the item is automatically added if the item has price. Focus is on" Quantity" when the price is successfully found, and 0 % is automatically entered in the discount field. Enter Quantity.
If the item does not have a price then you must add wholesales price.
Fields in expand view
ORDER
Order line note: An order line note can be added, it will be displayed in the "Order line note" column and in the order confirmation below the order line.
Quantity: Enter order quantity (required).
STOCK LEVEL
In order: Display quantity of remaining order lines for this item to this store.
Available quantity: Display the available quantity.
Order point: Order point.
Sales past 30 days: Sales past 30 days.
Sales next 30 days last year: Sales next 30 days last year.
DELIVERY DATES
Delivery date: Delivery date. Date can be changed by adding another delivery date, or by using the "calendar icon" to set a new date.
PRICE
Wholesale price: If the item has price, the wholesale price is added. If the item does not have a price, you must add the items wholesale price when adding item to the purchase order.
Discount: 0 % is default value, discount can be changed.
BUTTONS
There are 3 buttons below the expanded information when the item is added:
CANCEL – Cancel adding item.
ADD + NEXT (SHIFT+ENTER) – Add the item to the order and the "Find Item" dialog opens again, and you can add another item.
ADD (ENTER) – Add the item to the order.
If order line with item that does not belong to store assortment is added to proposal, such order line is deleted when processing proposals.
Edit/view item information
It is possible to view and edit item lines in the orders whit status "Draft", "Submitted" or "Edited".
Click on the "+ icon" to the left on the item line.

The item row is expanded and shows more information about the ordered item. The possibility to make changes depends on the order status.
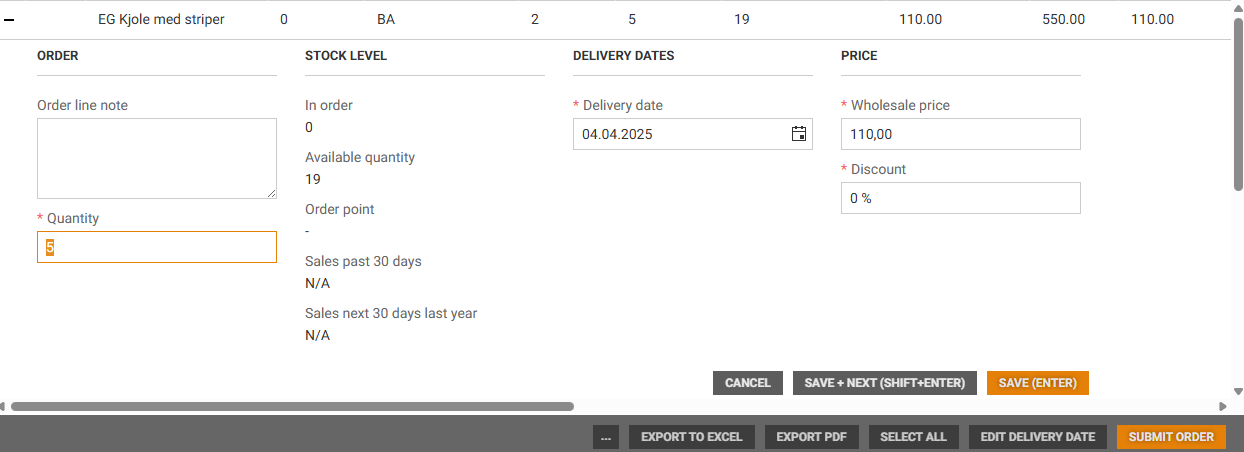
There are 3 buttons below the information when existing item lines are expanded:
CANCEL– Cancel the changes and collapse the information. You can also collapse the item line by clicking on the "– icon" to the right.
SAVE + NEXT (SHIFT+ENTER) – Save changes and moves to the next item in the order.
SAVE (ENTER) – Save changes.
Delete item
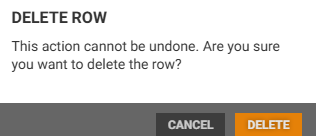
It is possible to delete an item from the order by clicking on the "more-button" on the desired item line and select Delete.
.png "image(270).png")
The "Delete row" dialog open. You must confirm that you want to delete the row by clicking the Delete button.
Cancel order
See Cancel order.
Export to Excel
See Export order rows to Excel.
Select all
If you want to do an action on all order lines, you can use the Select all function.
Click on the Select all button.

All order lines will be selected (marked). Then it is possible to e.g., edit delivery date for all order lines at once.

Edit delivery date
You can edit the delivery date for the whole order, one order line, selected order lines or all order lines. The dialog text depends on if order lines are selected or not.
Click on the Edit date button. The "Edit delivery date" dialog opens.
Select new delivery date using the "Calendar icon" or writing the date.
Click Save, to save changes.
.png "image(321).png")
Dialog when order line(s) isn’t selected
If only one of the order lines is selected, you get two options: Edit row or Change for order.
Select relevant option and edit delivery date.
Click Save to save changes.
.png "image(322).png")
Edit order
Orders with status Confirmed are by default not editable but can be edited by using the “Edit order” function.
Click on the Edit order button to switch to edit mode. The order has still status confirmed but can be edited.
.png "image(319).png")
Click on Edit to open the order opens in edit mode.
Order lines can be added, existing rows can be modified, order notes can be added/edited, and rows can be deleted.
It is NOT possible to remove the all order lines. At least one order line is required! If you try to remove the only/last order line, you get this information; "Cannot remove all lines from a confirmed order".
Click Finish editing when editing is finished.
Edit delivery dates
It is possible to edit the time of delivery by clicking on the Edit button. The "Edit delivery dates" dialog opens.
.png "image(324).png")
You can change the estimated time of arrival by changing the date and/or time.
Click Save, to save the changes.
If you have edited the estimated time of arrival, it will be shown in the Overview tab, in the Delivery section .
.png "image(325).png")
Submit/Print/confirm order
See Submit, print and confirm order.
Receive goods
See Receive goods.
Set to done
See Set to done.
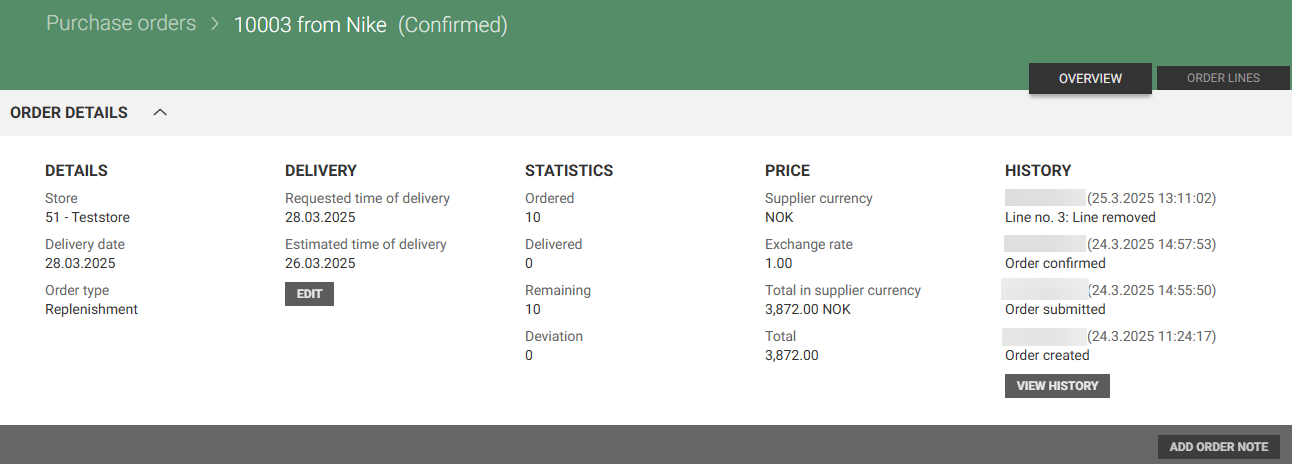
Overview tab
The Overview tab gives an overview of the delivery. It is divided into five sections: Overview, Delivery, Statistics, Price and History.