You can export items to Excel from the Item overview when you are in the item view.
For more information on item view and variant view and how to change view, see Display.
.png "image(58).png")
When you click on the Export to Excel button you get two options: "Item details and stores" and "Wholesale prices". Select what you want to export.
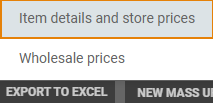
Item details and store prices
Used to export item details and store prices to Excel.
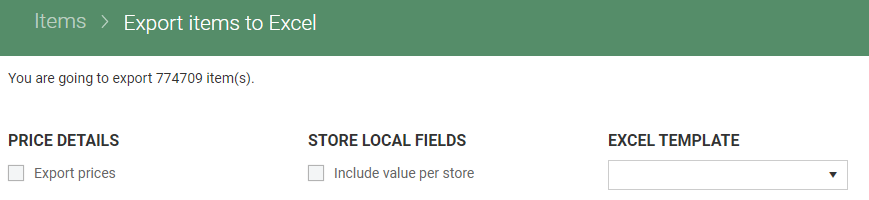
You can choose whether to export item details and store prices (default ticked), or only item details (untick "Export prices").
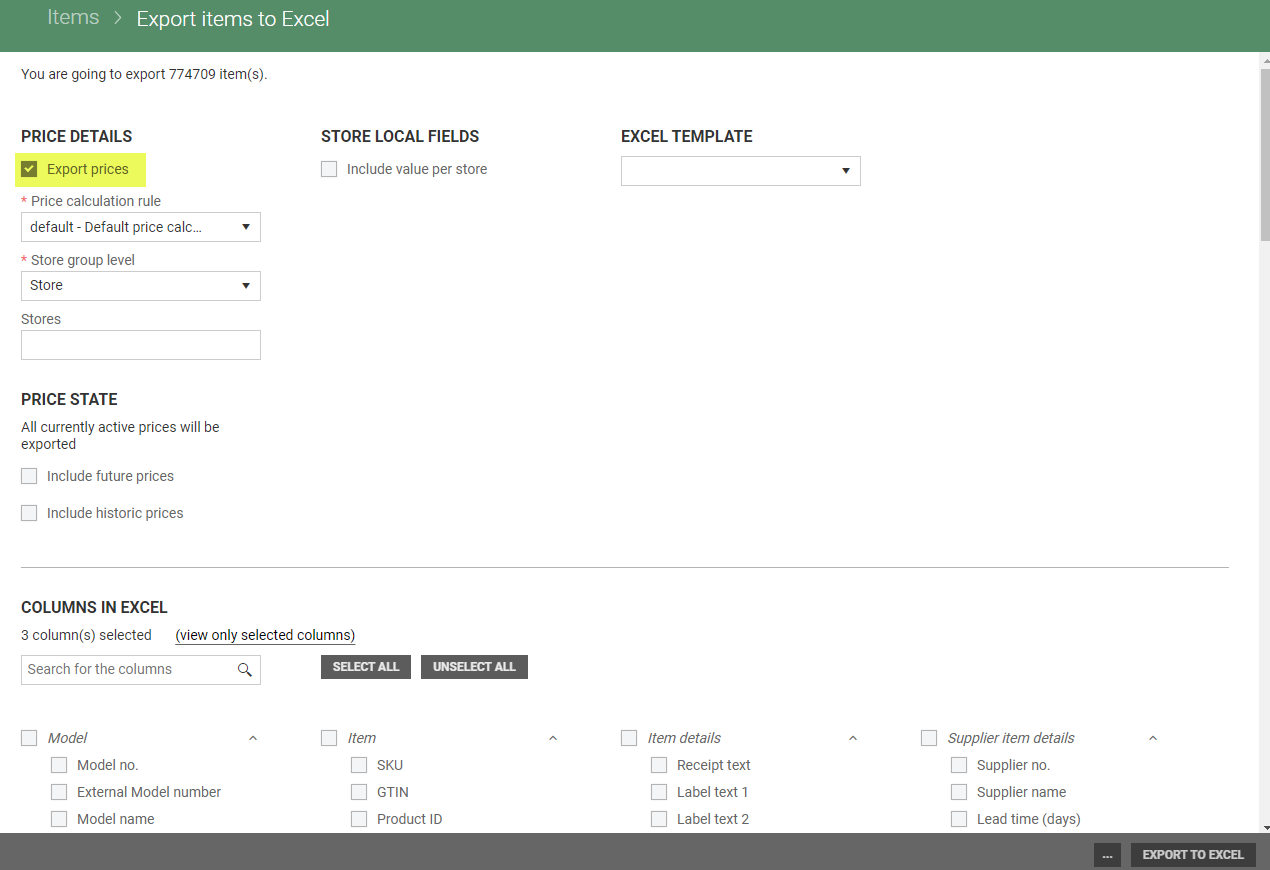
If you choose to export only item details price fields are hidden.
Wholesale prices
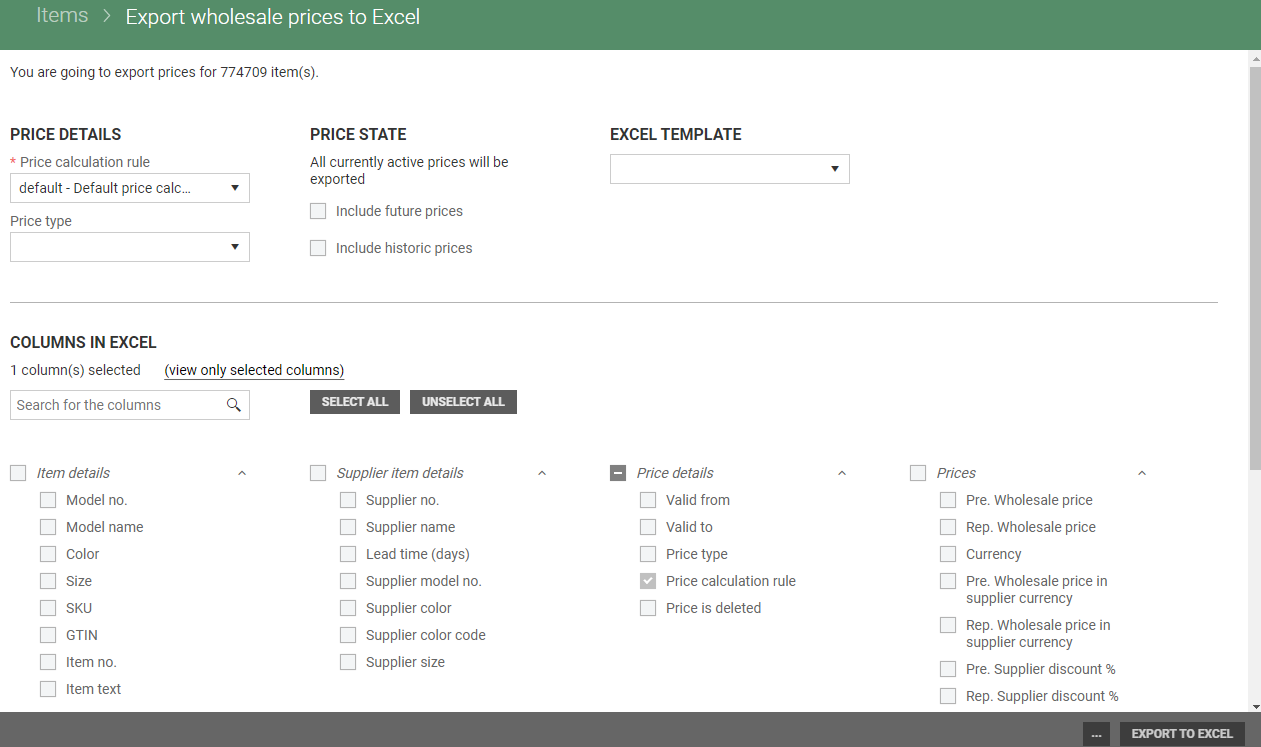
Used to export wholesale prices to Excel.
PS: large volumes of data cannot be exported to Excel. Exporting over 100 000 items can result in a time-out after 10 minutes and an invalid Excel file.
Common selection
Price details
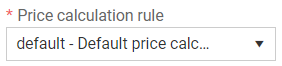
Price calculation rule
You can choose price calculation rule. By default, the default price calculation rule is selected.
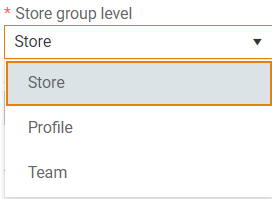
Store group level
You can choose Store group level. You can select Store, Profile or Team (store is selected by default).
Depending on selected store group level you have a field bellow where you can select stores, profiles, or teams to export.
This option is only available for “Export items to Excel”
Price state
Export prices to Excel based oncprice status.
There are two checkboxes in the Price state section. "Include future prices" and "Include historic prices".
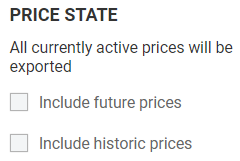
When they are not checked, only active prices are exported. If they are checked, they are set to one year in the future/past by default. When they are used, prices from the selected date range are exported. Both checkboxes can be checked at the same time.
Store local fields
If you select "Include value per store" item details for all stores is exported.
This option is only available for "Export items to Excel".
Excel template
You can use an existing template as a basis for what should be exported. Choose an Excel template from the drop-down list or start typing the name of the template. The columns defined in the template are displayed on screen. You can change the selection.
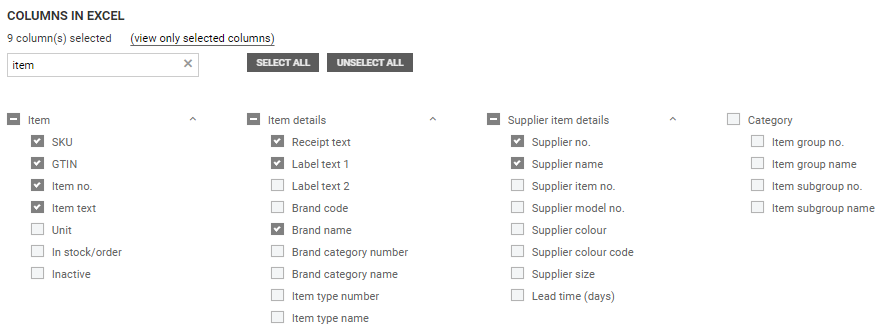
Columns in excel
Select which columns you want to export under Columns in Excel. Tick the columns to select them for export to the Excel file. The available columns vary according to the Export to Excel option chosen.
You can also select a category and all columns in that category will then be selected. Untick any columns you do not want to export.
If you choose to use an Excel template, the columns that are selected in the Excel template will be preselected. You can also add or remove columns when using an Excel template.
Search for columns
You can find columns faster by typing in the search box. This will display all the columns that contain the search text. You can then select the columns you want.
Example of a search in “Export items to Excel”
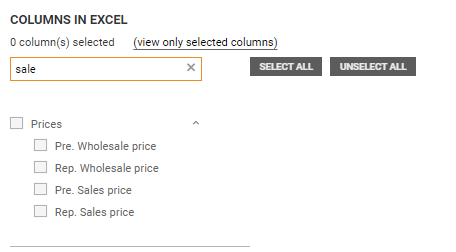
Example of a search in “Export prices to Excel”
Select all
Click on the Select All button to select all the columns. If you have used the search function, all the columns found in the search will be selected.
Unselect all
Click on the Unselect All button to untick all the selected columns.
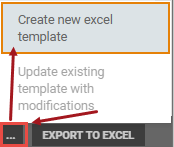
Create new Excel template
Use the “Create new Excel template” function to create an Excel template that can be reused later.
Select the columns you want to export, click on the “more” button (...) and select “Create new Excel template”.
The “New template” dialog opens. Enter the template name and an optional description.
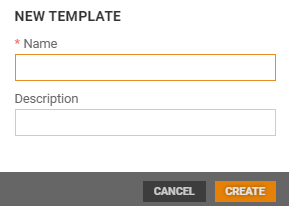
Select Create to create the new template.
The name of the template is displayed on the screen under “Use Excel template”.
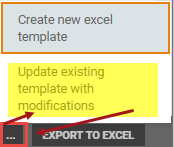
Update existing template with modifications
If you have modified an existing template, you can update the template using the “Update existing template with modifications” function.
Click on the “more button" (...) and select “Update existing template with modifications”.
The “Update existing template with modifications” dialog opens. You can change the name or description if you wish.
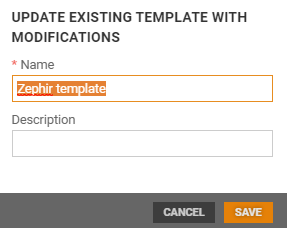
Select Save to create the template.
Please note that there is no function for deleting an existing template, so we recommend updating an ‘outdated template’ when you need a new template.
Export to Excel
Once you have specified what you want to export, click on the Export to Excel button to export the selection to Excel. An Excel file will be created. After downloading the file, you can modify/correct the content of the Excel file.
When you export items or prices to Excel the user will get a notification when the file is ready to download, or if an error occurred. The file can also be downloaded (later) when selecting view all notifications.
Please note that large export will take some time.
The exported Excel file can be used as a template for the Excel import! |