This page contains a description of the fields under General in Item Registers.
Country
The Country register displays an overview of the countries registered in the system. The user can maintain existing countries, add new ones, and deactivate countries.
The user can specify a default country, which is automatically entered on screens containing the country field.
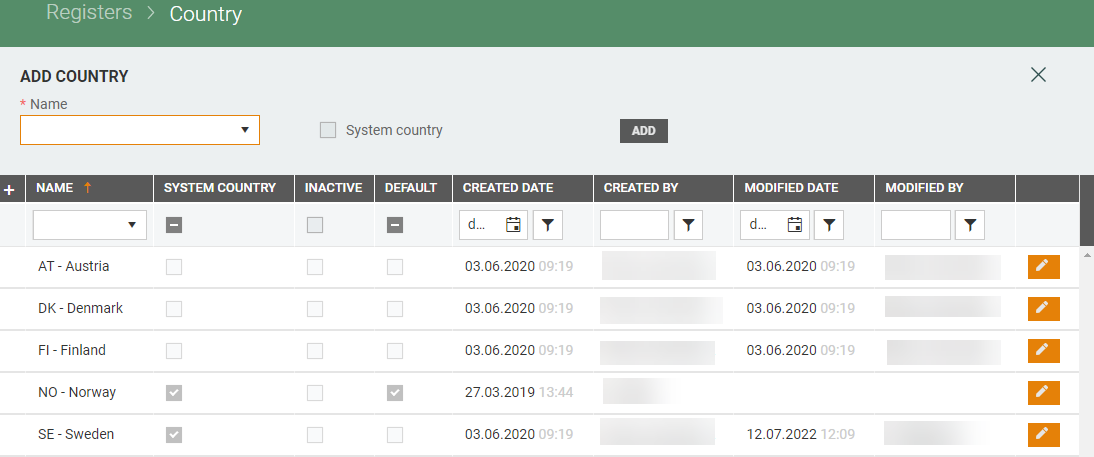
Add country
You can add more countries by registering a new country at the top of the screen. Select a country from the drop-down list.
Tick to indicate if the country will be a system country. Countries marked as system countries can be used in other programs in Chain Web that use the “Country” field.

This applies when working with a customer, for example, with campaigns, sales, and orders. Countries that are not marked as system countries will not be available on these screens.
Click on Add to add the country to the register.
Edit country
You can edit the Country field.
Click on the “pencil” icon on the line of the country you want to edit.

The “Edit country” dialog opens. Tick the System country box if the country is to be a system country.

Click on Save to save your changes.
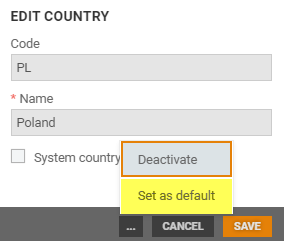
Set as default
In the “Edit country” dialog, you can set the country to be preselected when registering a country.
Click on the “more” button and select “Set as default”. The country will be marked as the default country.
You can change the default country by clicking on the “more” button and selecting “Unset as default”.
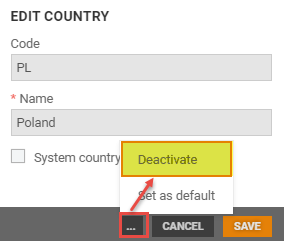
Deactivate
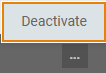
Use the “Deactivate” function to set a country as Inactive. Inactive countries are not available in the drop-down list on screens containing the “Country” field. Only active countries are displayed in the list.
Click on the “more” button and select “Deactivate”.
The following text is displayed at the top of the dialog: “Inactive country. Activate the country to make it available in the system”.
To reactivate the country, click on the “more” button and select “Activate”.
Currency
The Currency register displays an overview of the currencies registered in the system. Currency rates are used in POS for payments with foreign currencies. The rate for foreign currencies in POS is static and not updated frequently.
The user can maintain existing currencies, add new ones, and deactivate currencies. The user can also specify a default currency, which is automatically entered on screens containing the currency field.

Create new currency rate
To create a new currency rate, click on the New currency rate button below the currency table.
The “New currency rate” dialog opens. You can create new currency rate for Country or for Store group.
.png")
For Country: Choose country, select an existing country code and enter cost and sales rate. Optional: Enter default sales rate markup.
.png "image(65).png")
Click on Add to create the new currency rate.
For Store group: Choose Store group level, you can choose between Store, Profile and Price Zone. Choose the Store, Profile or Price zone that you wish to create a new currency rate for. Select an existing country code and enter cost and sales rate. Optional: Enter default sales rate markup.
.png "image(66).png")
Click on Add to create the new currency rate.
View details
Select the line for the relevant currency code and click on the underlined Code you want to view/edit. The Currency details screen opens. At the top of the screen, you will see the currency code, currency name and active rates (cost rate and sales rate). You can also see if the currency is “Inactive” or “Default”.
Below this is a table for the “Cost rate” and one for the “Sales rate”. The currency rate tables display historical currency rates (where available), active rates and future currency rates.
.png "image(67).png")
Edit currency
To edit the default sales rate markup or flag/unflag “Main currency” for countries press the Edit currency button.
.png "image(69).png")
The edit currency overview opens. Here you can enter a default sales rate markup and unflag/flag “Main currency” for the selected country.
.png "image(70).png")
Click Save to update the changes.
New cost rate
Click on the New cost rate button.
The “New cost rate” dialog opens. Enter a new cost rate and select a start date.

Click on Add to add the new rate.
New sales rate
Click on the New sales rate button.
The “New sales rate” dialog opens. Enter a new sales rate, a sales rate markup and select a start date.

Click on Add to add the new rate.
Deactivate
Use the “Deactivate” function to deactivate a currency, making it unavailable when registering a currency.
Click on the “more-button” at the bottom of the screen and select “Deactivate”. The currency will be marked as inactive.

To reactivate an inactive currency, click on the “more-button” at the bottom of the screen and select “Activate”.
Unit
The Unit register displays an overview of the item units used in the system. The user can maintain existing units, add new ones, and deactivate units. The user can specify a default unit, which is automatically entered on screens containing the unit field.

Add unit
You can create a new unit manually using the "Add unit" section at the top of the screen. Enter information in the required fields. In addition, you can select the flag Unit price factor (by default it is False), if you select it (set it to True) unit price factor can be selected in Item details. Click on the Add button to create a new unit.
If you want to add unit for another country, then this country needs to be set as System country in Country register.

Edit unit
Units can be edited. Select the relevant unit and click on the “pencil” icon.
The “Edit unit” dialog opens.

Edit the values as required and click on Save.
The “more-button” contains the Deactivate and Set as default functions. Use these functions to deactivate a unit and specify a default unit, respectively.
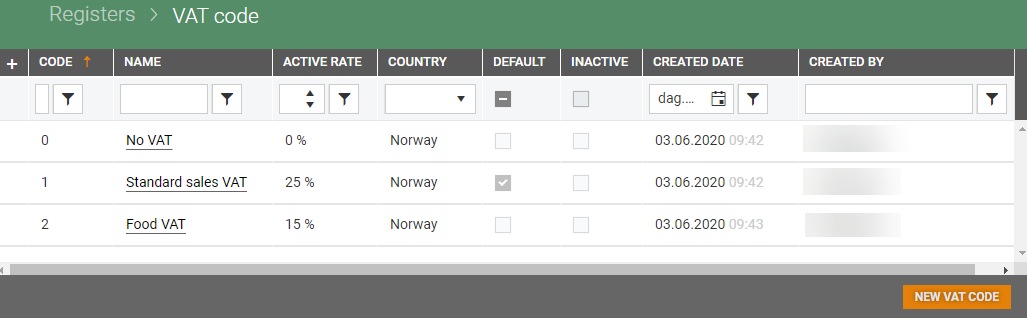
VAT code
The VAT code register displays an overview of VAT codes and the active rate for each VAT code used in the system. You can view/edit existing VAT codes or add a new VAT code.
Create new VAT code
To create a new VAT code, click on the New VAT code button.
The “New VAT code” dialog opens. Enter the Code, Name, Active rate and select the Country.

Tick the “Use as default” box if the VAT code is to be used as the default VAT code.
Click on Create to create the VAT code.
View VAT code
You can view details about a VAT code by clicking on the name for the VAT code. The VAT code details screen opens.
Details about the VAT code are displayed at the top of the screen. This display, among other things, details about the Code, Name, Active rate, and Country. If the VAT code is the default VAT code, the following text is displayed at the top of the screen: “This value is set as default VAT code when creating new item/model".
The screen also contains a table displaying both historical and future rates, where available. Future rates can be edited.

Add VAT rate
You can add a new VAT rate to an existing VAT code by clicking on the Add VAT rate button.
Complete the New rate % and Start date fields. The current date is suggested but can be changed.
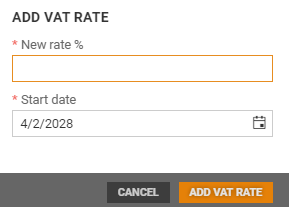
Click on the Add VAT rate button to add the new rate.
Deactivate VAT code
You can deactivate the VAT code from the VAT details screen.
Click on the “more-button” (...), where you can choose either “Deactivate” or “Set as default”.
If you select “Deactivate”, the VAT code will be deactivated and marked as inactive.

To reactivate the VAT code, click on the “more-button” and select “Activate”.
Set as default
You can set the VAT code as default from the VAT details screen.
Click on the “more-button” (...), where you can choose either “Deactivate” or “Set as default”.
If you select “Set as default”, the VAT code will be set as the preselected value for VAT code in the system.
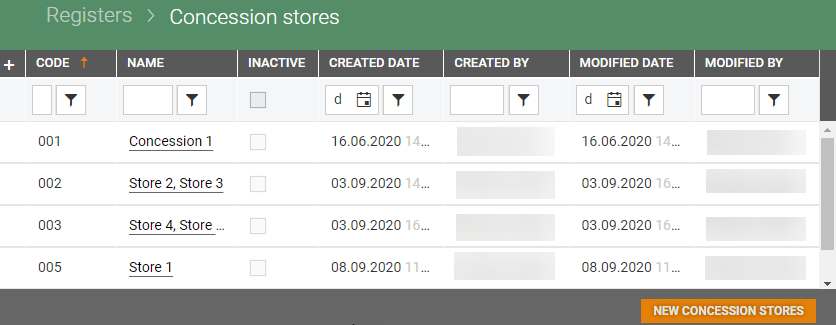
Concession stores
The Concession stores register displays an overview of the concession stores in the system. It is store groups used for concessions. You can maintain existing concession stores, add new ones, and deactivate concession stores.
Add new concession store
Click on New concession stores. The "New concession stores" dialog opens. Enter Code, Name and optionally Description.

Click on the Create button, new concession store is created.
View concession store
You can view Concession store details by clicking on the concession store name. The Concession store details opens.
Information about code, name and description is displayed at the top of the screen. A list of the stores that are included in this concession is displayed below.

Edit concession stores details
You can edit concession stores details.
Click on the Edit button below the details, the "Edit concession stores dialog opens. You can edit code, name, and description.

Click Save to save the changes.
Edit stores
You can edit stores included in the concession. Click on the Edit button beside the stores. Store selection view opens. In this view you can add/remove stores included in the Concession. Search for stores or tick the stores that should be included or remove them from the selection.
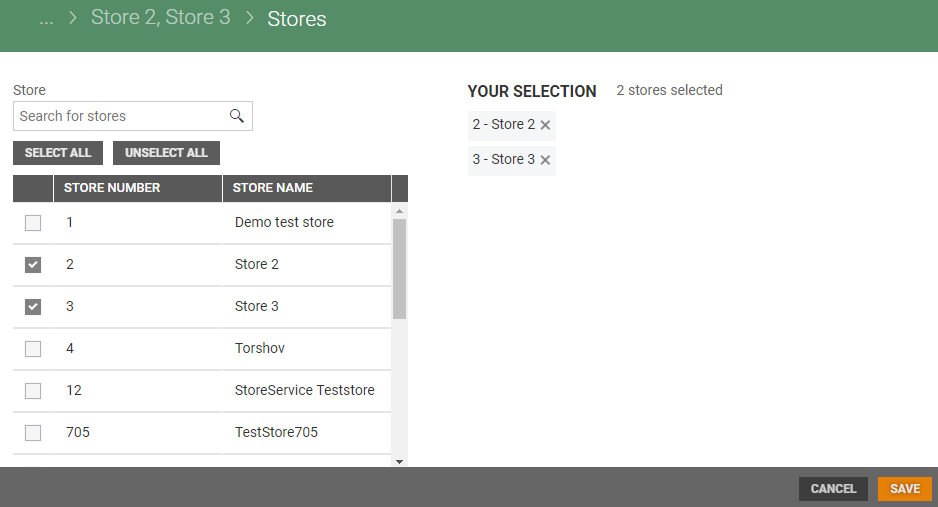
You can also use the buttons Select all to select all stores or Unselect all to unselect all stores.
After adding/removing stores from the concession stores, click on Save to save the changes.
Deactivate concession store
You can deactivate concession store by clicking on the "more-button” (…) and click "Deactivate".