Item segmentation is used in connection with mass update. When you create a segment, items/prices are exported to Excel. After creating the segment, you can edit the values in Excel and then import this file.
Item segments can be saved, edited, and run whenever the user requires. Item segmentation enables the user to create “queries” for items using a predefined selection of item attributes.
The segment results can be exported to Excel, with predefined columns saved for the segment.
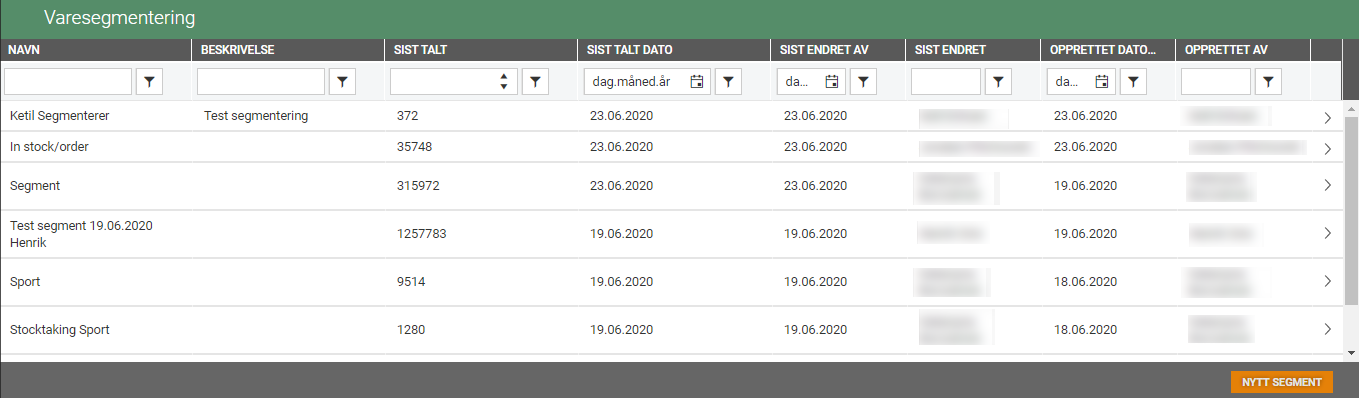
Item segmentation provides an overview of existing item segments. From this screen, you can edit existing segments or create new ones.
Create new segment
Item segmentation is used in connection with mass update. When you create a segment, items/prices are exported to Excel. After creating the segment, you can edit the values in Excel and then import this file.
Item segments can be saved, edited, and run whenever the user requires. Item segmentation enables the user to create “queries” for items using a predefined selection of item attributes.
Create a new segment by clicking on the New segment button at the bottom of the screen. The “New segment” dialog opens.
Give the segment a name and an optional description.

Click on the Create button to create a new segment.
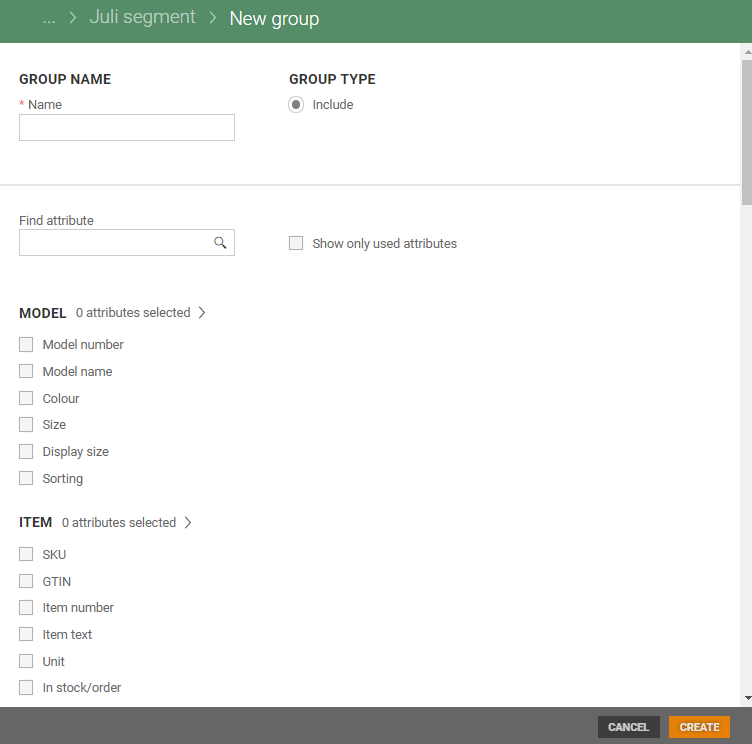
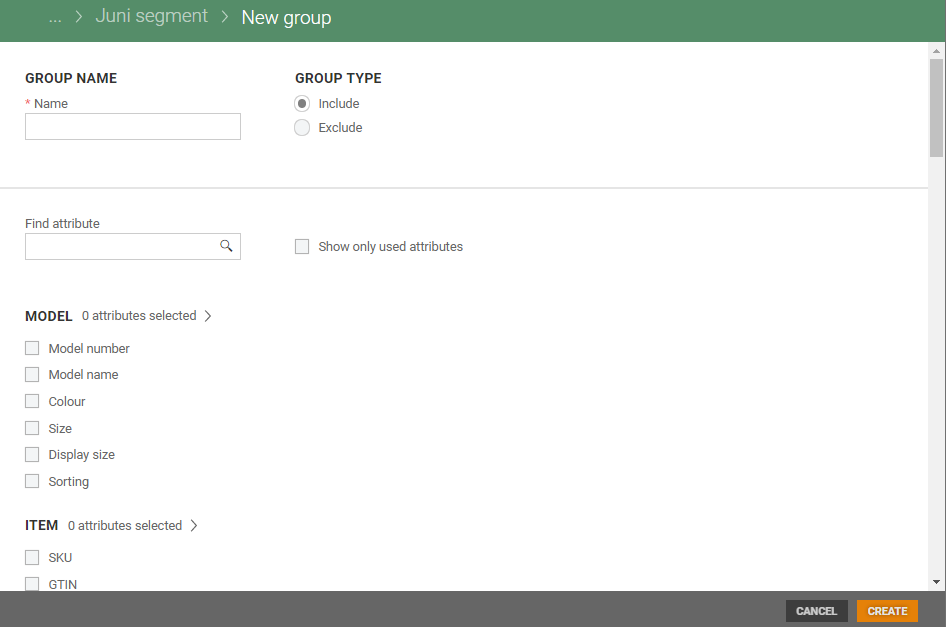
A new segment is created. The New group screen opens. You can define the selection in the segment here. The name of the segment and New group are displayed at the top of the screen.
The screen is divided into two parts, with fields at the top for entering the Group name and Group type. When you begin entering the first group, the Group type is automatically set to Include. Select here which attributes are to be included in the segment.
The rest of the screen displays the attributes available for selection. You can segment on most of the attributes/fields contained in the item register. Attributes are grouped in the same way as in the item register. Attributes related to item generation become available once a planning code has been selected.
You can search for attributes by typing search text in the “Find attribute” field or browse the screen and tick the attributes you want to select. Choose the settings for the attributes you select.
Video on how to create new item segment
Field types in item segmentation
The attributes can have various kinds of fields and the field type is displayed when you select an attribute. Click on an attribute to select it. This places a tick next to the attribute and opens fields where you can set the values for the attribute. Specify what/how you want to filter for each attribute.
Alphanumeric fields
You can filter on:
Contains
Equals
Starts with
Is empty
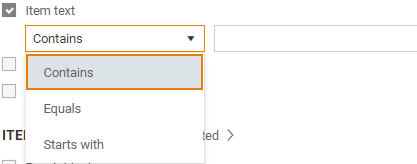
Choose what you want to filter on and enter the search text.
Leading and trailing spaces are not permitted in text fields!
Numeric fields
Numeric fields can be filtered on:
Between – Specify numeric values (from and to).
Equals
Is less than or equal to
Is greater less than or equal to
Is empty
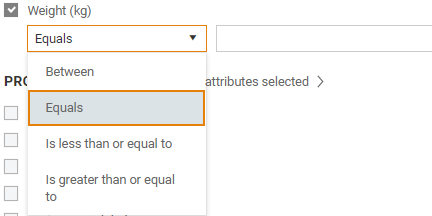
Enter a numeric value.
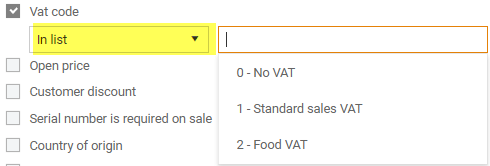
Drop-down list
For attributes contained in a register, select the value from a drop-down list. The drop-down lists contain the values entered in the register.
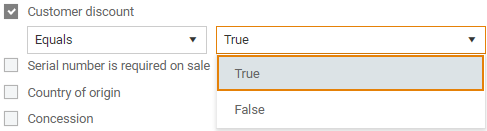
Checkbox
In checkbox fields, you can select whether the value should be True or False.
Date
For date fields, you can filter on:
Between – Specify a date range (from and to date)
Equals
Is before or equal to
Is after or equal to
Is empty
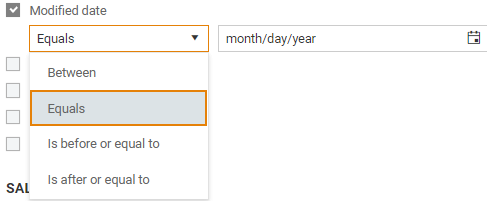
Type in the date or click on the “calendar” icon in the field and select a date from the calendar.
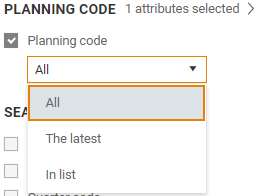
Planning code
You can select the following planning codes:
All planning codes
The newest planning codes
Planning codes in the list – select the planning codes from the drop-down list.
Create group
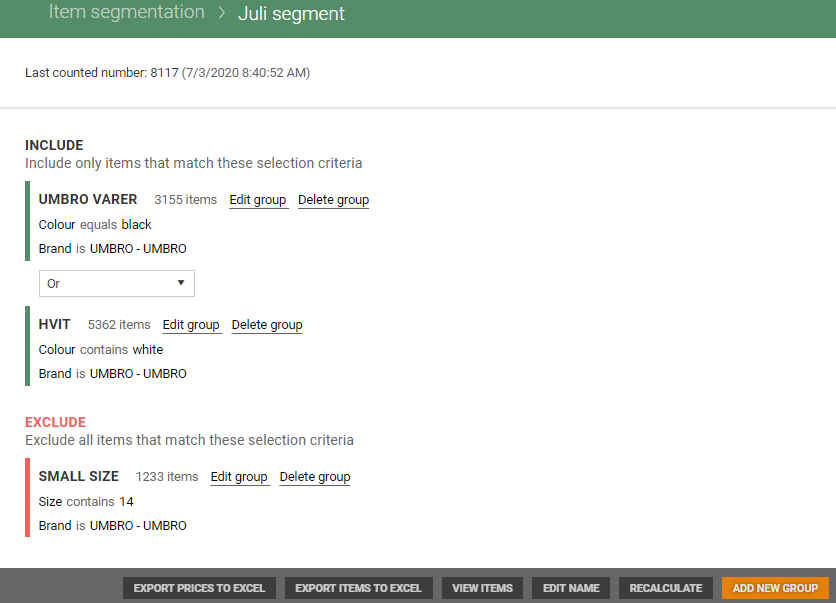
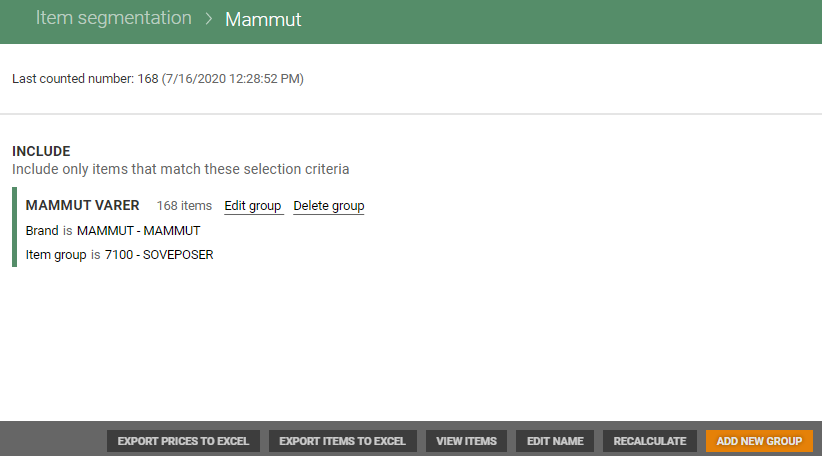
Click on the Create button once you have defined the selection you want include in the segment. The group is then created. If the segment has a description, this is displayed at the top of the screen. Information is also displayed about the group created. The first group in the segment always has the group type Include. Items that fulfil the selection criteria specified in the selection in the group will be included in the segment.
The name of the group and an overview of the selection made are displayed for each group.
Include group types have a green vertical line to the left of the group. Exclude group types have a red line to the left of the group.
Definitions
Include: Items that fit these specified criteria will be included in the segment. However, if an included item is also part of the excluded section, then it will not be part of the segment.
Groups: For an item to be added to a group, its attributes must match all specified within the group. For example, if the group is specified with ‘Item text contains Summer’ and ‘Item group is 1234’, then all items within the group must contain both those values.
‘Or’: If two groups have an ‘Or’ between them, then an item must fit the criteria of either one of the groups to be added to the item segmentation. If an item fits both groups' criteria, it will also be part of the segment.
‘And’: If two groups have ‘And’ between them, then an item must fit the criteria of both groups, to be added to the item segmentation. If an item fits the criteria of only one of the groups, it will not be part of the segment.
Exclude: Items that fit these specified criteria will be excluded from the segment. If an item is part of both the include and exclude section, the item will not be part of the segment. If an item only exists in the excluded section, the item will also not be part of the segment.
Video on how to create new group
Edit group
Select the “Edit group” function if you want to change the selection in a group.

This opens the “Edit group” screen, which displays the selections you have made for the group.
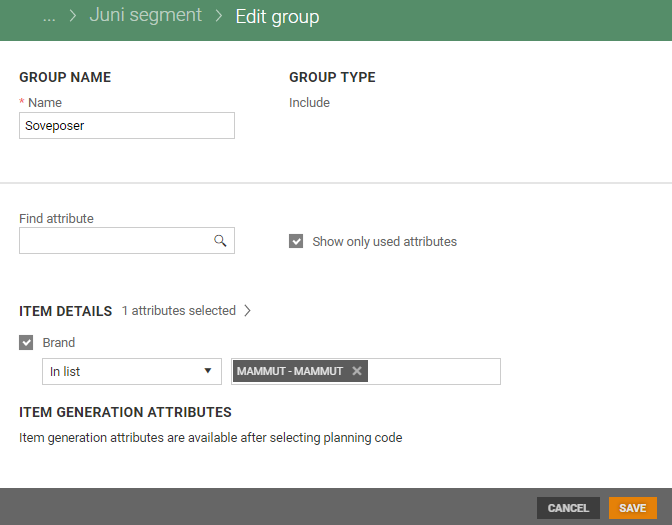
You can change your selections in the same way as they were made when creating the group. Once you have made changes, you must click on Save to save your changes. To update the number of items included in the segment, select the “Recalculate” function after saving your changes.
Delete group
To delete a group, select the “Delete group” function.

The “Delete group” dialog opens, warning that you are about to delete a selection group.
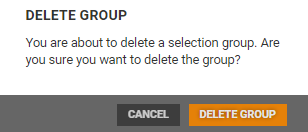
Confirm that you want to delete the group by selecting Delete Group.
Functions in Item segment details
You will find a range of functions at the bottom of the “Item segment details” screen that can be used to process the segment.
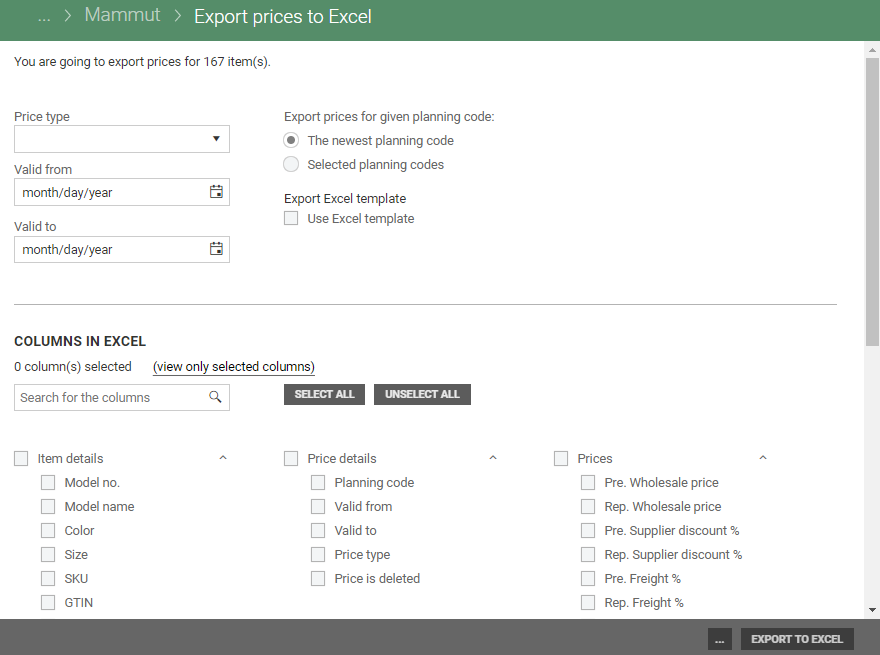
Export prices to Excel
Same function as in the item register. See Export items to Excel.
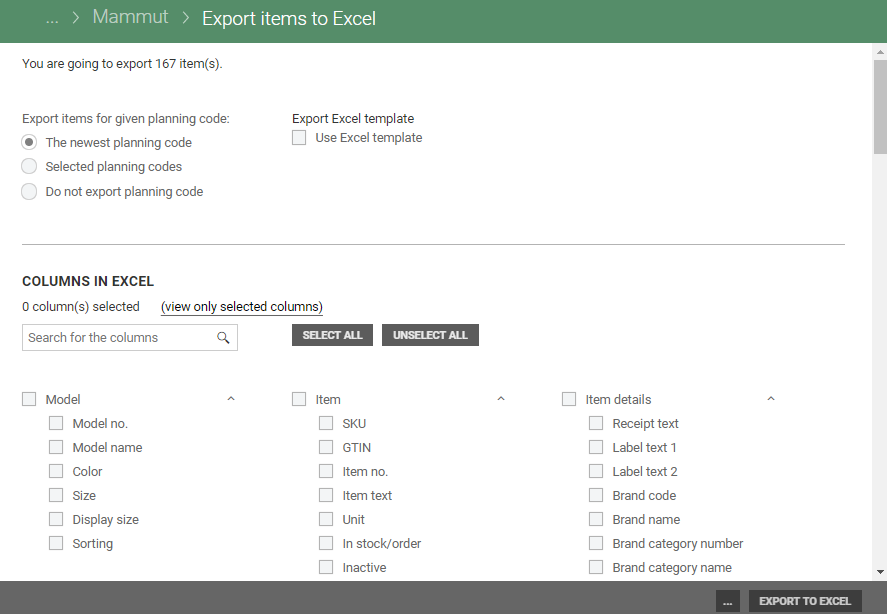
Export items to Excel
Same function as in the item register. See Export items to Excel.
View items
Select the “View items” function to see which items are included in the segment.
The items that are included in the segment are displayed on the screen.
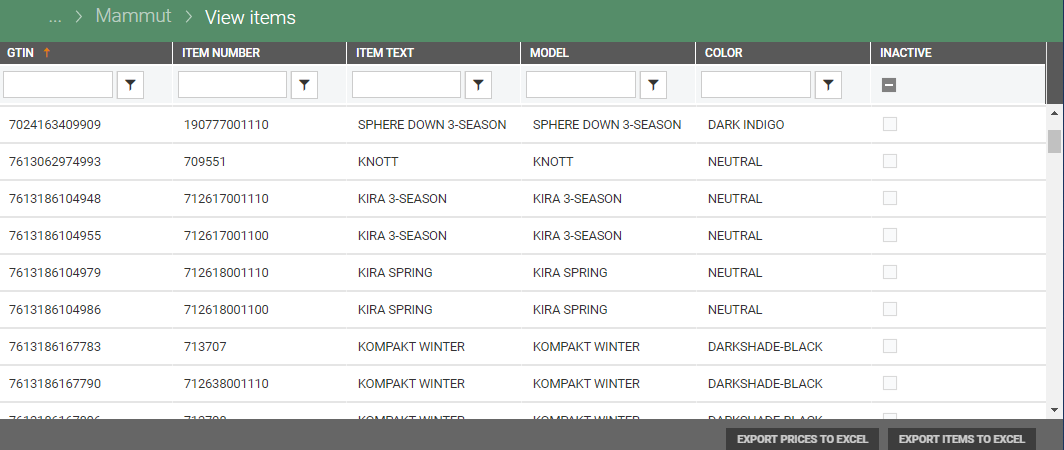
You can use filters to make further selections of the items in the segment. You can then export prices or items to Excel for the filtered items.
Edit segmentation name
You can change the name or description of the segment.
Click on the Edit button below the name. The “Edit name” dialog opens.
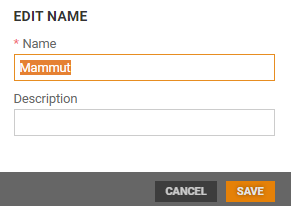
Edit the name and/or description, then click on Save. The name and description will be updated.
Recalculate
Use the “Recalculate” function to determine the number of items included in the segment. You should use this function if you have made changes to the segment to then “Recalculate” the items included in the segment.
Click on the Recalculate button.
You will see “Counting ...” displayed at the top of the screen. You are also informed that counting may take a while and that you cannot make changes to the segment while counting is in progress.
You can click on the Refresh button to check if the count has finished.
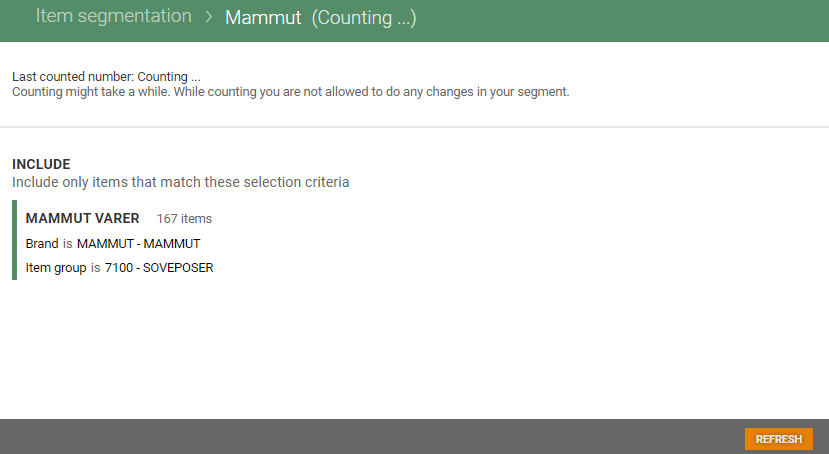
If the count has finished, the number of items in the segment is displayed at the top of the screen, alongside the date and time of the count.
Add new group
Use the “Add new group” function to create a new group. The New group screen opens.
You create a new group in the same way as the new group you created when the segment was created. Select either “Include” or “Exclude” as the Group type.
This determines whether the selection you make will be included in the segment or excluded.