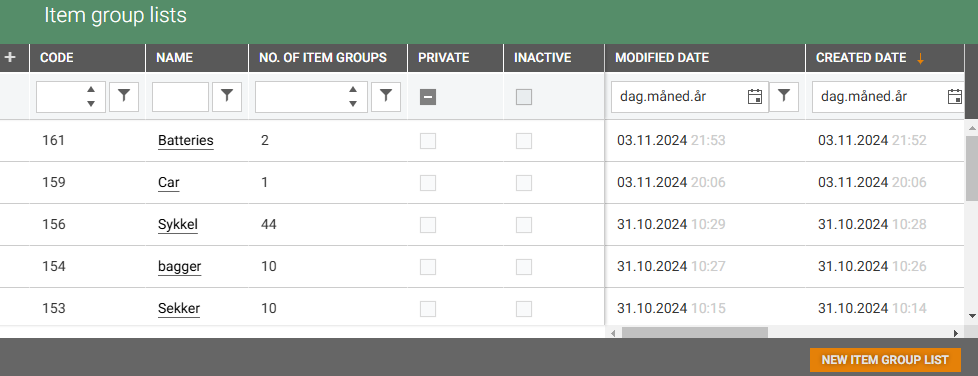
An Item group list can be used to do "actions" on multiple item groups. In the item group lists view you find a list of existing item group lists. Item group list is a list of item groups.
From this view you can edit/view existing item group lists or add new item group lists.
New item group list
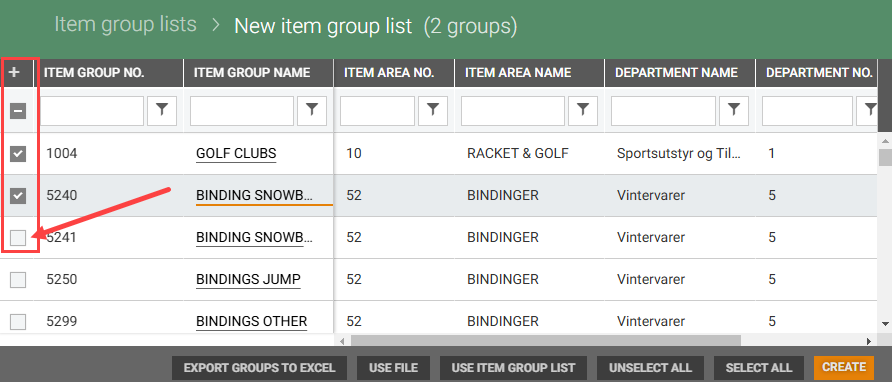
To create a new item group list, click on the New item group list button. This will open the “New item group list” view, where you can select item groups by ticking the desired item groups in the “+” column.
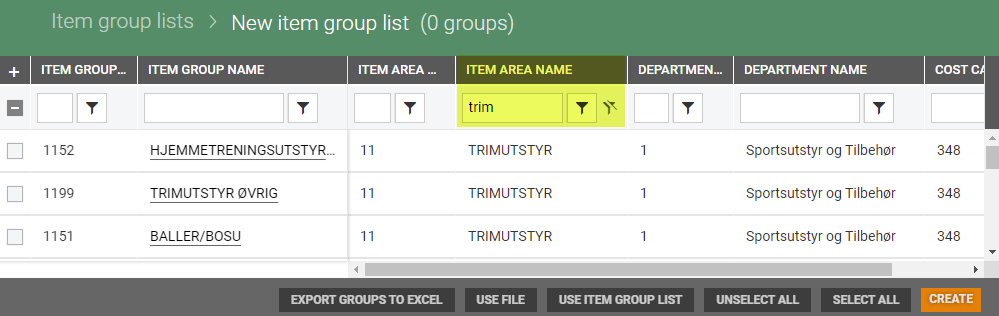
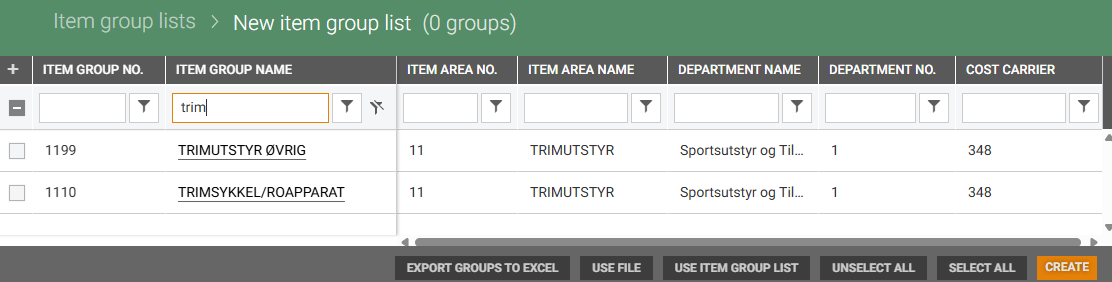
You can also use Filter  to narrow down the item groups you want to add to the item group list. For example if you filter by "Item area name" containing "trim", the result will show all item groups with item area name "Trimutstyr":
Tick the item groups you want to add to the list in the + column, or click on the Select all button to select all item groups in the filter.
If you want to select additional item groups, remove the filter by clicking on the Clear filter  button next to the filter button. You can then add more item groups, either by ticking them individually or by applying a new filter.
Create Item group list or Promotion
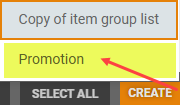
Once you have selected the desired item groups, click the Create button. You will have two options: Item group list or Promotion.

Create Item group list
Click the Create button and select "Item group list". The "Create item group list" dialog will open.
Add a name and an optional description (optional).
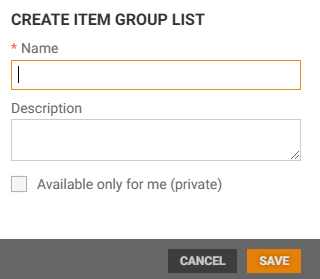
You can also make the item group list private by ticking the "Available only for me (private)" option.
Click Save to create the item group list. The Item group list details view will open, displaying the included item groups.
Use the buttons at the bottom of the view to modify the item group list.
Create promotion
Click on the Create button and select "Promotion" to create a Promotion.
The Promotion > New view opens.
.png "image(131).png")
Your offer will contain the item groups in the item group list. Add the promotion details.
Click the Create button to create the Promotion.
See Create new promotion for information on the promotion details.
Please note that you should not use this feature unless you are using the Promotion module.
Video showing how to create new item group list
Functions in the new item group details view
At the bottom of the view, you will find functions that allow you to modify your selection. These functions can be used both on new item group lists and on existing item group lists.

Select all
You can use the Select all function to select all item groups in the item group list.
To use the "Select all" function you need to use filter to select the items groups you want in your item group list. If you do not use filter the selection will be too large. If you try to us the function without filtering, you get a warning.

Unselect all
The Unselect all function can be used to unselect all the selected items groups. The behavior of the function depends on if filter is used or not, and if the function is used on a new item group list or on an existing item group list.
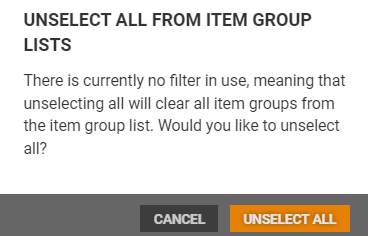
Without filter on new item list
If item groups where selected without using filter on a new item group list, and the Unselect all function is selected, the "Unselect all from item group lists" warning dialog will open.
To unselect the item group lists, click Unselect all.
With filter on new item group list
If you select Unselect all when filter is used on a new item group list, the item groups are unselected. Item groups selected without filter will be kept.
With filter on existing item group list
If the Unselect all function is used on an existing item group list, all item groups in the item group list will be removed.
Use item group list
You can select an existing item group list to copy to your selection.
Click on the Use item group list button. The "Use item group list" view opens, it gives an overview of existing item group lists. You can either Include or Exclude item groups to your item group list.
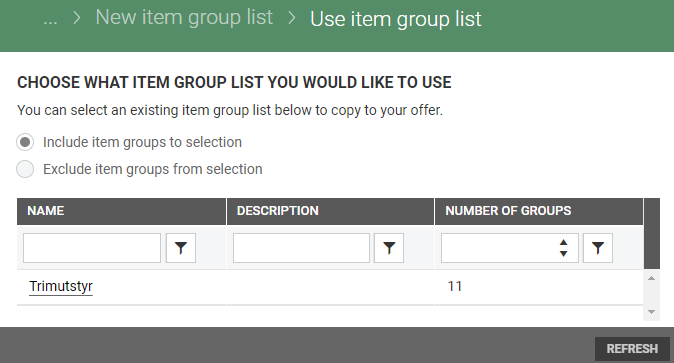
Include item groups to selection
Click on the name of the item groups list you want to add to your selection. The "Add item group based on item group list" dialog opens.
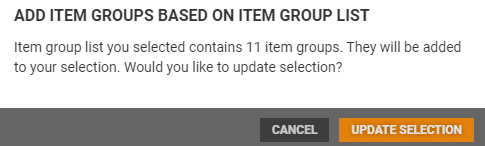
Click the Update selection button to include the item groups in the item group list.
Exclude item groups to selection
Click on the name of the item group list you want to exclude from your selection. The "Remove item group based on item group list" dialog opens.
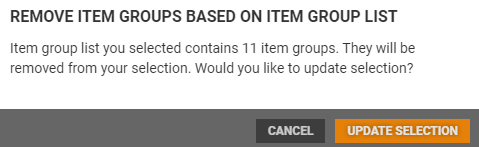
Click on the Update selection button if you want to exclude the item groups in the item group list.
Use file
An existing file can be used to add item groups to the selection, by clicking the Use file button.
This opens the “Use file” dialog, where you select how the file should affect your item selection. The default option is "Include item groups to selection", but "Exclude item groups from selection" can be selected instead.

Click the Select file button to upload the item groups you want to update to your selection. Select wanted file; it must have .csv or .xlsx format.
Click Open to upload the file.
Click Update selection. Selection is updated.
To add items to the item list you select a .csv file with Item group number (ItemGroupNo) column as identifier.
You can use the "Export groups to Excel" function to create an Excel file that you can use as a template for the file.
Do not remove or unhide the column definitions (in row 2)!
Consider removing columns which you do not want to modify, except from the identifier column!
Export item groups to Excel
Item group in the item group list can be exported to Excel. Select the item groups you want to export to Excel and click on the Export groups to Excel button. A message is displayed at the bottom of the screen informing you that the export has started.

When the export is finished a notification is shown, and the "Bell-icon” gets a red mark  .
.
Click the "Bell-icon" to see the notification. The notification panel opens.
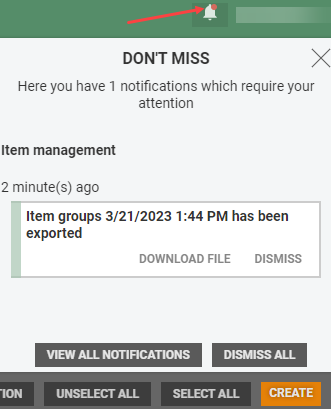
To download the file click "Download file".
The Excel file can be used as a basis for a template for adding item groups to the item group list using the Use file function.
View existing item group list
Click on the Item group name (in the Item group name column) on the item group list you want to open.
The item group list opens in a new view. In this view you see the item groups in the item group list.

At the bottom of the Item group list details view, you will find buttons that allow you to modify the item group list. Most of these functions are explained below the description of the new item group list.
Functions unique to the existing item groups list view are described here.
Create
You can create a "Copy of the item group list" or create a "Promotion" with the item groups in the item group list.
Copy of item group list
You can copy the item group list and use the copy as basis for a new item group list.
Click on the Create button and select "Copy of item list". This will open the "Copy of item group list" dialog.

You can give the item group list a name and add a optional description.
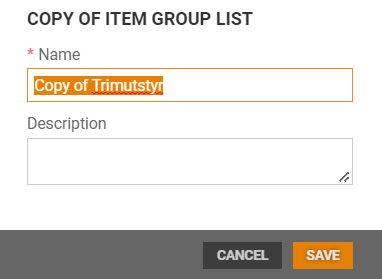
Click the Save button to create a copy. A copy of the item group list opens in a new view.
Promotion
You can create a Promotion for the item groups in the item group list.
Click on the Create button and select "Promotion" to create a Promotion. The Promotion > New view opens.
Your offer will contain the item groups in the item group list. Add the promotion details.
Click on the Create button to create the promotion.
Please note that you should not use this feature unless you are using the Promotion module!
Edit name and description
The Item group list name and description can be edited, by clicking the Edit name and description button. This will open the “Edit name and description” dialog.
Edit desired information and click Save.
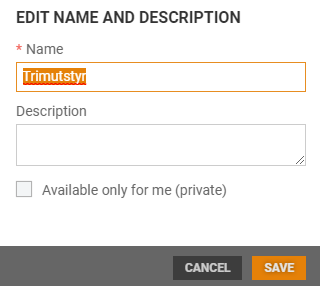
You can also make the item group list private by ticking the "Available only for me (private)" option.
Click Save to save the changes.
Export item groups to Excel
See Export item groups to excel in Functions in the new item group details view.
Delete item group list
Item group lists can be deleted by clicking on the (…) "More-button" and select "Delete".
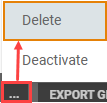
The “Delete item group list” dialog will open, where you must confirm that you are sure you want to delete it.

Click on the Delete button to delete the item group list.
Note: It is not possible to restore deleted item group lists.
Deactivate/activate item group list
Item group lists can be deactivated.
Click on the (…) "More-button" and select "Deactivate".
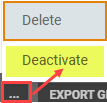
The item group list is deactivated and marked as inactive item group list at top of the screen.

You can activate an inactive item group list by clicking on the (…) "More button" an select "Activate". The item list becomes active.