The “Stores” view displays an overview of all stores registered in the system. You can create new stores, maintain existing stores, and activate/deactivate stores.

Create new store
You can create new stores from the Stores overview. Click on the New store button. 
The “New store” view details open.
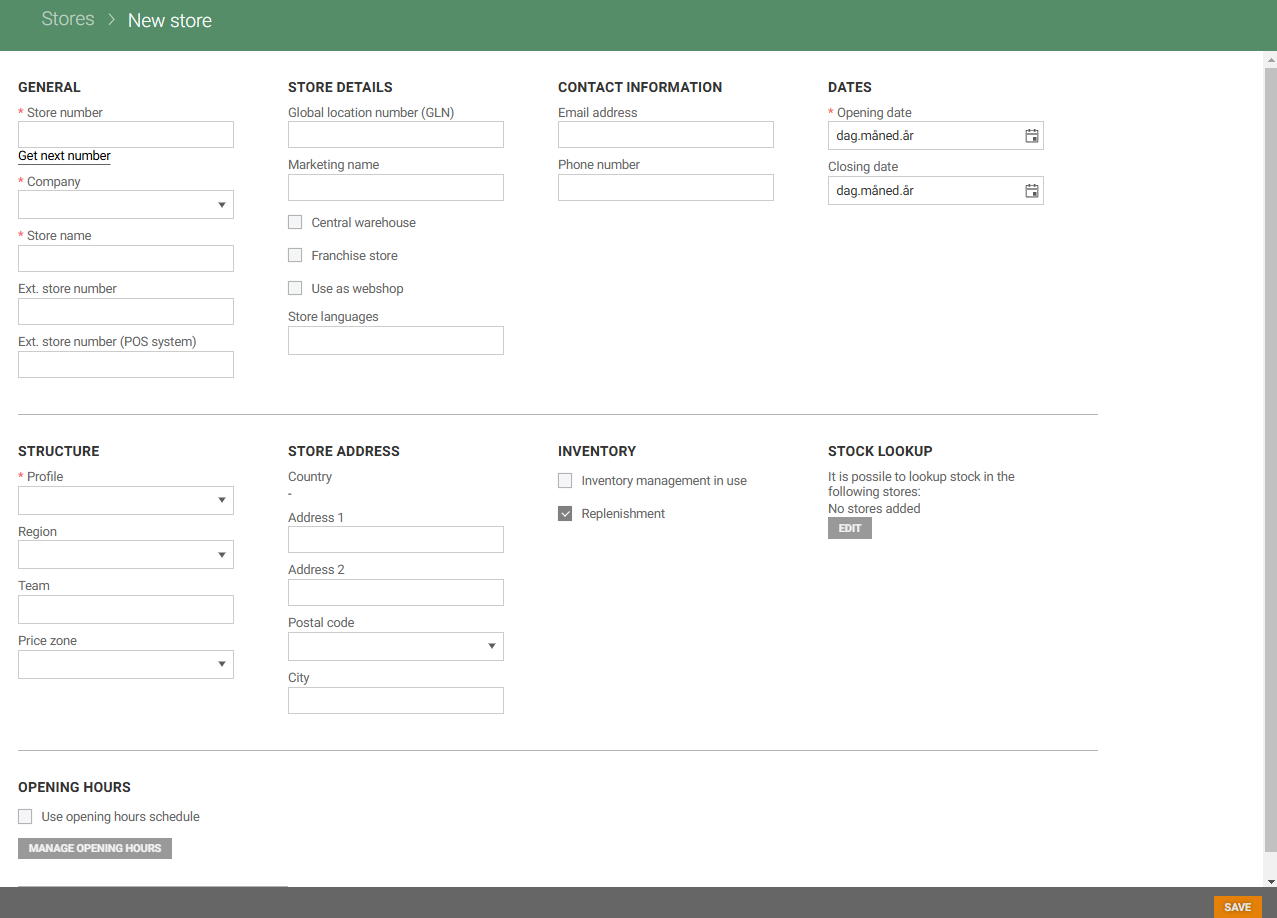
In the "New store" screen you configure Store details (see field description in the table). Fields marked with * are required and must be filled in. Other fields are optional and depend on the store's setup.
Click Save to create the new store.
Store details
You can view store details for an existing store. Click on the Store name in the Name column. Store details for the selected store opens. In this view you see information about the store and can edit Store details.
The view consist of different sections; General, Store details, Contact information, Dates, Structure, Store address, Inventory, Stock lookup and Opening hours.
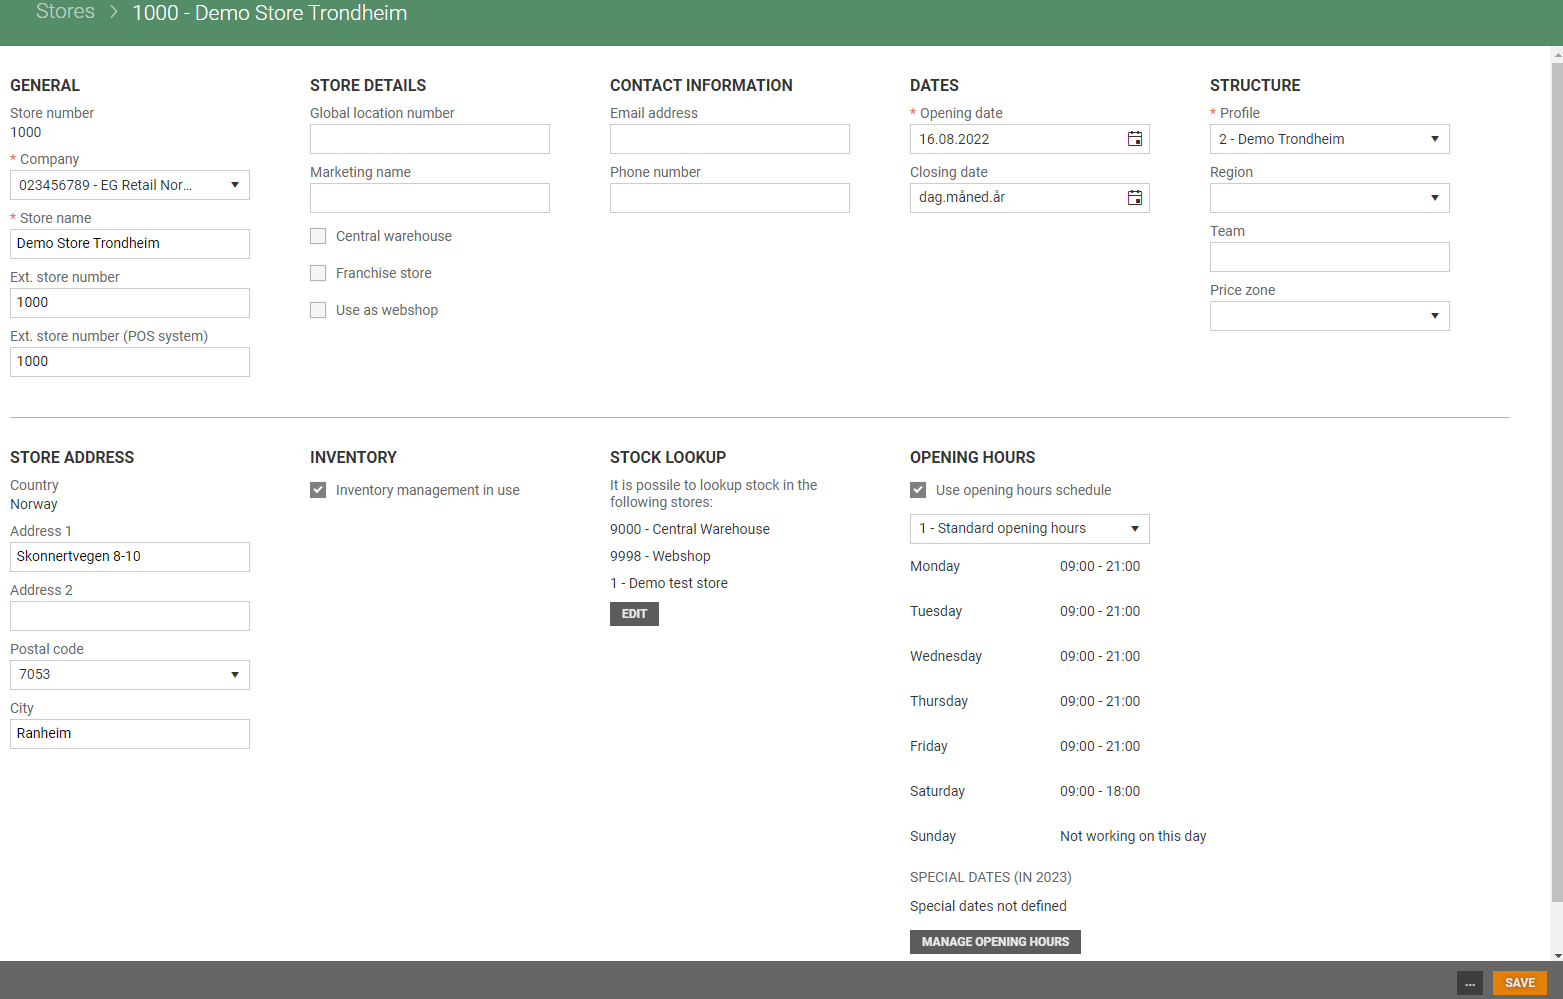
The information has an impact on the treatment in the system. If you enter incorrect information in this view, it could have major consequences for the system.
General
Store number: Enter store number. Store number must be a positive, whole number. Store number is validated when you create a new store.
You can register the store number by clicking on "Get next number". The next free store number is registered automatically.
Company: Select Company from the drop-down list.
Store name: Enter store name.
Ext. store number: Enter external store number.
Ext. store number (POS System): Enter external store number (POS system). This field is used for identifying stores in 3rd party POS systems.
Store details
Global location number: A location number is a reference key that identifies every physical, functional, or operative location within a business or an organizational unit. The Global location number can identify firms, accountancy departments, stock, delivery point, point of re-shipment and individuals if necessary.
Marketing name: Enter marketing name.
Central warehouse: Tick this if the store should be marked as central warehouse.
Franchise store: Tick this if the store should be marked as franchise store. This is required for using Price control.
Use as webshop: Tick this if the store should be defined as web shop.
Store languages: You can specify st
ore preferred languages, if they are different from the language of a country the store belongs to. You can select 2 languages. If you attempt to add more languages, then a validation message is displayed.
Contact information
Email address: Enter e-mail address.
Phone number: Enter phone number.
Dates
Opening date: The store's opening date. By default, the value is set to the created date.
Closing date: Closing date.
Structures
Profile: Select profile. If a default profile exists, it is preselected. It is possible to change to another profile.
Region: Select region.
Team: Select team, you can select several teams.
Price zone: Select price zone. Only price zones within the selected profile can be chosen. If a default price zone exists, it is preselected. It is possible to change to another price zone.
Store address
Country: Displays the Country of the selected Company.
Address 1: Enter store address.
Address 2: Enter store address 2.
Postal code: Select postal code.
City: City is automatically added based on the postal code.
Inventory
Inventory management in use: Tick this field if Inventory management is in use.
Replenishment: The field is by default ticked.
Stock lookup
It is possible to lookup stock for related stores. In this section you can add/edit which stores it is possible to lookup stock in.
Click on the Edit button to add or edit related stores that should be available for stock lookup.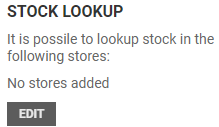
The "Stock lookup" screen opens.
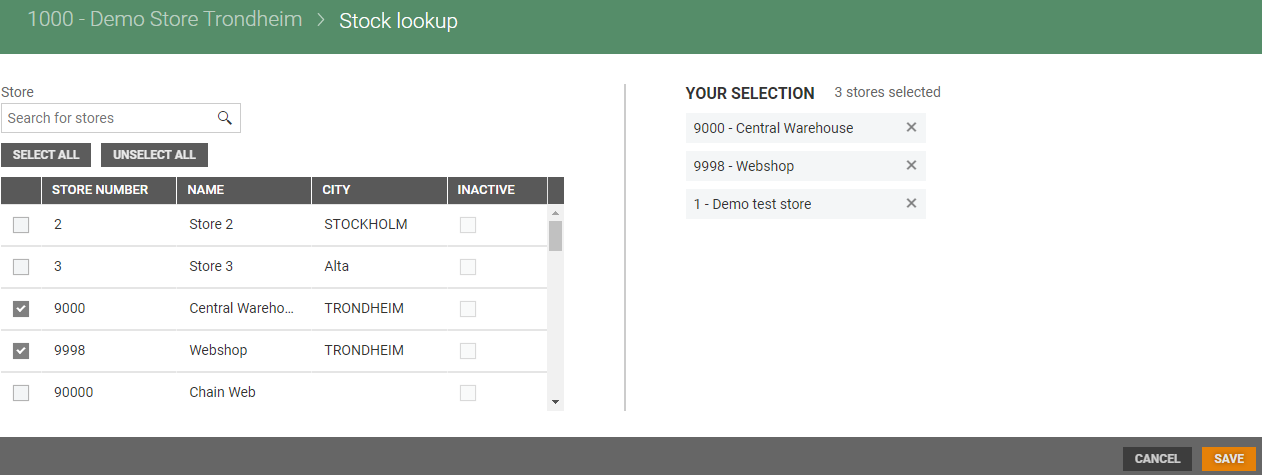
The Stock lookup view is divided into two sections. To the left you will find a table with all the stores. You can search for stores, or select one by one by ticking them, or use the Select all/Unselect all buttons.
At the right side of the view you see your selection of stores that are available for stock lookup for the store.
Click on the X behind the store name to remove selected store.
Only active stores can be added to stock lookup. It is not possible to select stores before the Store is created. See stock lookup description.
Opening hours
Use opening hours schedule: Tick this field if an existing opening hours schedule should be used. If you tick this field a drop-down list with active opening hours schedule from the Opening schedule setup appears. Choose wanted schedule. Opening hours from the selected schedule are displayed. It displays opening hours for each weekday and special dates in the current year (same as in opening hours register details).
Manage opening hours: It is possible to manage opening hours and special dates for the store if the existing opening hours schedule/special dates is not in use. Click on the Manage opening hours button, it opens a page with two tabs; "Opening hours" and "Special dates". It has the same design as the "Opening hours" register. See description in the Schedule opening hours register.
Logic for company and country in Store Management
For Companies:
Organization number - Country code is a unique pair
External number is a unique field
Company code is a unique field
For stores:
Store number is a unique field
External number - company Id is a unique pair
GLN is a unique field
Deactivate/Activate store
It is possible to deactivate stores. Click on the "more button" at the bottom of the store details screen, select Deactivate. The store is deactivated and marked as inactive.

If a store is inactive, then information about inactive store is shown at the top of the store details screen:

It is possible to activate inactive stores. Click on the "more button" and select Activate. The store is activated.
Export stores to Excel
You can export stores to Excel. You can export all stores by clicking on the Export to Excel button without filtering, or you can use filter and export only some stores. The export can be used as a template for Import of stores.
When you click on the Export to Excel button, you get information about that the Export has started.
When the file is ready you get a notification and the "Bell icon" gets a red mark. Click on the "Bell icon" to open notifications. You can download the file by clicking on "Download file" in the notification. The file is downloaded. 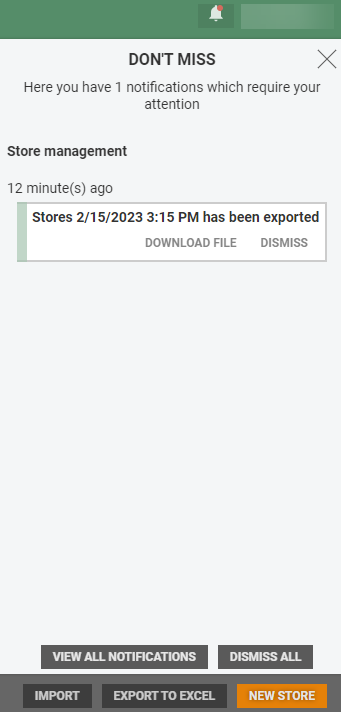
You see the file at the bottom left corner when it is downloaded.

You can click on the file to open it.
Import stores
Stores can be imported from an Excel file. Imports can be used to create new stores and update active stores. Stores can be deactivated using file, but inactive stores cannot be activated or edited. Stores cannot be assigned to inactive organization, profile, region, price zone.
Click on the Import button, the "Import stores" dialog opens.
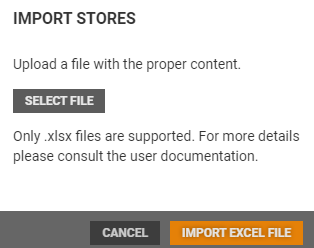
Click on the Select file button to select a file to upload. The file must be in .xlsx format. Required columns are 'Store no.', 'Store name', 'Opening date', 'Profile no.', 'Country', 'Company'.
Select a file and click on Open to upload the file.
Click on Import Excel file, to import the stores.
The Excel file is validated. You get a notification when the import is completed.
Exported file with stores should be used as import file template!
You can modify the Excel file, for example change values and delete columns that should not be updated.
It is important that the hidden row (row number 2) is hidden when you run the import.