General information and Display
Items are imported from the Import screen. This displays an overview of the files that can be imported into Item Master. The user must approve the files before update.
The system updates the items based on the information defined in the import rules. The items are updated according to the following hierarchy:
If an import rule exists containing both a supplier and an item group, the system will use this import rule.
If there is no import rule for a given item group, the default rule for the supplier will be used.
If there is no import rule for the supplier, the system will fail and return an error message.
The system will work through a set of predefined validation rules.
An item with validation errors is given the status “Error” as well as an error message.
Each import has a name and an import ID in the “staging table” for identification purposes.
The overview screen consists of a table containing a line for each import file. The files may be of different file formats. You can choose from Default (Excel import), PRICAT, Temalogic, Mass update and RIGAL.
The columns on the left of the screen are locked and are always displayed. The remaining columns are displayed on the right, with a horizontal scroll bar at the bottom of the screen (1). You can use this to scroll across and display further columns. A grey line (2) on the screen separates the locked columns from the other columns.

You can choose which columns are displayed (using the column selector, +, at the top left of the screen) and choose where they are positioned by moving columns.
You can use filters to find the file you want. You can add one or more filters in the filter row.

Maintain confidence that everything is imported correctly
In order to maintain confidence that we are importing everything correctly, the Import view should be kept 'empty'. By default the view does not show files that are imported fully (i.e. the "Done" flag is checked).
When the imports no longer need any action, it is advised to manually set the flag to Done. To set the import to status Done you can select multiple rows, and then click on the Set to done button.
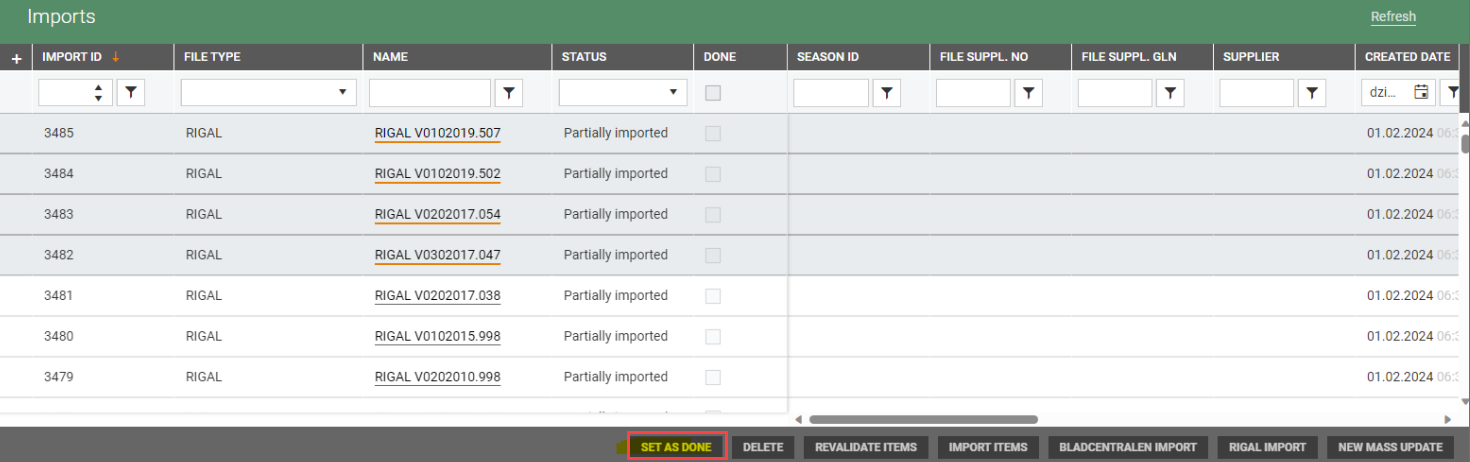
If you use the "Set to done" function, it has no effect other than the selected files, by default is removed from the Import view. It make it easier to get an overview of files that are not processed.
If there are files that are not processed, it usually means that manual action is required. The cause could be a bug in our code, a bug in the 3rd party or some intermitted outage.
Select a file to import
Select the line of the file you want to import and click on the file name in the “Name” column. The file content opens in a new screen.
This consists of a table containing a line for each item, with various columns containing information about the items.

Functions in the Import overview

New mass update
If you want to mass update items or prices you can use the “New mass update” function to update items from an Excel file (an exported Excel file to which changes have been made).
Click on the New mass update button to open the “Mass update” dialog.
Select what you want to update. You have four options; Item details (you can select "Only update existing items" or "Create new items form file"), Item relations, Wholesale prices and Store prices.
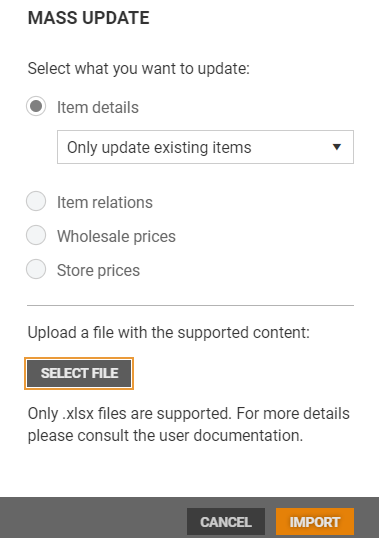
Select your preferred option. The text displayed describing what is uploaded is different depending on what you choose to update.
Click on Select file to select a file to upload. This file must be in .xlsx format.
Select a file and click on Open to upload the file. Click on Update to update the items from the file.
The Excel file is validated. You get a notification when the validation is finished.
For more information, see Mass update items.
RIGAL import
If you want to import items from RIGAL file, click on the RIGAL import button, the “RIGAL import” dialog opens.
Select the Store group level for which you want to upload items. You can choose between "Profiles" (default), "Stores" and "Price zones".
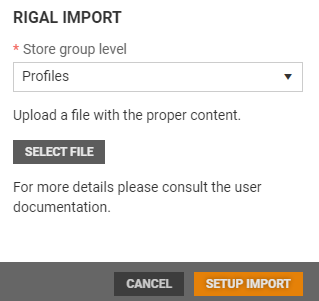
Click on Select file, select a file, and click on Open to upload the file.
Click on Setup import to update the items from the file.
Important!
Do not remove or unhide the column definitions! Consider removing columns which you do not want to modify, expect from the identifier columns!
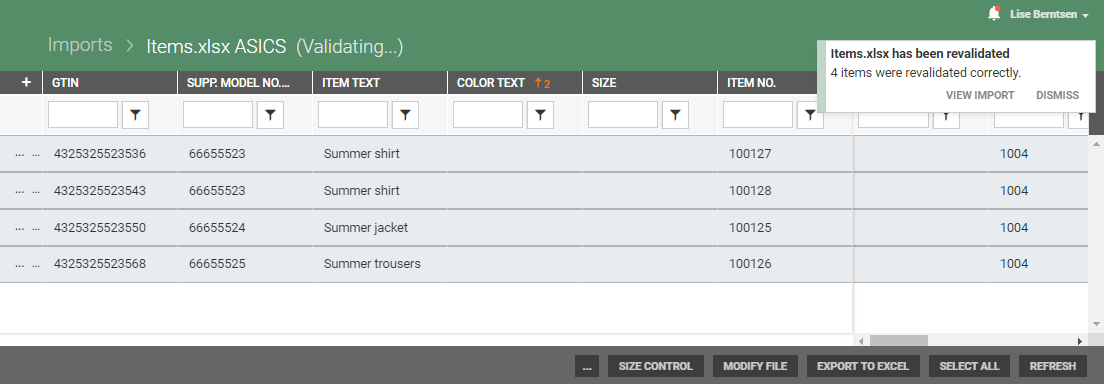
Revalidate items
Use the “Revalidate items” function if validation has failed. You can use this function to revalidate the file after making corrections.
Click on the Revalidate items button. All the items in the file will be revalidated.
Validated files are given the status “Validated”. If some items still contain errors, they are given the status “Validation failed”.
Delete
The files can be deleted from the Imports overview.
Select the relevant file. Click on the Delete button.
The selected file is deleted.
Import items
The Import items function is used to start import of the file.
Select the relevant file. Click on the Import items button.
The import starts, and the status on the file changes to Pending. When the import is finished, you get a notification. If some items was not imported, you get also get a more detailed notification about the result ot the import.
Notification in Import
When you run jobs in Import you can continue working. You get a Notification when the job is done. The notification displays the result. You can click "View import" to open the import.