Add item to sale
Items can be added to the sale by scanning items, searching for items or directly from the Sales board in the options menu.
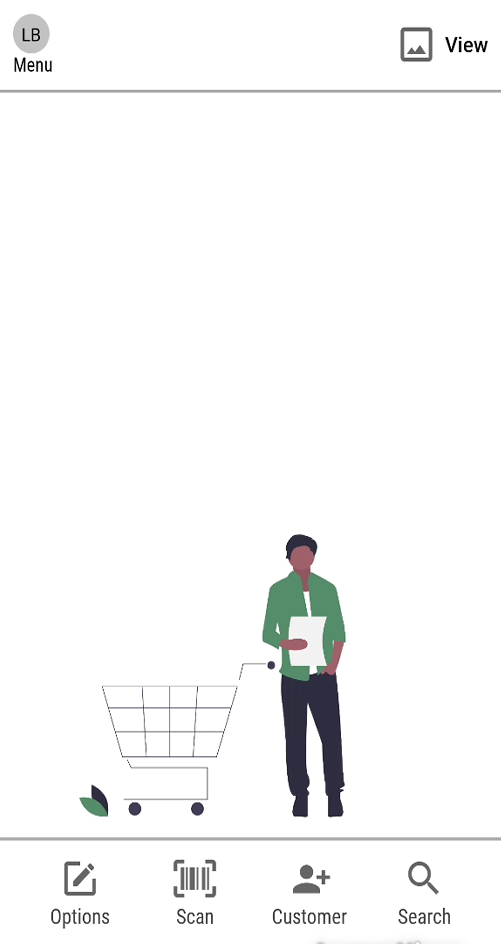
See “Bottom menu in sales” in menu for more information.
Scan item
There are two options for scanning the item.
Scan the item with a camera. Tap on the Scan button. The camera opens, and you can scan the item with the camera.
Scan the item using the scanner on the device.
Scanned items are added to the sale.
Search item
You can search for items e.g. if it has no barcode.
Tap the Search icon to open the search screen.
Enter the search text (e.g. EAN or item text).
Tap Enter to start the search. The search result is shown. You can change how the result is shown by tapping on the View icon and select view.
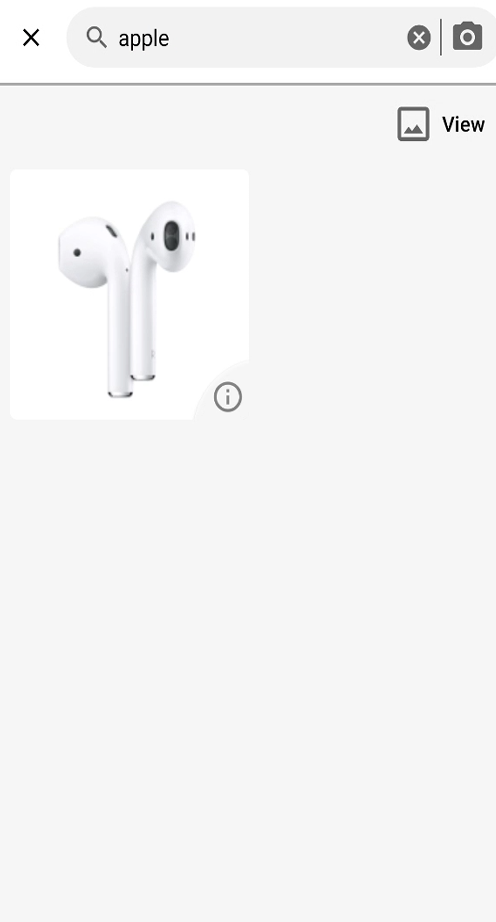
Tap on the item to add the item to the sale.
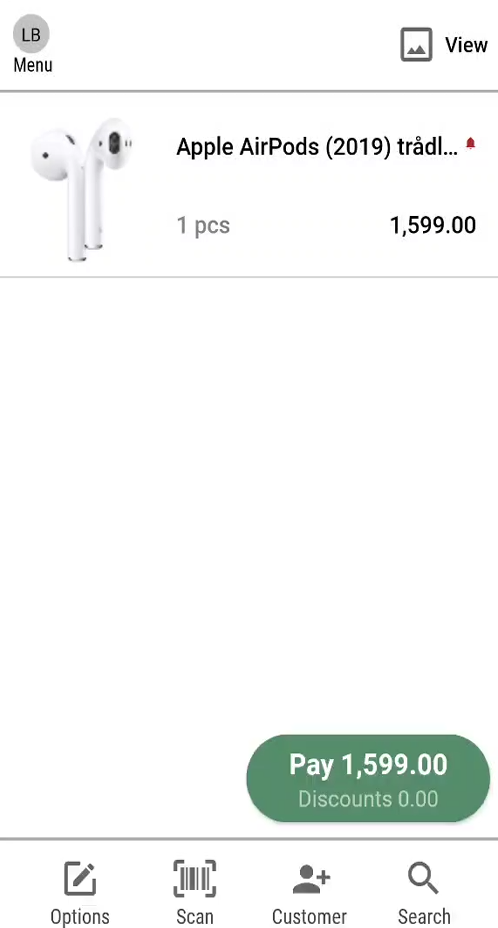
You can also search by scanning an item to directly view item details of the given item.
Item details
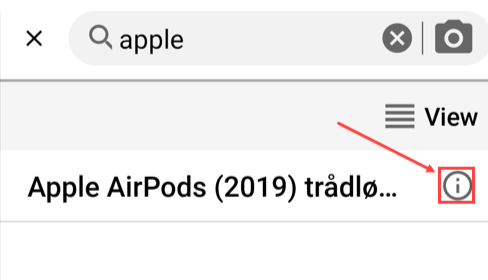
It is possible to view item details for items in the search result.
There is an (i) icon to the right of the item line. You can tap the icon to view item details for the item.
Item details show item information incl.: Name, EAN, Price, Image, Product information and Stock (optional, only shown if EG has access to the stock values in the retailer’s system).
You can add the item to the sale by tapping on the Add to cart button.
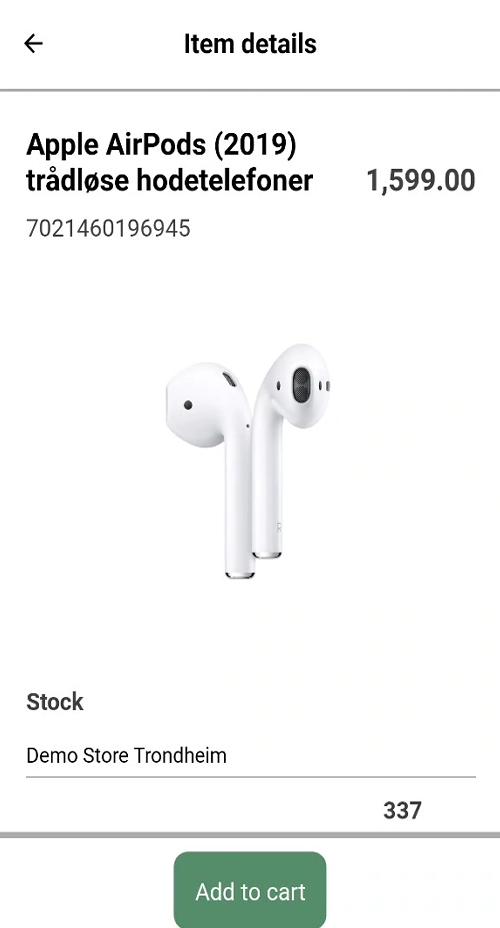
Tap on the arrow at the top left if you do not want to add the item. Then you go back to the search view.
Display options
Different views can be selected to display items in various ways.
Tap on the "View" icon at the top right. A list of view options is displayed: Expand view, Compressed view, and Image view.
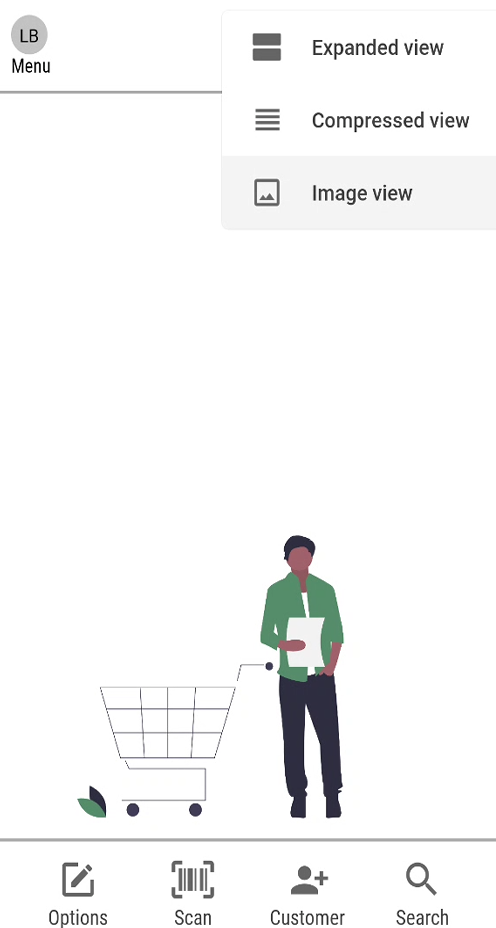
Image view
The Image view shows more details and an image of the item.
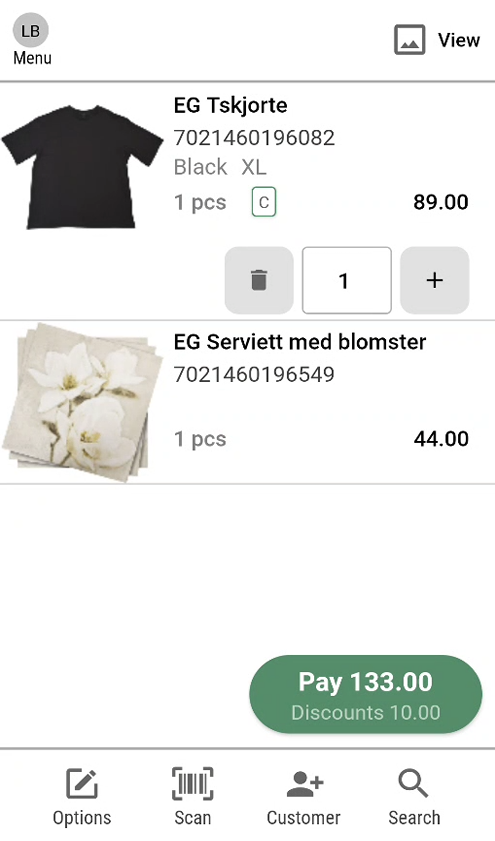
Compressed view
The Compressed view shows few details regarding the items and fits more items on the screen.
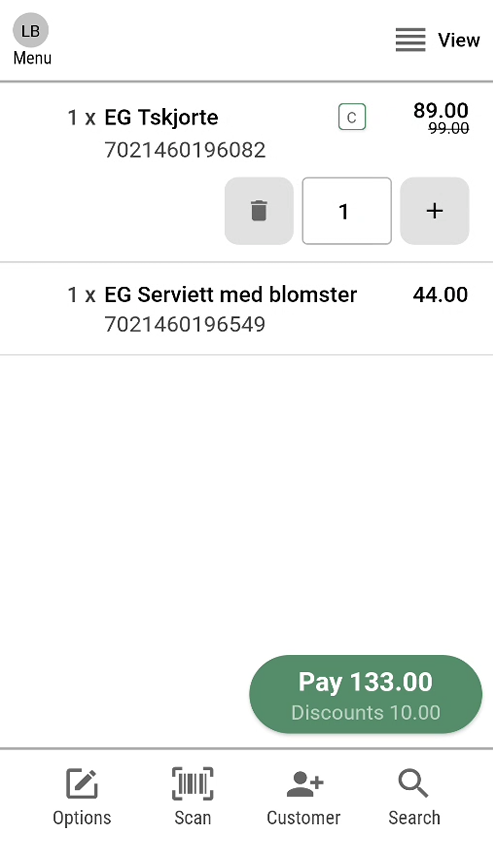
Expanded view
The Expanded view shows more details about the item, such as colour and size.
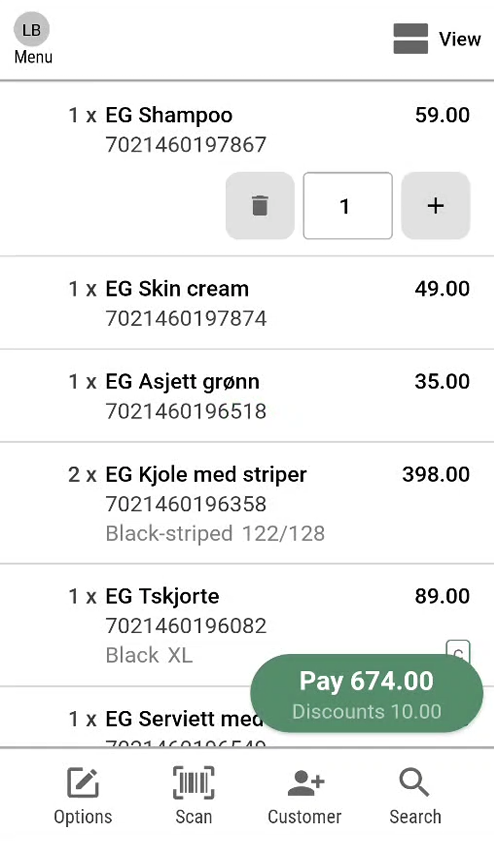
Change quantity
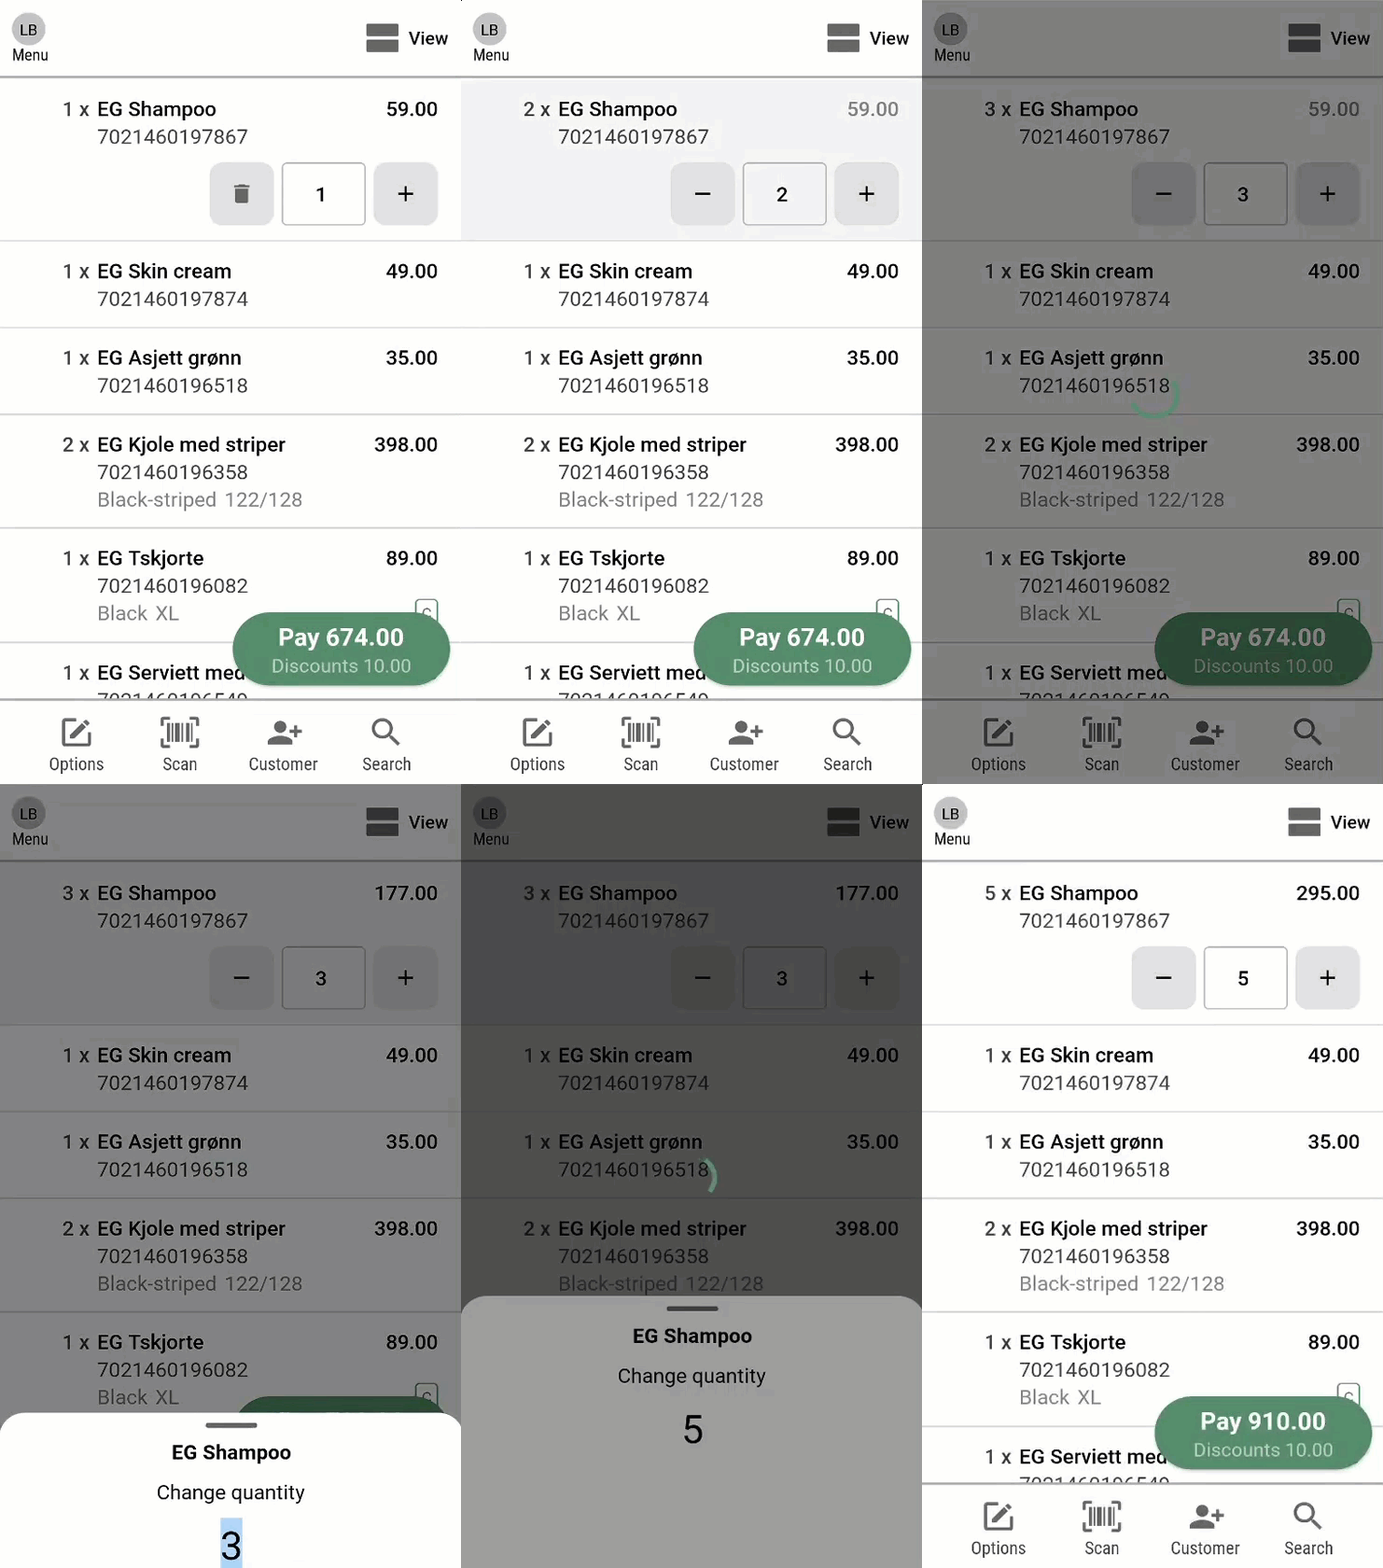
It is possible to change the quantity of the item manually, instead of scanning more of the same item.
You can quickly change the quantity of the last scanned item by using the + button or by tapping inside the quantity area to directly type the new quantity.
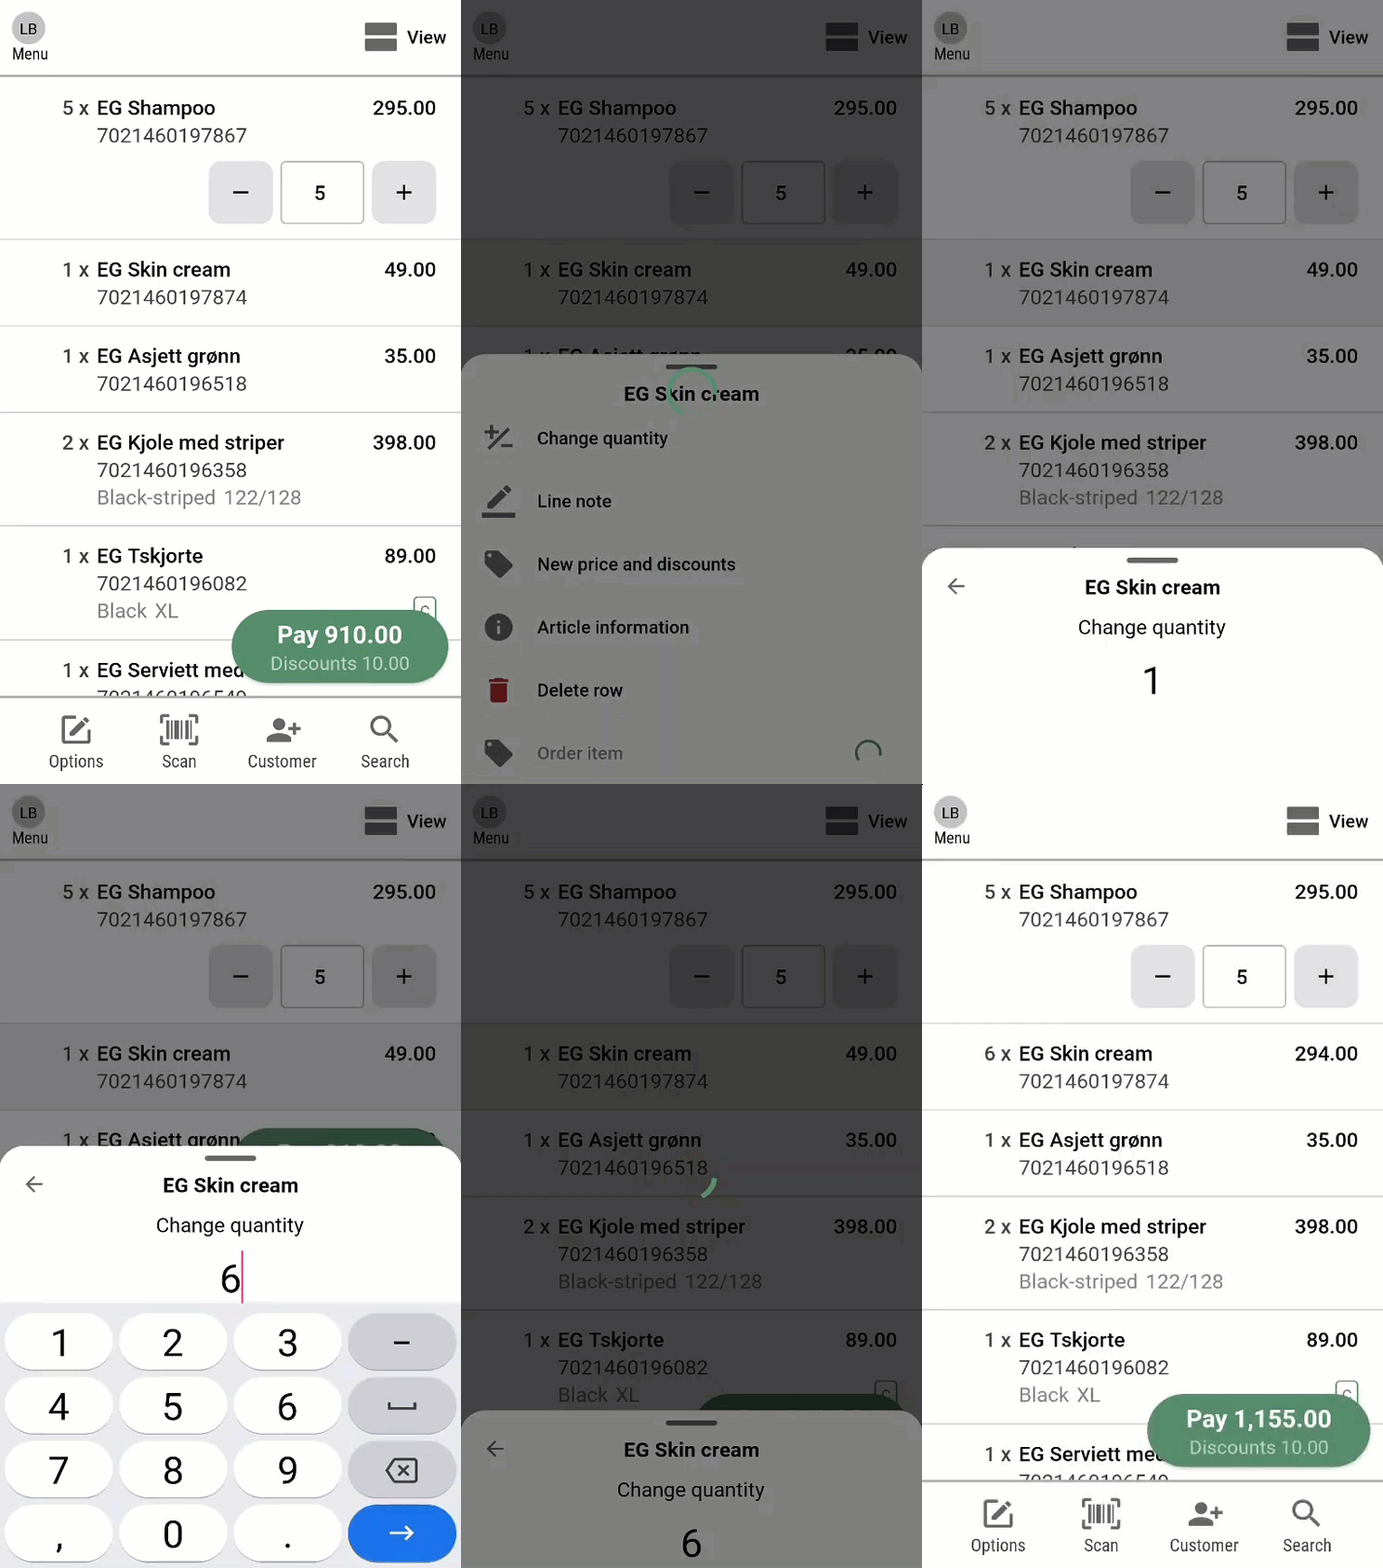
Anoter way to change quantity is to tap on the relevant item. The item menu will open.
Tap Change quantity, the "Change quantity" dialog opens.
Enter quantity and tap Enter.
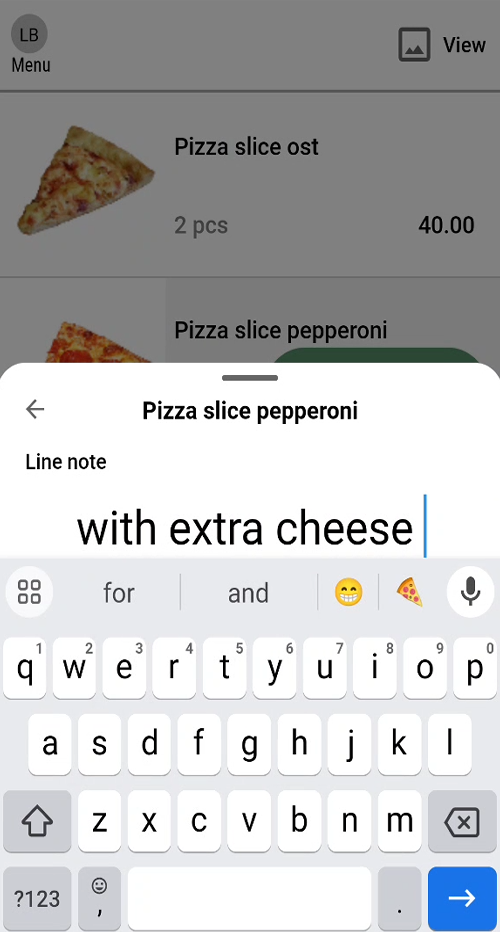
Line note
It is possible to add a line note on the item line.
Tap on the relevant item, item menu opens.
Tap Line note, line note dialog open.
Add a line note and tap Enter.
The line note is added to the item line.
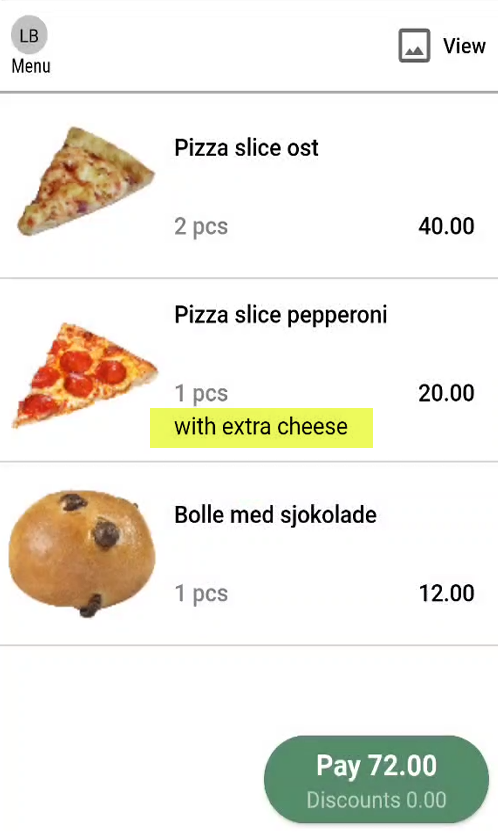
The line note can be changed by performing the same steps once more.
Sales note
Tab on the "Options icon".
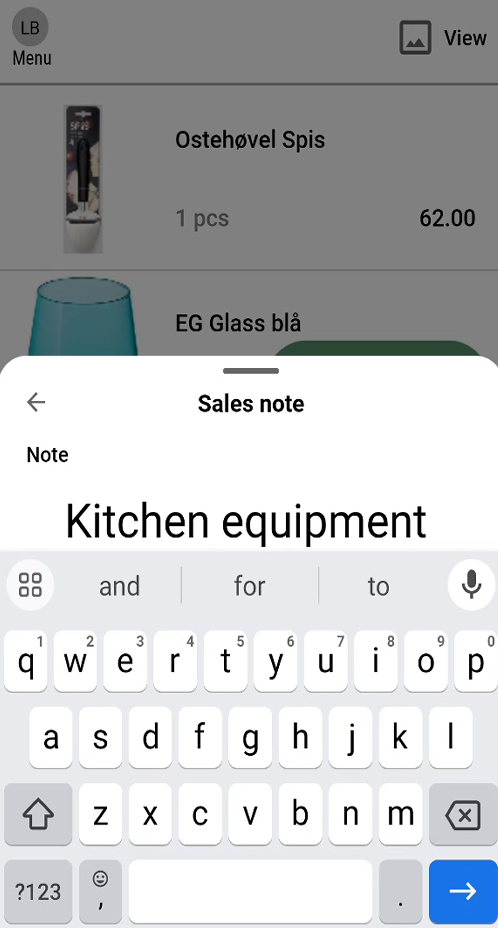
Select "Sales note", the "Sales note" dialog opens.
Add sales note and tap Enter.
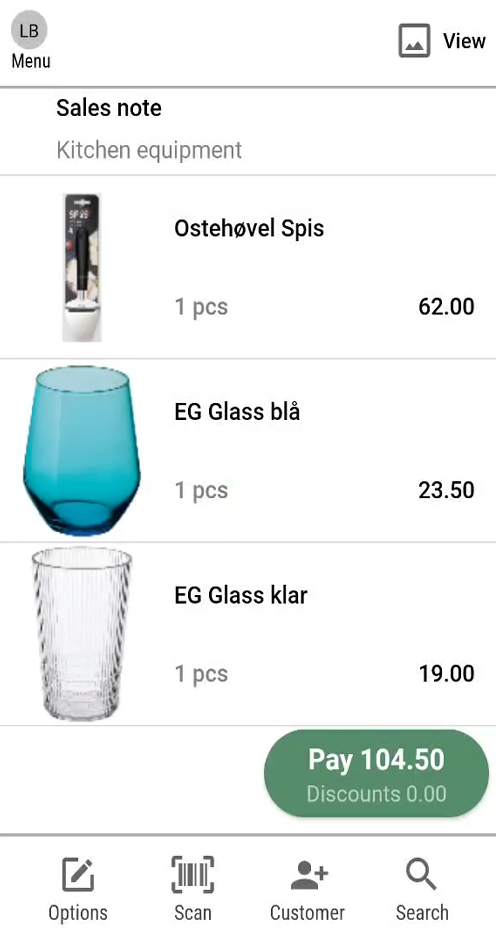
The sales note is added to the receipt.
Delete Row
It is possible to delete an item line. Tap on the relevant item, item menu opens.
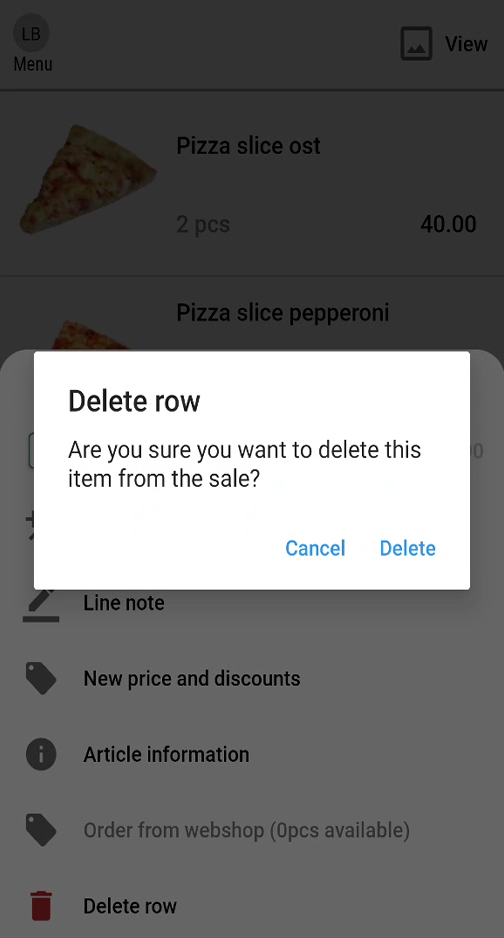
Tap Delete row. The "Delete row" dialog opens.
You must confirm that you want to delete the item from the sale. Tap Delete, to delete the item.
It is also possible to delete a row by swiping to the right on the given item line.
Item is deleted from the sale.
Discounts
Discounts on single item
Manual discounts, price reduction and new price can be added for given item.
Tap on the relevant item, item menu opens.
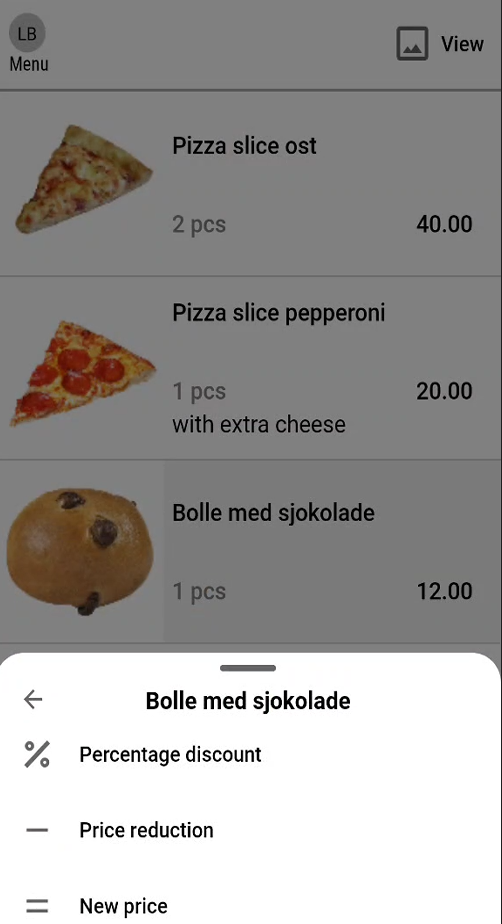
Tap New price and discounts. A new menu with three options opens: Percentage discount, Price reduction and New price.
Percentage discount
Tap on Percentage discount.
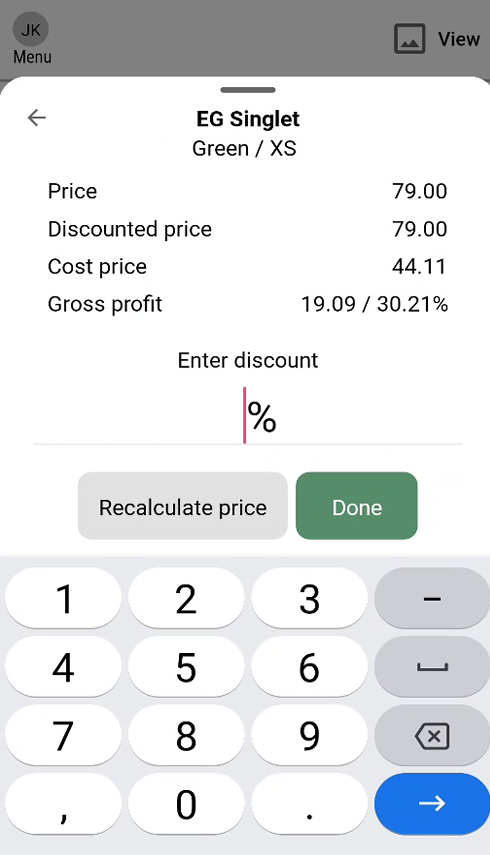
The "Percentage discount" dialog open. You will be able to see the original price, the discounted price (after applying a discount), the cost price and the gross profit when applying a discount.
Enter the discount and tap Recalculate price to view the profitability of the item after adding discount.
Tap Enter on the keyboard or Done to apply the discount.
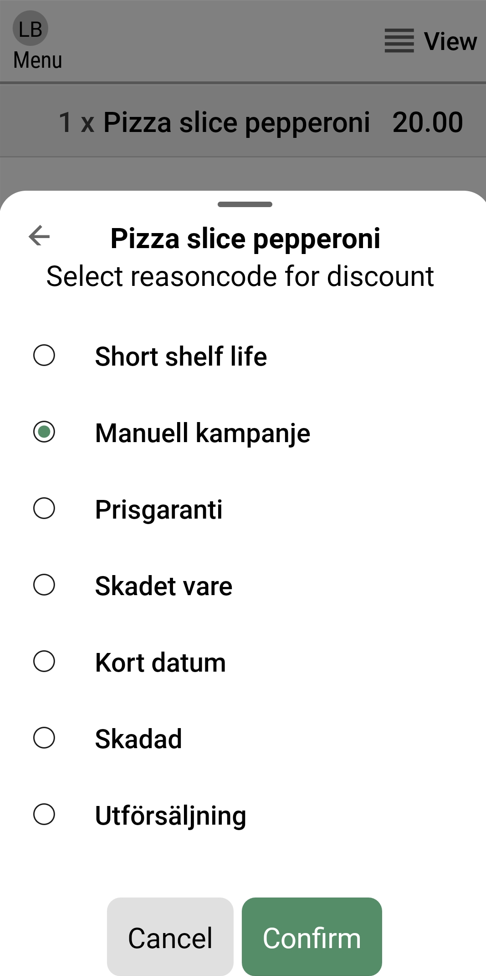
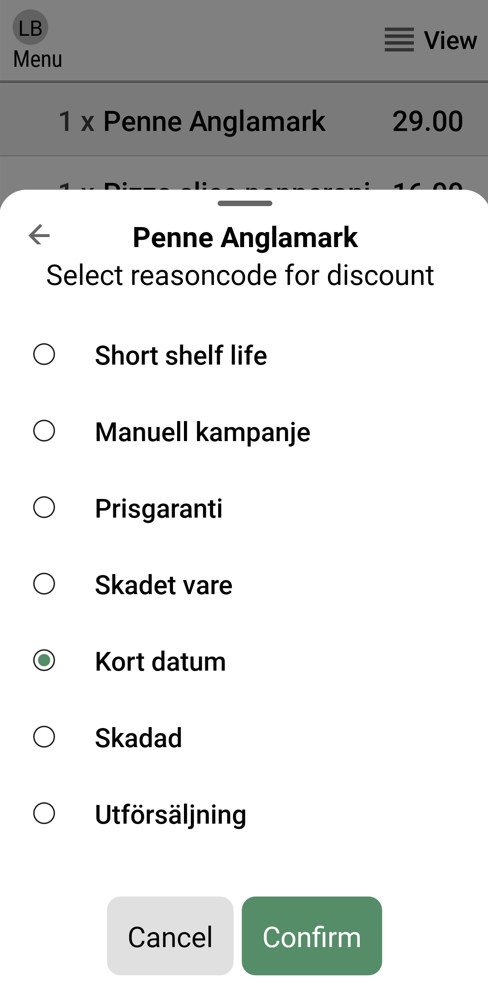
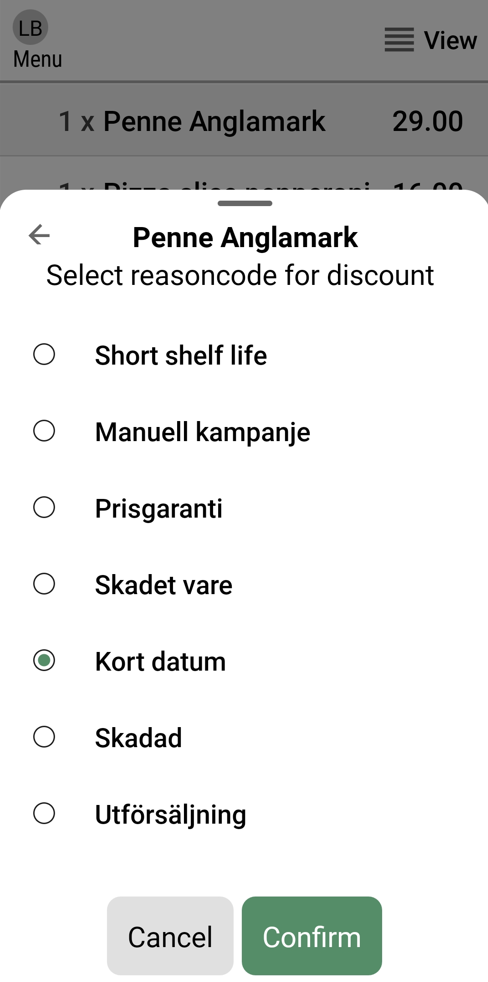
The "Select reason code for discount" dialog opens, if reason codes for discounts are set up. Select reason code and tap Confirm to add the discount to the item.
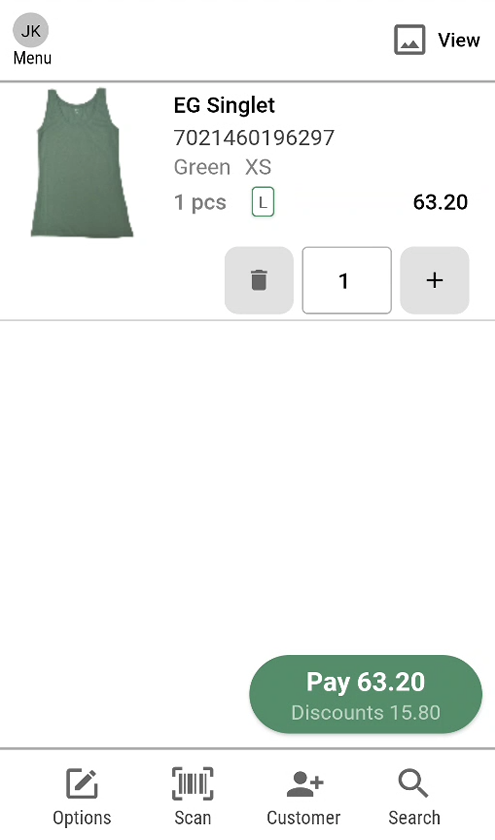
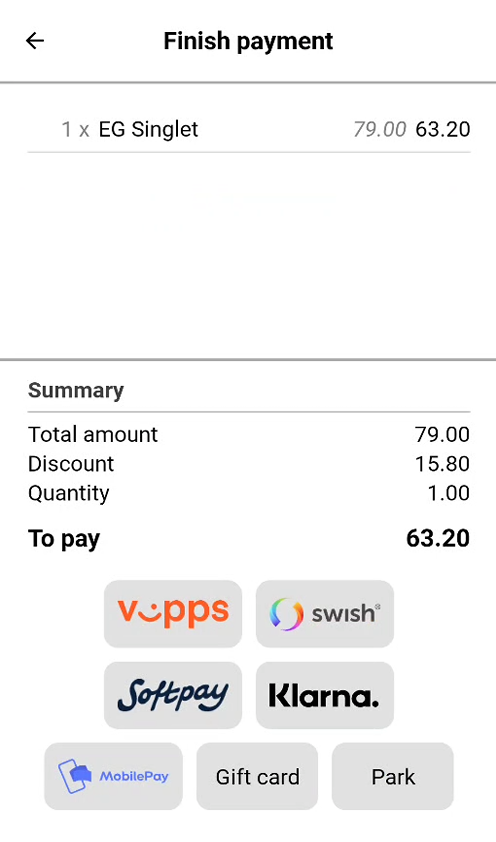
A discount is given on the item. The new amount is displayed on the item line along with a discount icon. L icon stands for “Line discount”.
In addition, the discount is shown on the Pay button, and in the "Finish payment" screen.
Price reduction
Tap on Price reduction.
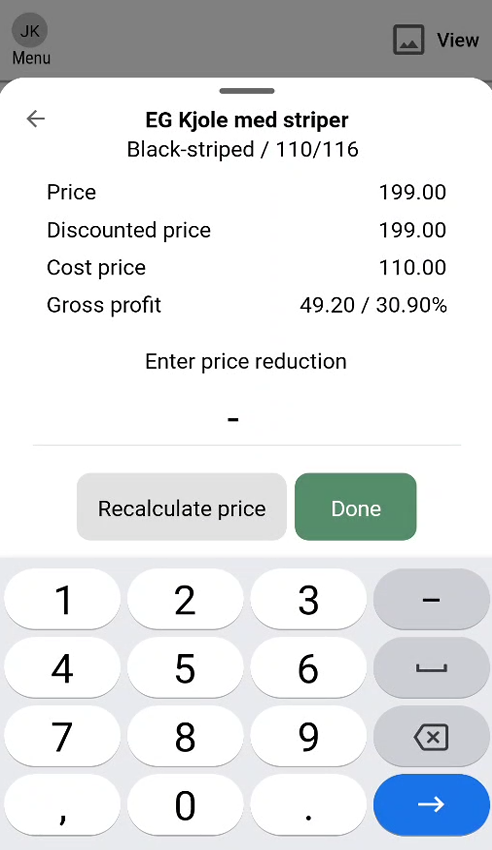
The "Price reduction" dialog opens.
Enter the price reduction, and tap Enter.
The "Select reason code for discount" dialog opens. Select reason code and tap Confirm to add the price reduction to the item.
New price
Tap on New price.
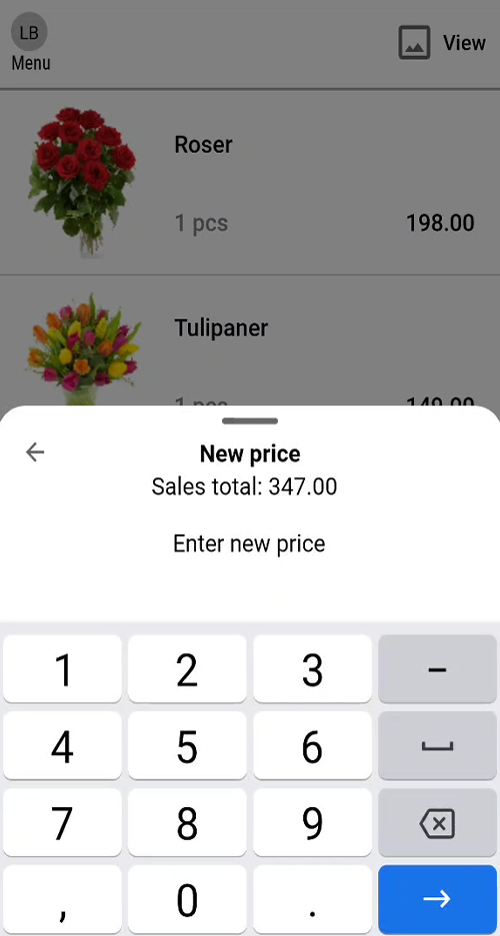
The "New price" dialog open.
Enter the new price, and tap Enter.
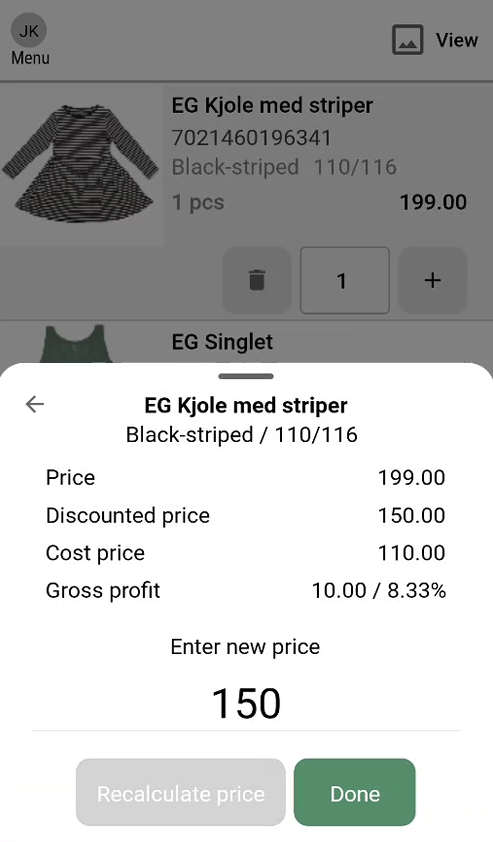
The "Select reason code for discount" dialog opens. Select reason code and tap Confirm to add the new price to the item.
Discounts on total sale
Manual discounts, price reduction and new price can be given for the entire receipt.
Tab on the "Options icon".
Select New price and discounts.
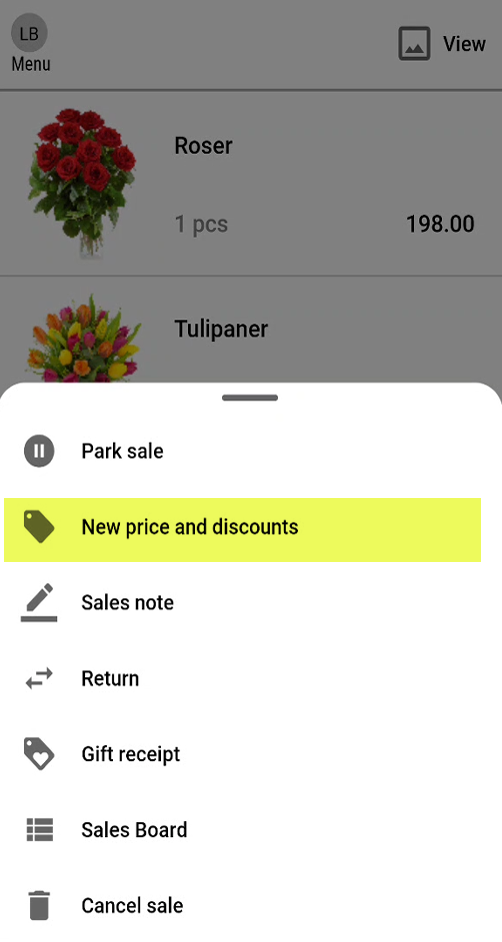
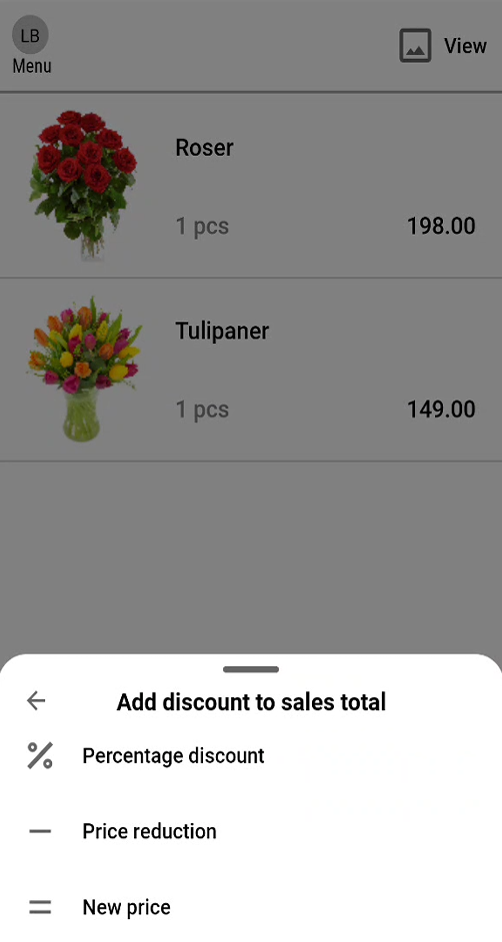
The menu "Add discount to sales total" opens. You have three options: Percentage discount, Price reduction and New price.
Percentage discount
Tap on Percentage discount.
The "Percentage discount" dialog opens.
Enter the discount, and tap Enter.
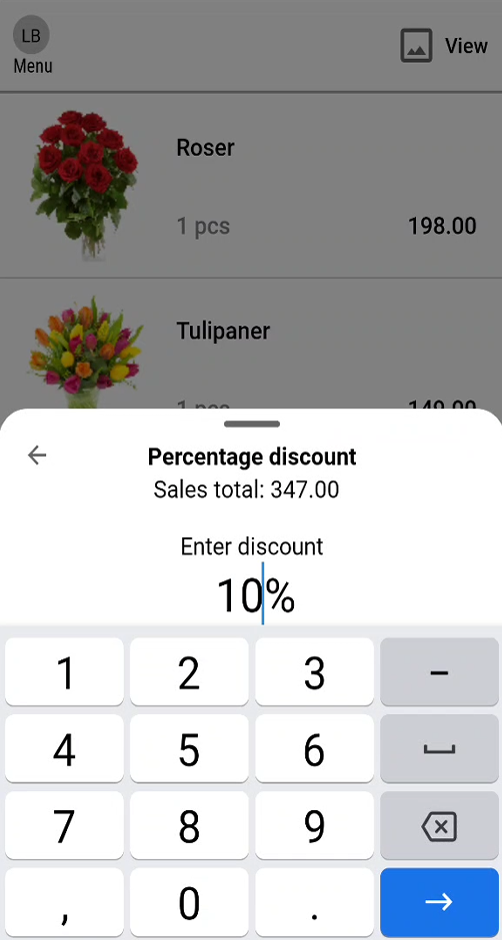
A discount is given on each item. The items are marked with an "S" icon – showing that a subtotal discount is added (the "S" icon in not shown if Compressed view is used).
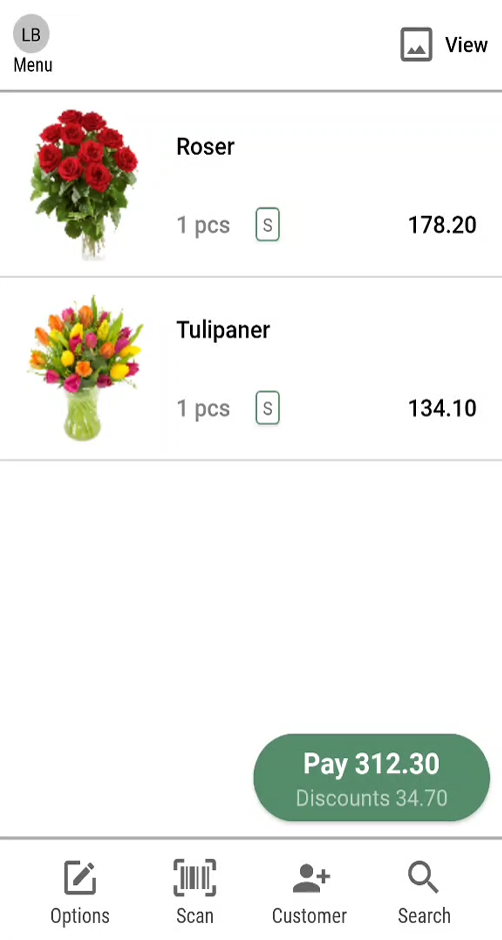
Price reduction
Tap on Price reduction.
The "Price reduction" dialog opens.
Enter the amount for the Price reduction.
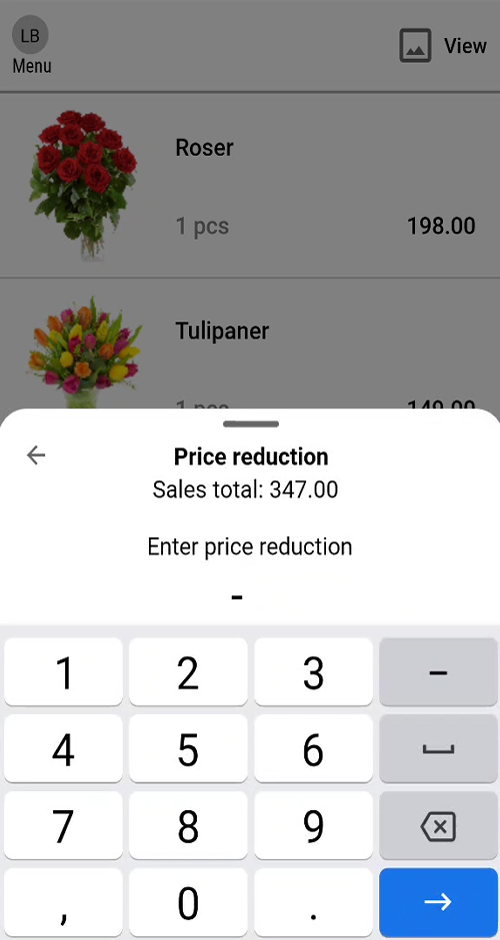
Tap Enter, the sales total is reduced with the given amount.
Sales Board
Access to the sales board is defined as separate user access right.
In the Options menu, you can see Sales board.
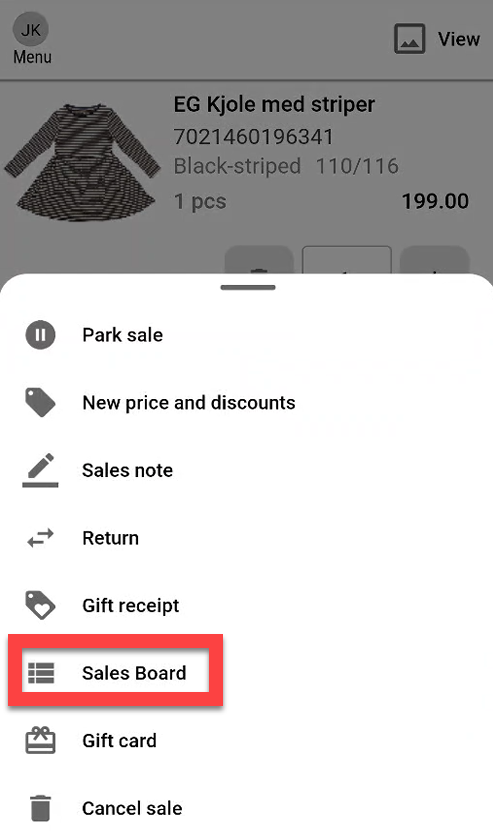
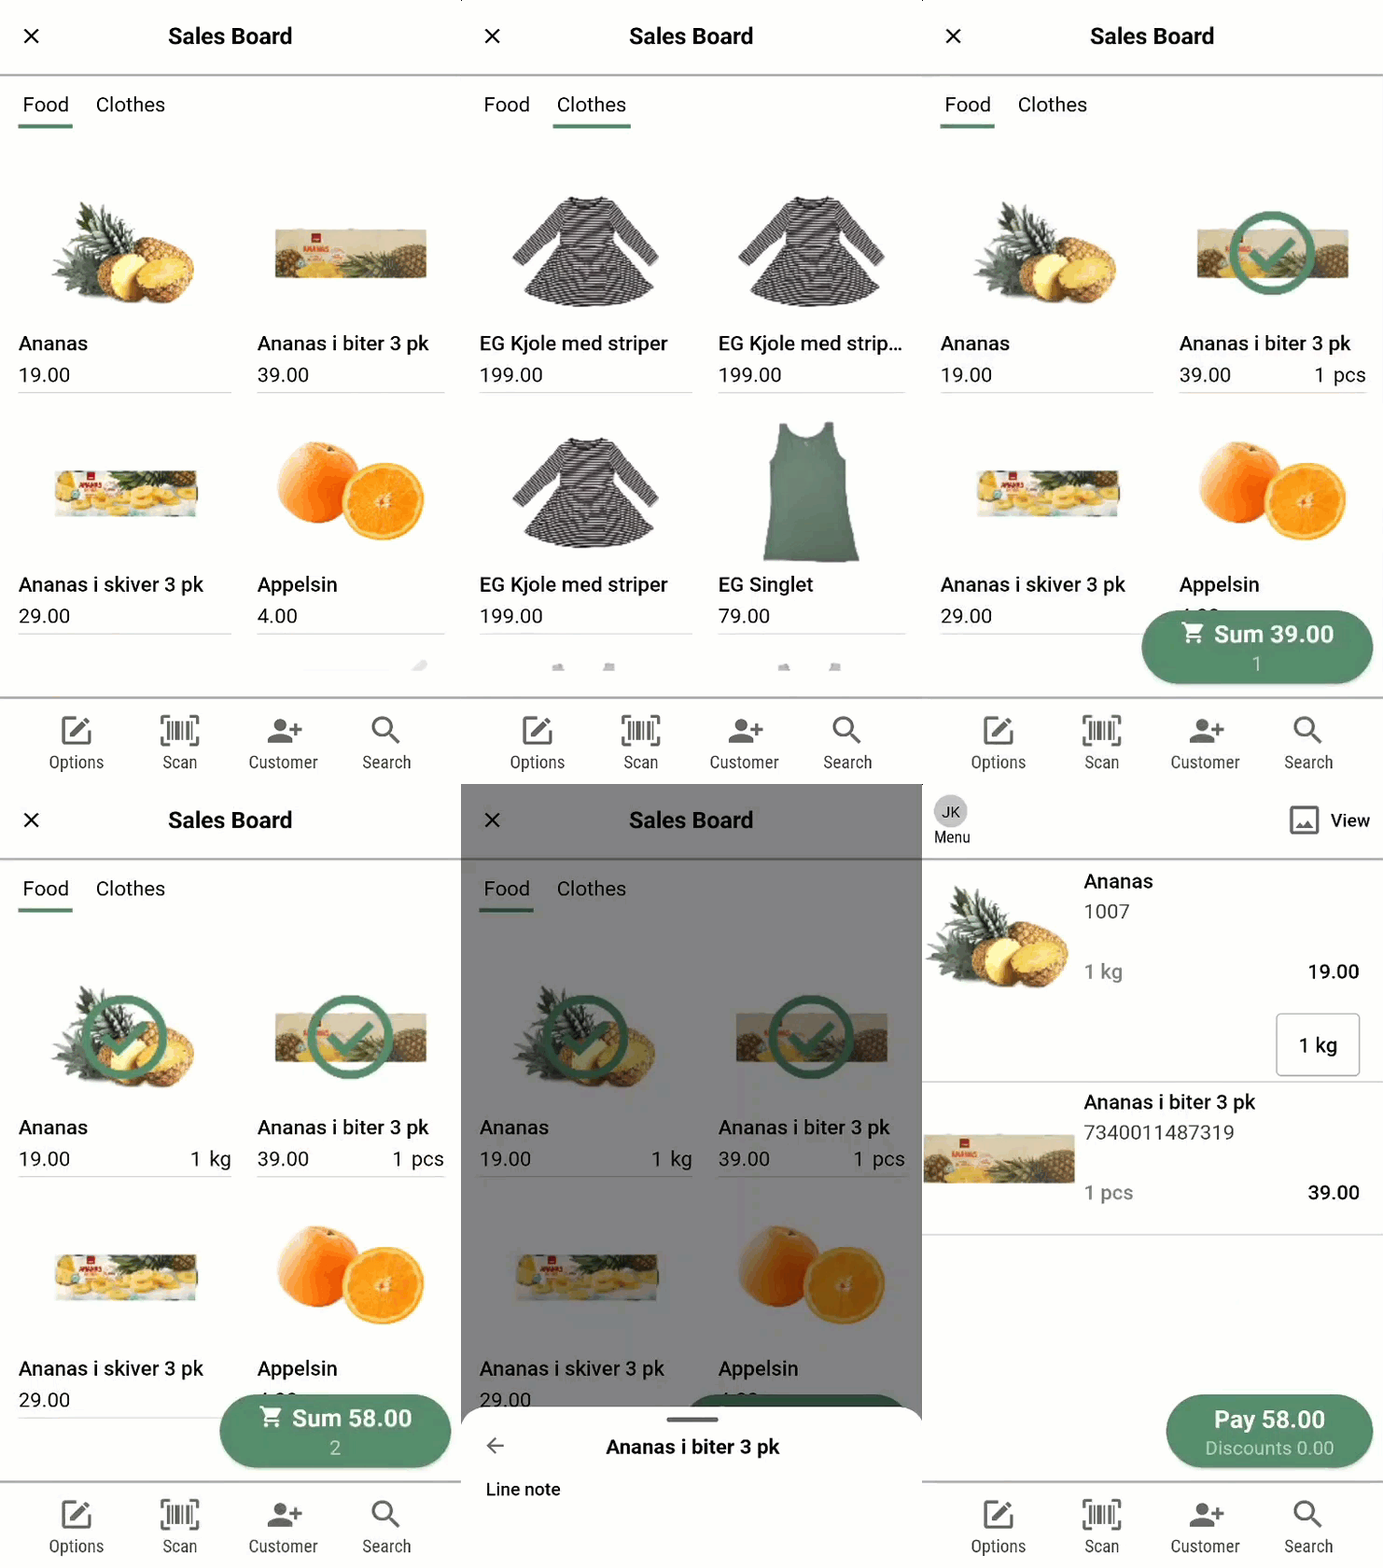
When tapping on Sales board a view opens, showing preconfigured items for the given store. This is typically used for items without a barcode. At the top you will find categories that can be used for simpler scrolling.
All items are displayed in 1 list and you can scroll to find a given item.
In the sales board you can perform the following actions:
Tap on an item to add the item to sale. You can tap many times on the same item to add many of the same item.
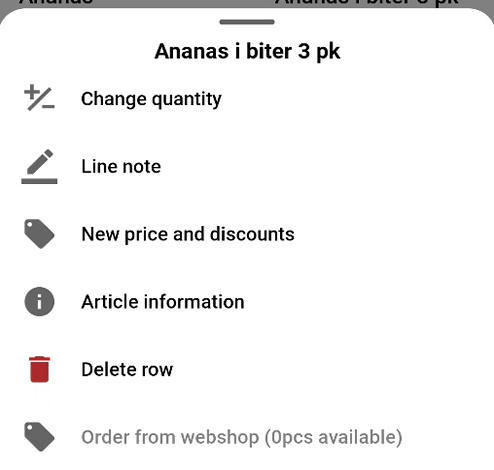
For items that are added to the sale already, you can hold your finger on the item for approx. 1 second to open a menu with actions.
The menu will allow you to:
Change quantity
Add Line note
Apply discount
View Article information
Delete row
Mobile POS Sales board
For member discounts, see Loyalty.
For information on parked receipts, gift receipts and sending out digital receipts, see Receipts.
