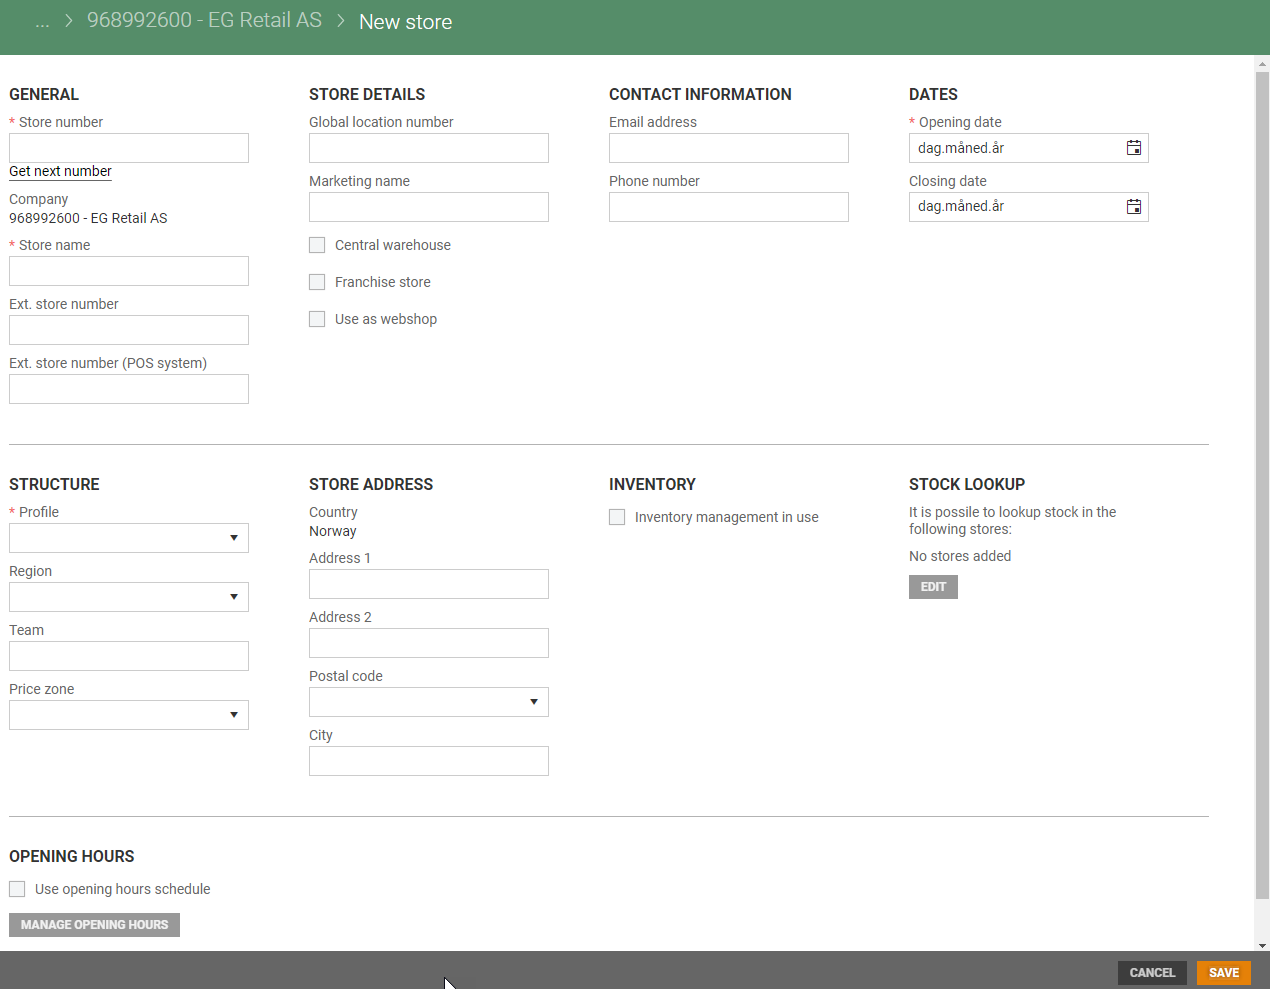
The Companies menu gives an overview of all Companies registered in the system. You can create new companies and maintain existing companies.

Create new company
You can add a new company by clicking on the New company button. The "New company" view opens.
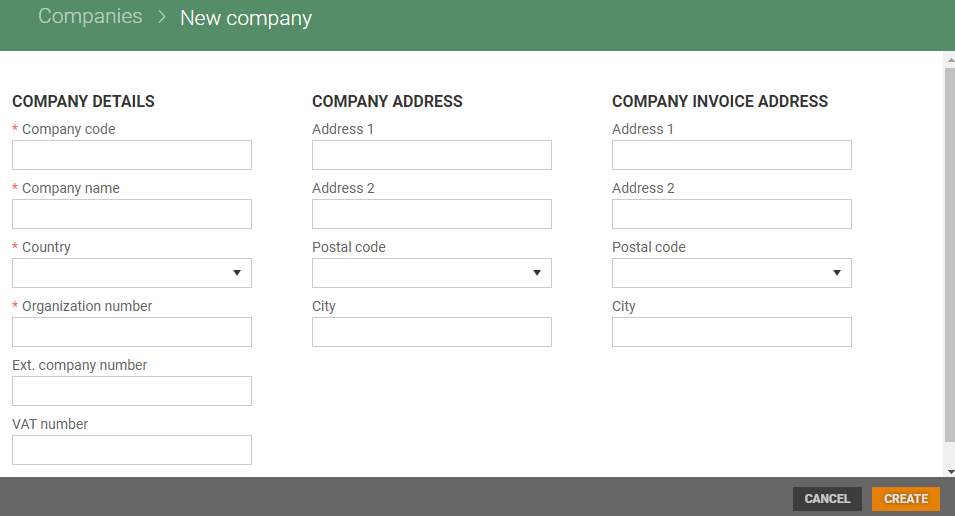
Some fields are required, they are marked with * before the field name. See Company details for information on the different fields. Click Create to create the new company.
Company details
You can view company details by clicking on the Company name in the Name column. Company details view opens.
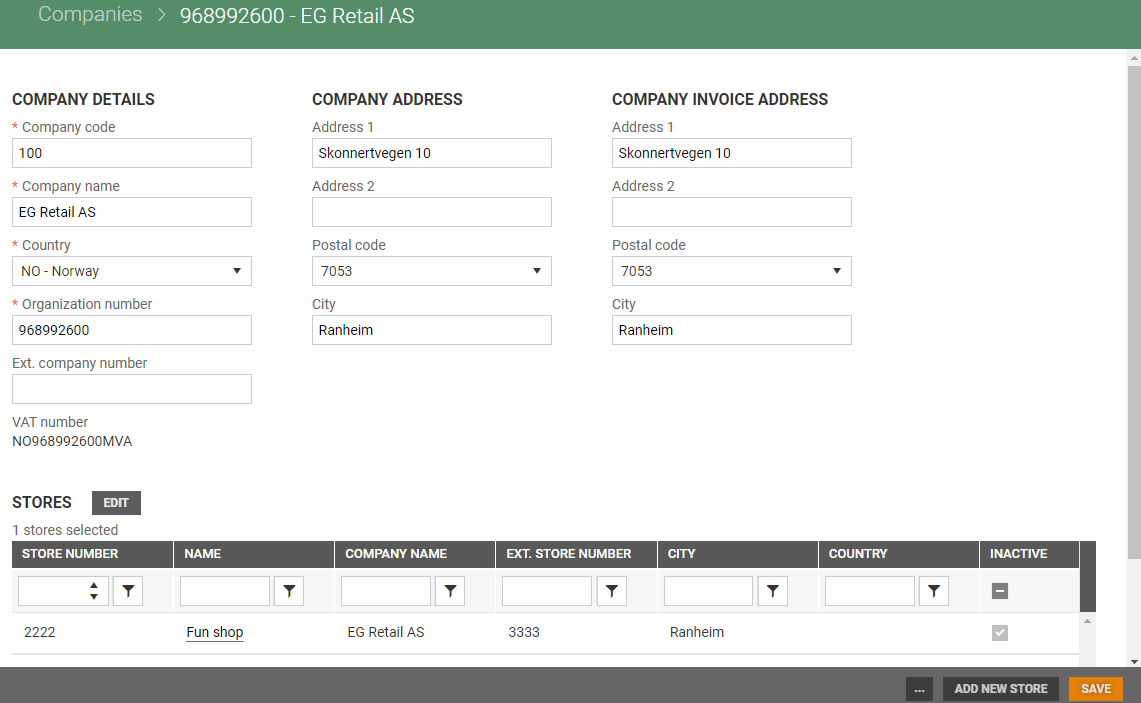
At the top of the view, you see company details. It contains three sections, Company details, Company adress and Company invoice address.
Company details
Company code: enter company code.
Company name: enter company name.
Country: select country.
Organization number: Enter organization number. Organization number is validated based on selected country. Organization number generate the content for the VAT number field if the country is Norway or Sweden.
Ext. company number: enter external company number.
VAT number: VAT number is filled in when you enter organization number if your country is Norway or Sweden. For other countries you can enter VAT number manually.
Company address
Address 1: enter company address 1.
Address 2: enter company address 2.
Postal code: select postal code.
City: city is automatically filled in when you select postal code.
Company invoice address
Address 1: enter company invoice address 1.
Address 2: enter company invoice address 2.
Postal code: select postal code.
City: city is automatically filled in when you select postal code.
You can edit values. When changes are made you must click on the Save button to save changes.
Below company details are a store section where you see the stores assigned to the Company. You can click on the store name if you want to open store details.
Edit stores in the company
You can add/remove stores in the company by clicking the Edit button in the "Stores section". The Stores view opens.
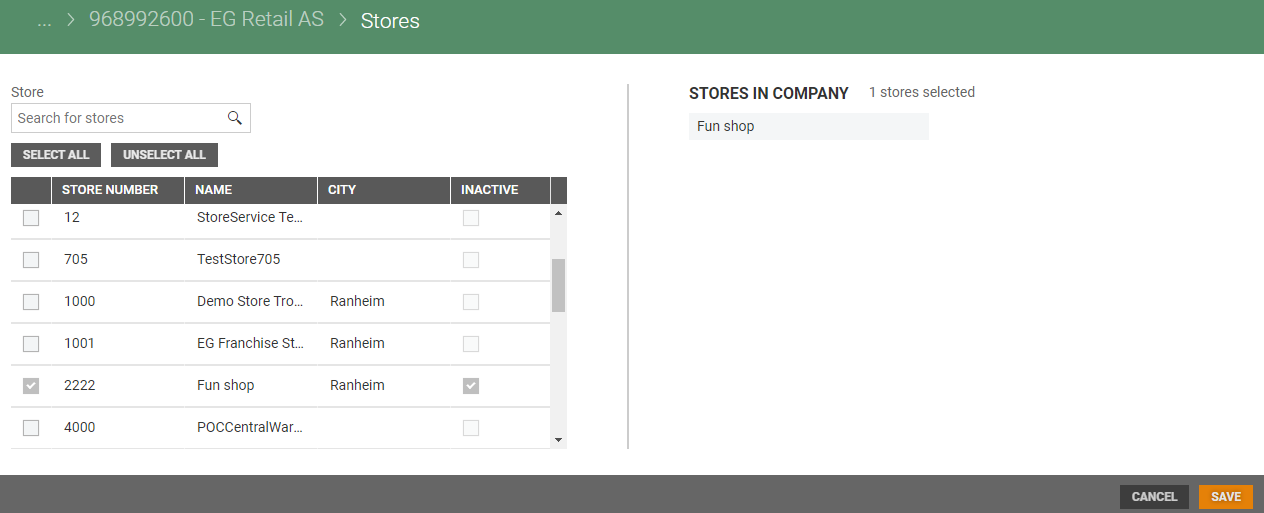
Stores view has two sections. On the left side you find a table with all the stores in the system. You can search for stores, or select stores one by one by ticking them, or use the Select all/Unselect all buttons.
On the right side of the view, you see a list of stores that are a part of the company.
Add new store to the company
You can create new stores from the company's detail's view. Click on the Add new store button, the "New store" view opens. When you create a new store from this view, the Company is pre-selected. See Create new store for more information.
Deactivate/activate companies
It is possible to deactivate companies. Click on the "more button" and select "Deactivate".

The text "Inactive company" is displayed at the top of the view.

If a company is inactive, you can activate the company by clicking on the "More-button" and select "Activate".
Export to Excel
You can export companies to Excel. You can export all companies by clicking on the Export to Excel button without filtering, or you can use filter to export only some companies. The export can be used as a template for Import of companies.
When you click on the Export to Excel button, you get information about that the Export has started.

When the file is ready you get a notification and the "Bell icon" gets a red mark. Click on the "Bell icon" to open notifications. 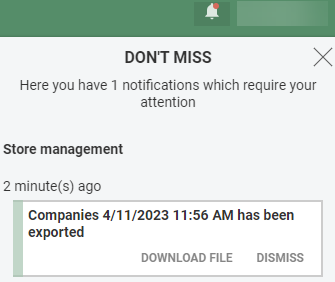
You can download the file by clicking on "Download file" in the notification. The file is downloaded.
You see the file at the bottom left corner when it is downloaded. 
You can click on the file to open it.
Import from Excel
Companies can be imported from an Excel file. Import can be used to create new and update existing companies. Companies can also be deactivated using file when all stores within company are inactive.
Existing values can be cleared by importing "NULL" in cell.
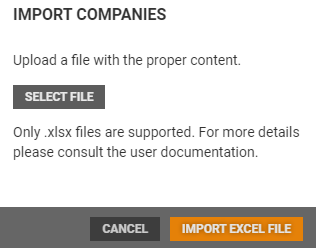
Click on the Import button, the "Import companies" dialog opens.
Click on the Select file button to select a file to upload. This file must be in .xlsx format. Required columns are "Company code", "Company name", "Country", "Organization no."
Select a file and click on Open to upload the file.
Click on Import Excel file to import the companies.
The Excel file is validated. You get a notification when the import is completed.
Exported file with companies should be used as import file template!
You can modify the Excel file, for example change values and delete columns that should not be updated.
It is important that the hidden row (row number 2) is hidden when you run the import.
