Offer can be created by copying an existing offer or adding a new offer.
Copy existing offer
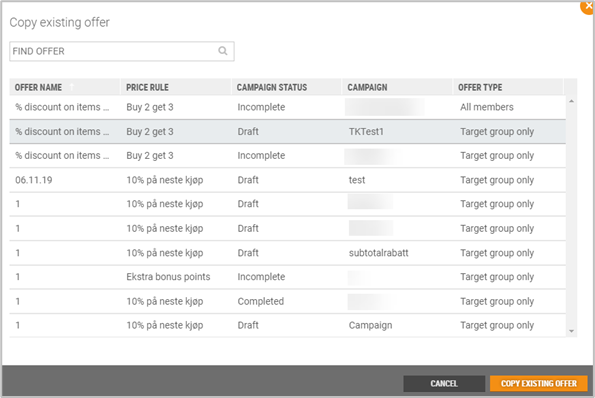
Click on the Copy existing offer button. The "Copy existing offer" dialog opens.
Search for the offer or select offer from the list. Click on the relevant offer and click on the Copy existing offer button. The offer is added to the campaign. It is possible to edit the offer.
Add new offer
New offers are created by clicking the Add new offer button.

This will open the “Campaign offers” view.
Create new offer
The new offer view is divided into two: “Offer details” and “Offer type”.
Offer details
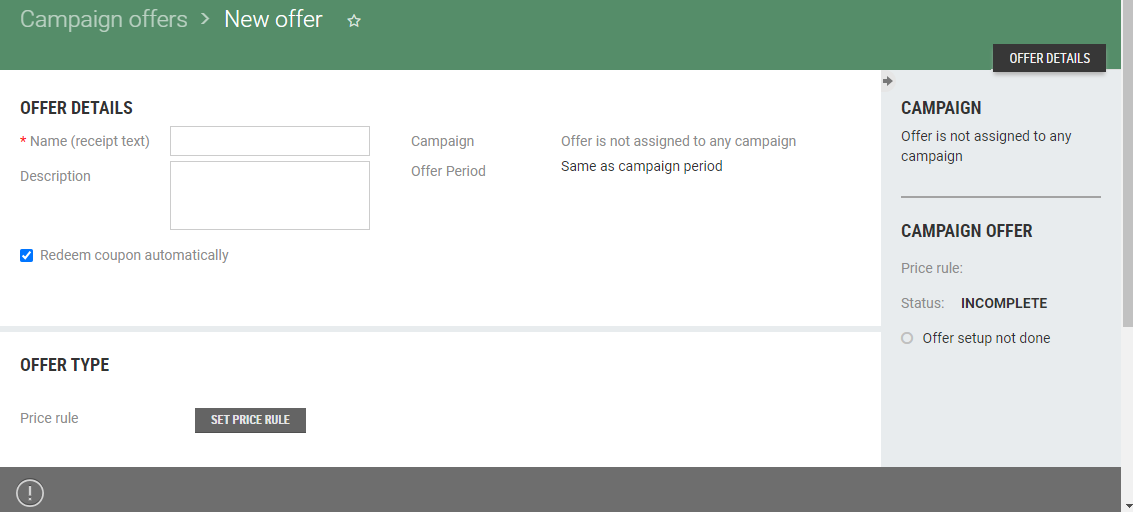
In the offer details section you register general information about the offer.
Offer details fields
Name (receipt text) - Register a name for the offer; the name will be used as the receipt text.
Description - Write a description of the offer, if applicable.
Redeem coupon automatically - Determines whether coupon must be redeemed automatically. This is ticked by default. Then the coupon will be automatically redeemed once the member is identified.
If it is not ticked, the customer can choose whether to use the coupon.
Campaign - Display the name of the campaign. You can click the campaign name to go to the campaign details view.
Offer period - The offer period can be aligned with the campaign period, but it can also be set up to be outside it. There are three choices:
Same as campaign period
Define time period
X days since the member received the coupon (this one is most relevant for stamp cards and event-driven campaigns)
Save - Click Save to save the offer details.
Offer type
Select the offer type by selecting a price rule. The price rule will determine which type of offer that must be created.
The registration details will vary depending on the price rule and on how each price rule is configured. The tabs available and the details that need to be registered will depend on the price rule.
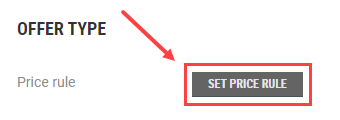
Click on the Set price rule button.
The “Select price rule” dialog opens, showing an overview of available price rules (price rules are configured in the Price rules menu).
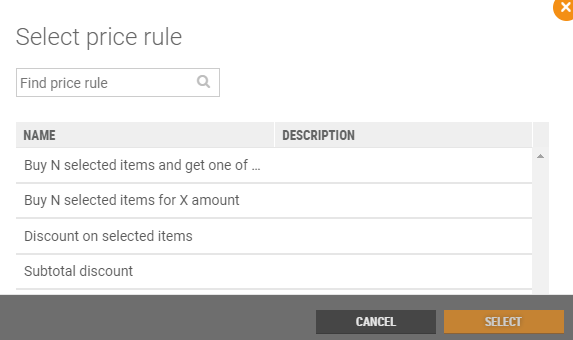
Select a price rule by applying or selecting a price rule from the list, or search for the price rule.
Click the Select button to select the price rule.
The view will be updated with the details for the selected price rule. It is possible to change the values in active fields. Which fields are active is determined by the configuration.
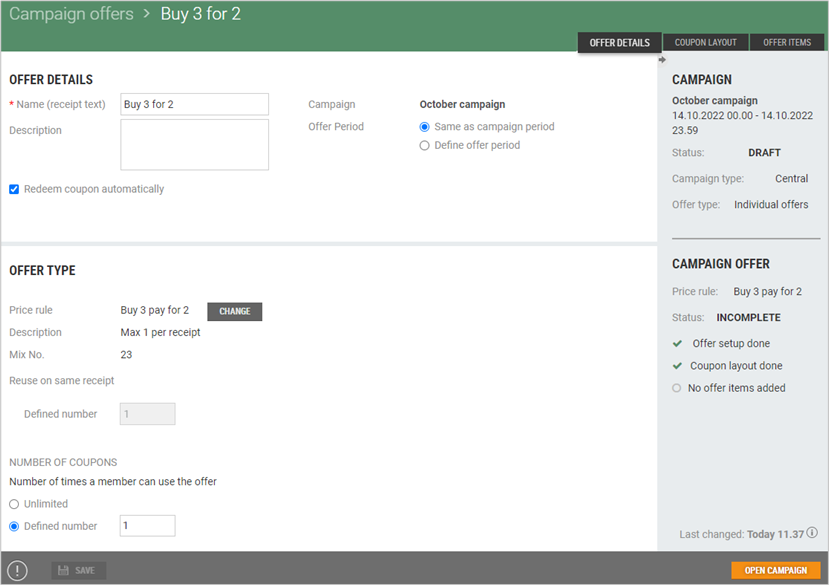
Which tabs to set up are determined by the selected price rule. See a description of the various tabs: Coupon layout, Offer items, Condition items and Discount items .
When offer details and offer type is setup you must click on the Save button to save the Offer setup.
Coupon layout
The appearance of the coupon printout is configured on the Coupon Layout tab. Coupon layout is used for “Individual Offers”.
When defining offers with coupons, you can choose from six types of layouts:
With image and without text
With image and a short text.
With image and a long text
With image and both a short and long text
Without image, with a title and no text
Without image, with title and text
It is advisable to use coupons with images. Coupons without images are useful for testing and when coupons are distributed via a third party and used automatically at checkout.
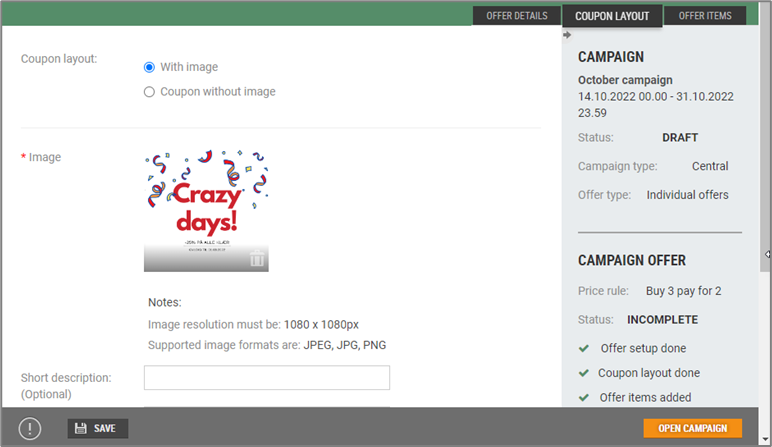
The example shows the available selections when a coupon with an image is selected
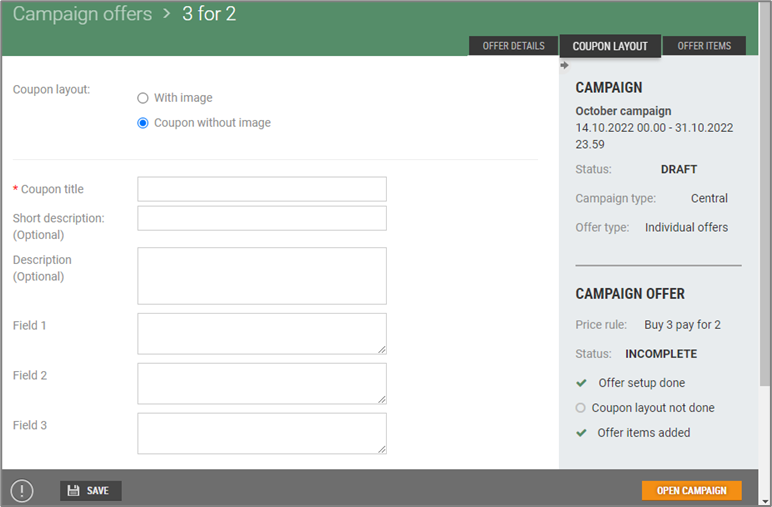
The example shows the available selections when a coupon without an image is selected
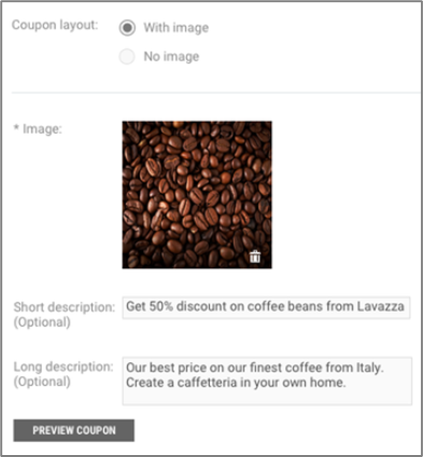
Sample configuration
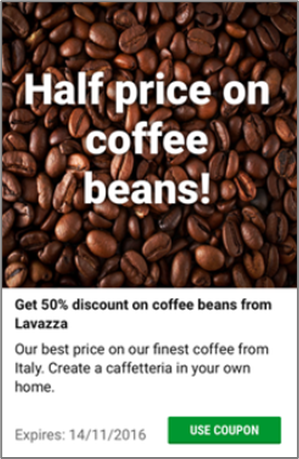
Sample coupon
How to save images for coupons
To customize images to be used for coupons, use an image processing tool such as Microsoft Paint. Make sure to use an image that is big enough to start with(minimum 1080 x 1080 pixels). If the image is smaller than this, it can blur when enlarged.
Open an image.
If the image is not square to start with, shrink it to make it square.
Customize the size to 1080 x1080 pixels.
Add a text to the image, if relevant.
Save the image(supported image formats are JPG/JPEG and PNG)
Offer items
In the Offer items tab you select items/item groups that must be included in the campaign offer. Offer items are item(s)that will be given a discount.
Items are added by searching in the “Add offer item” section at the top of the screen.
Choose Selection. You can choose between: Item, Item group, Item list or Item grouplist.
Enter your search text in the search box. You base your search on both text and EAN. This will produce a list of search results. Select the desired option and press Add. This will add the item to the table for special offers.
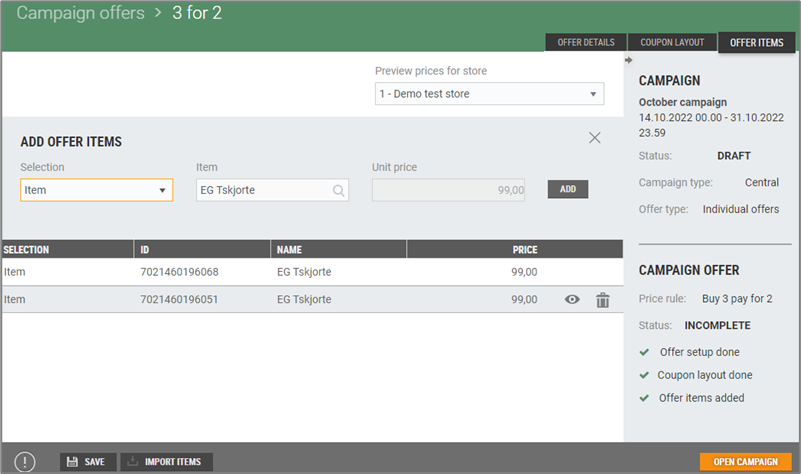
Import items
A function for importing items is found on the tabs used to configure the items included in the offer. This makes it possible to import a .csv file with the items. Select the “Import Items” function and a view to select a file will open. Select .csv file and press the Open button. This will import the items on the list and add them to the offer.
The items are imported as a .csv file with a column with an EAN number.
View price information
Clicking on the “eye” icon for one of the item lines will open the “Price information” dialog, showing price information for the item.
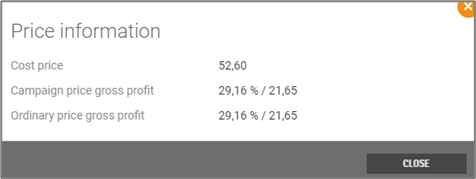
Delete an item line
To delete an item line, click the “bin” icon. This will delete the item line from the table.

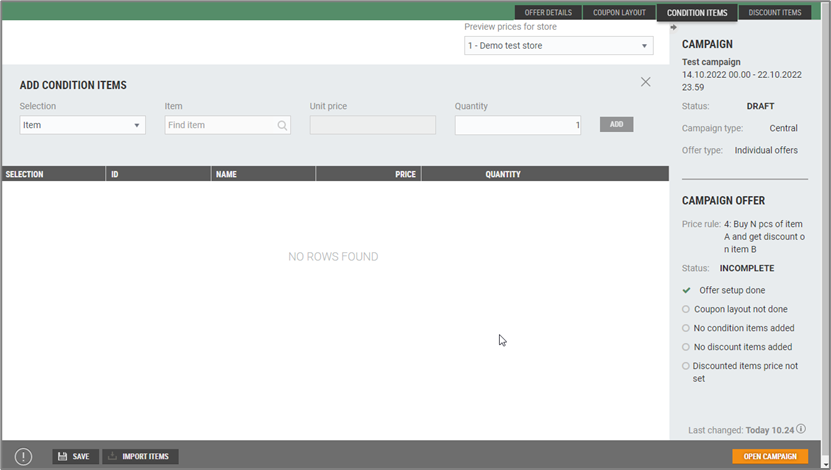
Condition items
In the Condition items tab, select an item, item group, item group list, or item list that must be condition items. A condition item is an item that must be purchased to get a discount, but which does not have a price reduction itself.
If you have access to multiple stores, you can choose for which store the price is to be previewed.
Items are added by searching in the “Add condition item” section at the top of the screen.
Choose Selection. You can choose between: Item, Item group, Item list or Item grouplist.
Enter your search text in the search box. This will produce a list of search results. Select the relevant option and press Add. This will add the item to the table for condition items.
Discount items
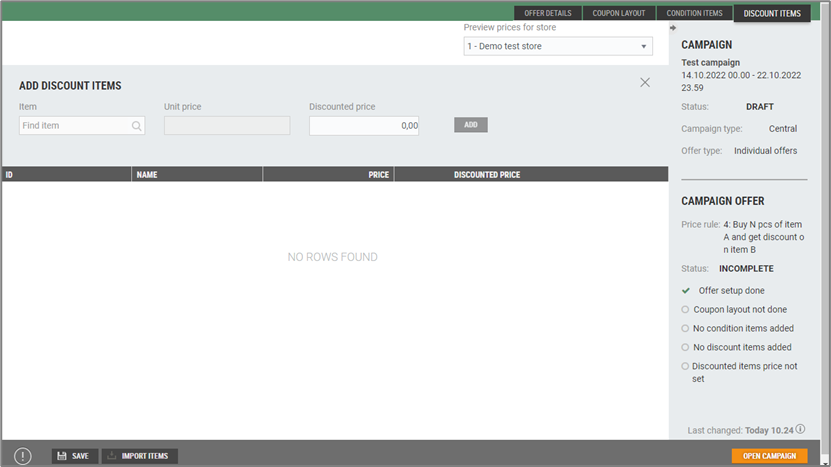
In the Discount Items tab, add a discount item.
If you have access to multiple stores, you can choose for which store the price is to be previewed.
A discount item is the item that will be given a discount. We differentiate between condition items and discount items as only one of these receives a discount, whereas the other must be purchased to trigger the discount for the discount item.
Add an item by entering a search text in the search box. This will produce a list of search results. Select the desired item and press Add. This will add the item to the table for discount items.
Incomplete offers
If an offer has insufficient details, e.g., items are not registered, the status of the offer will be “Incomplete”. A campaign containing incomplete offers cannot be activated. You need to add the missing details or delete the incomplete offer to activate the campaign.
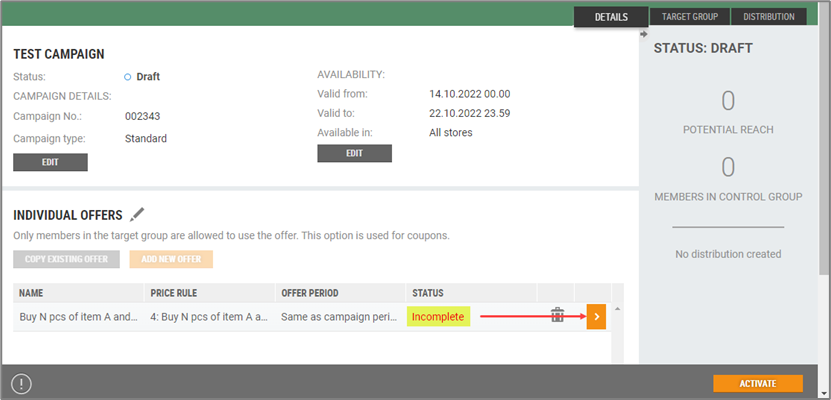
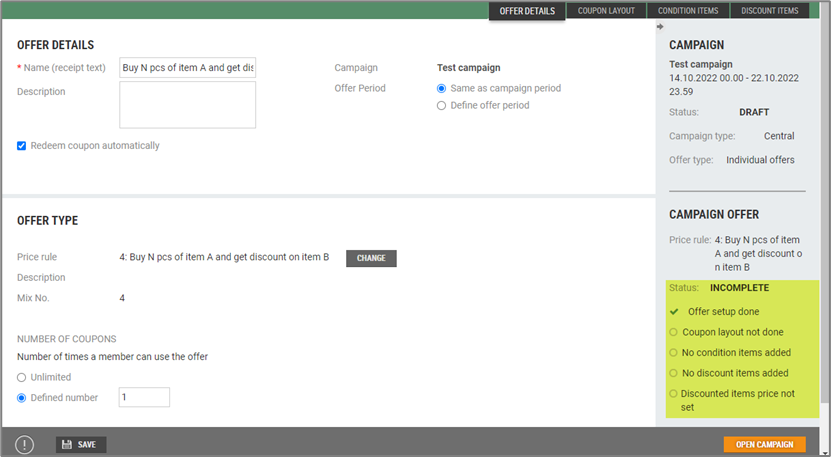
Highlight the incomplete offer and click the orange arrow to open the offer. This will open the Campaign offers view. An information panel is found on the right side of the view. Under “Campaign Offers”, you will find information about the status and the details of what is missing (what is not ticked). Register the missing details and Save.
