Temporary storage moves items between your sellable stock and a storage unit set aside for a specific purpose (seasonal items, repairs, returns, display items, and so on).
The flow has two sub-actions:
Put away - move items into a storage unit (either an existing one or a new one you create on the fly).
Unpack - move items out of a storage unit, either back into sellable stock or written off as breakage.
You reach the Temporary storage flow from the Create tab → Inventory → Temporary storage. Temporary storage pages share the general transaction layout, header, more menu, put-on-hold, discard, finish, and done described on Transaction basics.
This page covers only what is specific to temporary storage.
The start page
The start page asks which sub-action you want to run.
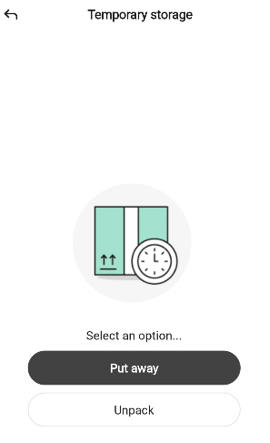
The page shows an illustration of a box next to a stopwatch, the message “Select an option…”, and two buttons:
Put away - start a put-away. Tap to open the Put away options sheet.
Unpack - start an unpack. Tap to open the Unpack flow (see Unpack below).
To leave the start page, tap the back arrow in the top-left.
Put away
Tapping Put away opens an options sheet with two choices.
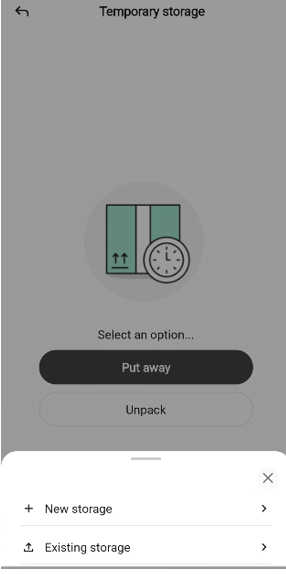
+ New storage - create a fresh storage unit. You pick its category and an optional description, then start adding items.
⬇ Existing storage - pick a storage unit that already exists and add items to it.
Tap the X to close the sheet without choosing.
Creating a new storage
Choosing + New storage opens the “New storage” dialog on top of the put-away page.
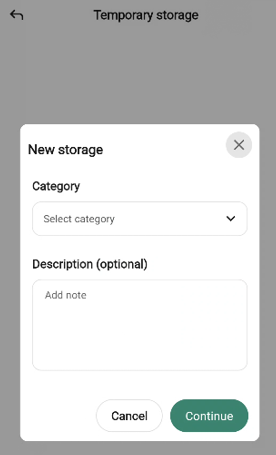
Tap the Category drop-down to pick a category - Seasonal storage, Repairs, Internal repairs, Returns, or Display items.
Optionally type a note in the “Description (Optional)” field.
Tap Continue to open the empty put-away page. Continue stays disabled until a category is picked. Tap Cancel to go back to the options sheet.
The storage unit itself is not created in back-office until you submit the transaction - if you discard the transaction the new storage never appears elsewhere.
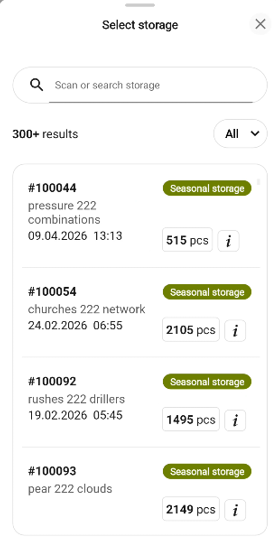
Picking an existing storage
Choosing ⬇ Existing storage opens the Select storage bottom sheet.

Scan a storage barcode or type in Scan or search storage to narrow the list. The result count appears below (for example, 8 results).
Each row shows the storage ID, a category badge in a distinct color (Seasonal storage, Repairs, Internal repairs, Returns, or Display items), the description, the last modified timestamp, and the number of items in the storage.
Tap the All drop-down at the top-right to filter by category.
Tap the info (i) icon on a row to open a read-only Storage detail sheet.
Tap a row to open the Put-away page for that storage.
Tap the X to close the sheet. You return to the start page.
The Put away page
The put-away page uses the standard transaction layout with one twist: when you are adding to an existing storage, the header includes the storage ID (for example, “Put away (100054)”). For a new storage, the header simply reads Put away until the storage is created on submit.

A Total row below the progress bar shows the item count and total value once items are added. The empty state shows a + icon and “Scan or use search to start adding items”.
Items are added by scan or search and follow the shared quantity-row pattern. The bottom bar has a Scan icon, a Search icon, and a Next button - Next is disabled until at least one item is on the transaction.
The cart layout is the same for new and existing storages; only the header differs.
The more menu
The “More (… )” button in the header opens the Put away options sheet.
The menu has the common Add quick action, Hide total, Put on hold, and Discard transaction options plus one extra - but only when working with existing storage:
View storage details - opens the same read-only storage detail sheet used in the Select storage search.
On a new storage (not yet submitted) there is no storage to inspect, so View storage details is not listed.
Viewing a storage’s content
The storage detail sheet - opened from the info icon in search or from View storage details in the “More (…)” menu - is a read-only view of a storage unit.
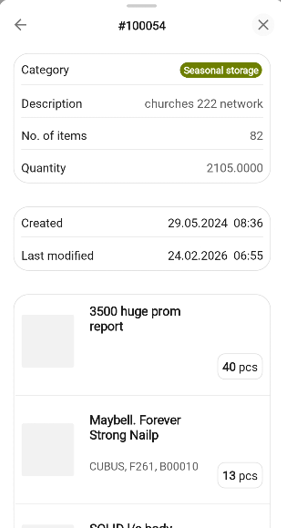
The sheet shows the storage’s Category, Description, No. of items, Quantity, Created and Last modified timestamps, and a list of every item currently in the storage with its quantity. Tap the back arrow to return to where you opened the sheet, or the X to close it.
The finish page - existing storage
On the finish page for an existing storage, the summary is read-only - the storage’s properties cannot be edited during a put-away.
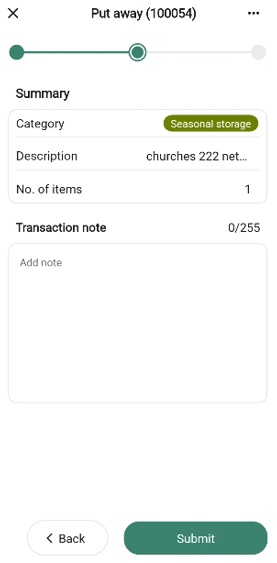
The summary has:
Category - the storage’s category.
Description - the storage’s description.
No. of items - number of distinct items being added.
The free-text field is labelled Transaction note with the placeholder “Add note”.
Tap Submit to move the items into the storage, or Back to return to the put-away page.
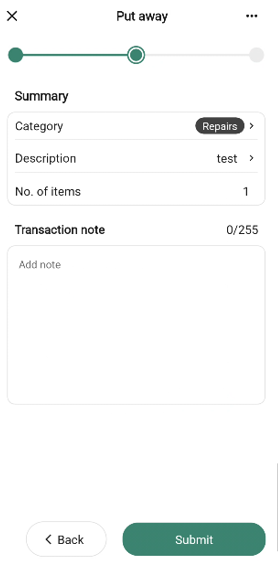
The Finish page - new storage
For new storage the Category and Description rows have a chevron - tap either row to open the Edit storage modal.
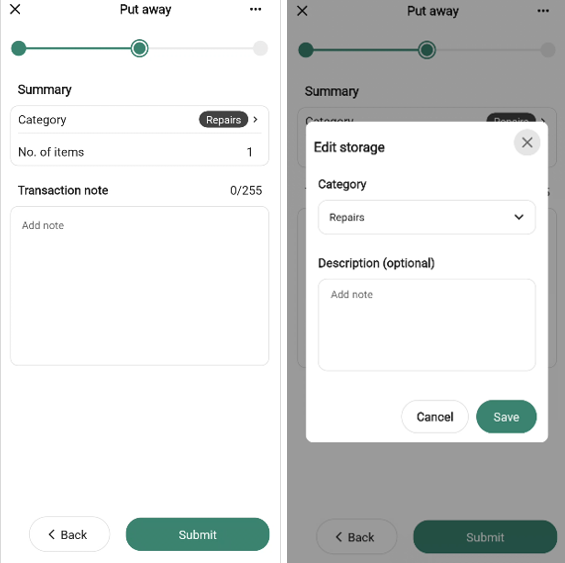
The Edit storage modal has the same layout as the New storage dialog with a different title and button text - change the category or description and tap Save or tap Cancel to discard your edits.
Everything else on this Finish page matches the existing storage variant.
The Done page
After you submit, the Done page confirms the put away. The header for an existing storage continues to show its ID; for a new storage the app assigns an ID and may show it here. The message reads “Stock levels will update soon”.

How the submission is processed
When you tap Submit on a put-away, the app calls the Inventory Service directly to move the items into the storage. If you created a new storage, the service assigns it an ID and saves it as part of the same call. The done page appears once the service confirms the update, so storage contents are effective immediately.
Unpack
Choosing Unpack on the start page moves items out of a storage unit. Each item can be returned to sellable stock or written off as breakage - the choice is made per item (or in bulk via Unpack all). Unpack always targets an existing storage, so the flow opens directly on the Select storage bottom sheet - the same sheet described in Picking an existing storage above.
Scan, search, or filter by category, then tap a row to open the unpack page for that storage. The info (i) icon opens the same read-only storage detail sheet. Tap the X to close the sheet and return to the start page.
The Unpack page
The header includes the storage ID (for example, Unpack (100134)). A Total row below the progress bar shows the count of items currently marked for unpack and their total value.
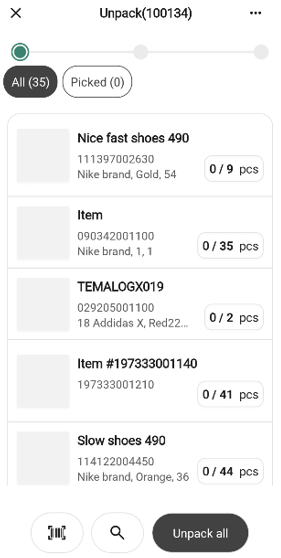
Below the total, two tabs split the view:
All (n) - every item currently in the storage, whether it has been picked for unpack yet. Rows show the item image, name, article number, storage location, and the remaining pcs in the storage.
Picked (n) - only items you have already marked for unpack. Each row shows the picked quantity over the available quantity (for example, 1 / 4). When every item in the storage is fully picked, each row shows 4 / 4 and the All tab count matches the Picked tab count.
The bottom bar has a Scan icon, a Search icon, and an Unpack all button. Once at least one item has been picked, the Unpack all button is replaced with a Next button that takes you to the finish page.
Unpacking a single item
Scanning an item barcode, tapping an item row, or selecting an item from the Search items sheet opens the single-item bottom sheet. The sheet title is the item’s name.
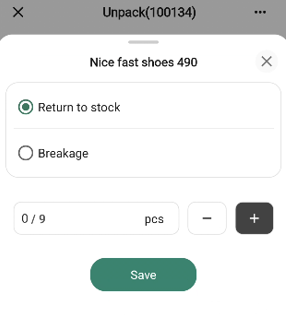
Choose how to unpack:
Return to stock - the item is moved back into sellable stock.
Breakage - the item is written off. Selecting this reveals a Reason code and Action code drop-down. Both must be picked before Save becomes enabled.
Enter a quantity in the stepper. The field shows the picked quantity over the available quantity (for example, 1 / 4). Use +/− or the numeric keypad. Tap Save to add the item to the Picked tab. Tap the X to close the sheet without saving.
After the sheet closes you stay on the tab you opened the sheet from.
Searching items in the storage
Tapping the Search icon in the bottom bar opens the Search items sheet, which searches only within the current storage.
Type to filter the list - the result count updates as you type. The sort drop-down (A→Z) on the right controls the row order. An empty result set shows a box illustration with “No results” and “Try to adjust your search”.
Tapping an item opens the single-item bottom sheet described above. After you save or close the sheet you return to the tab you started on.
Unpack all
The Unpack all button applies a single decision to every item still in the storage.
Return to stock - picks every item at full quantity and returns everything to sellable stock.
Breakage - picks every item at full quantity as breakage. A Reason code and Action code drop-down appear; both are required before Confirm is enabled.
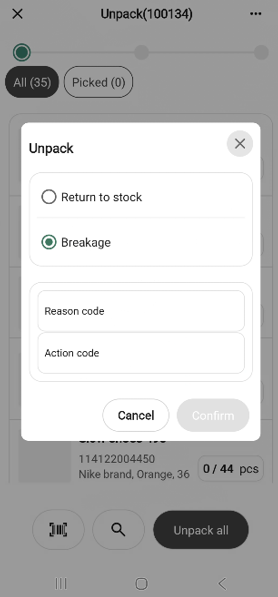
Tap Confirm to apply. Every item moves into the Picked tab at its full quantity. Tap Cancel or the X to close without applying.
The more menu
The ”More (…)” button in the header opens the unpack options sheet.
The menu has the common Add quick action, Hide total, Put on hold, and Discard transaction options plus View storage details, which opens the same read-only storage detail sheet used elsewhere.
The Finish page - Unpack
The Finish page summarizes what will be unpacked.
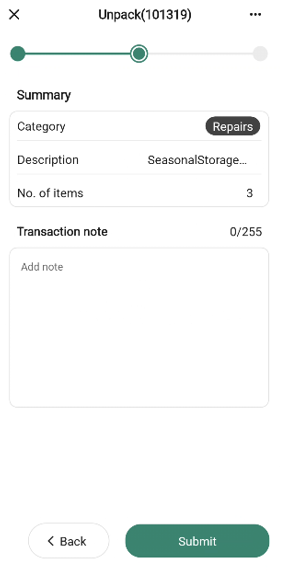
The summary has:
Category - the storage’s category.
Description - the storage’s description.
No. of items - the number of distinct items being unpacked (picked) - not the number of items remaining in the storage.
The free-text field is labelled Transaction note with the placeholder “Add note”.
Tap Submit to unpack the picked items, or Back to return to the unpack page. An unpack can be full (every item picked at full quantity) or partial - items you did not pick, or remaining quantities of partially picked items, stay in storage.
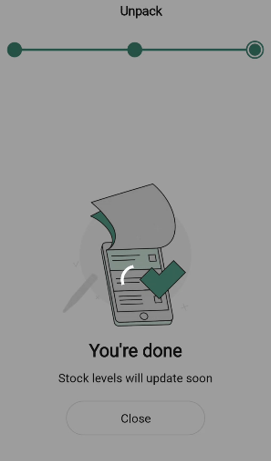
The done page - Unpack
After you submit, the done page confirms the unpack with the message “Stock levels will update soon”. The unpack done page does not display the storage ID (unlike the put-away done page).
How the submission is processed
When you tap Submit on an unpack, the app calls the Inventory Service directly to remove the picked items from the storage and return them to sellable stock. The done page appears once the service confirms the update.
If any items were picked as Breakage, the Breakage is also queued for delivery to the Inventory Service in the background - the same way a standalone breakage transaction is submitted.