You can create new items both in Item view and in Variant view.
For more information on the different views and how to switch view, see Display.
Create new item
You can create new items from the Items register. Click on the New item button.
.png "image(17).png")
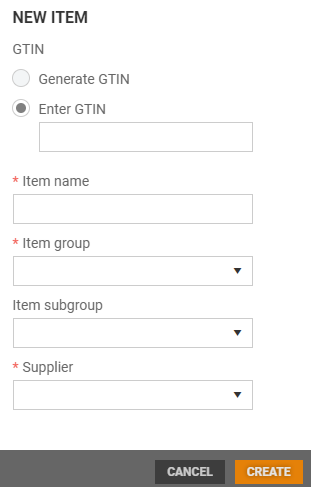
The "New item" dialog opens.
Select whether you want to generate a GTIN automatically or enter it manually.
Select an "Item group” and, where it is applicable, an “Item subgroup”.
Select a Supplier.
The item detail view opens.
Enter details in the fields that apply to the item. Some fields may already contain a default value, which is entered automatically. You can edit these values. You can also edit the item details later.
Click on Save to save your changes.
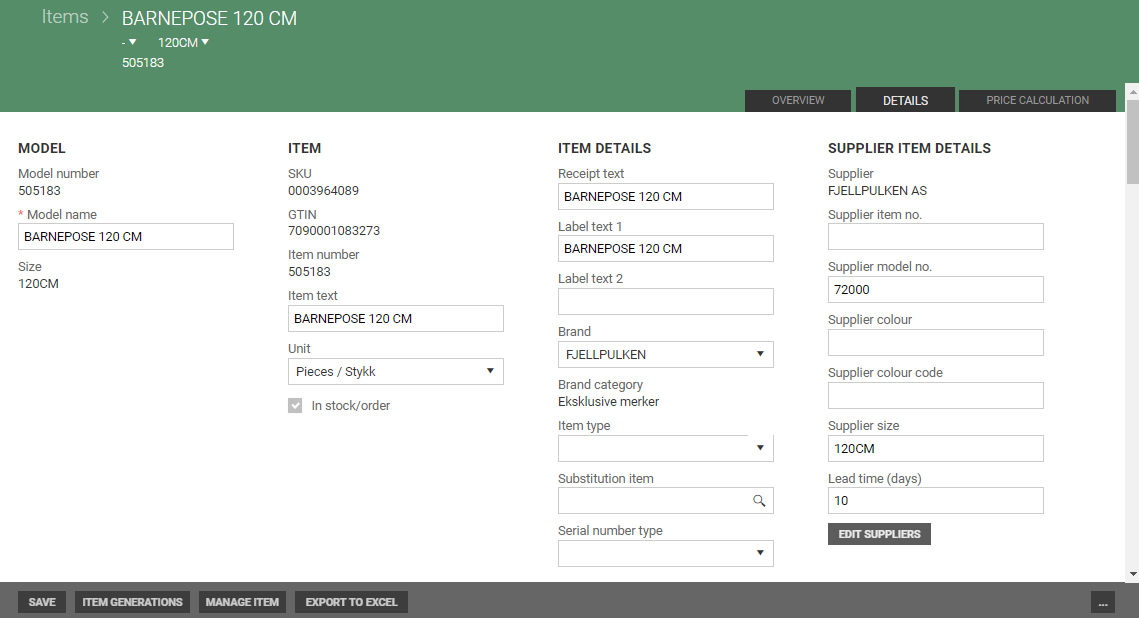
For more information on item details, see Item details.
Create new item when variants are in use
You can create new items from the Items register. Items can be created as:
Model items with both colors and sizes.
Model items with colors but without sizes.
Model items with sizes but without colors.
Items that are not model items, i.e., without colors or sizes.
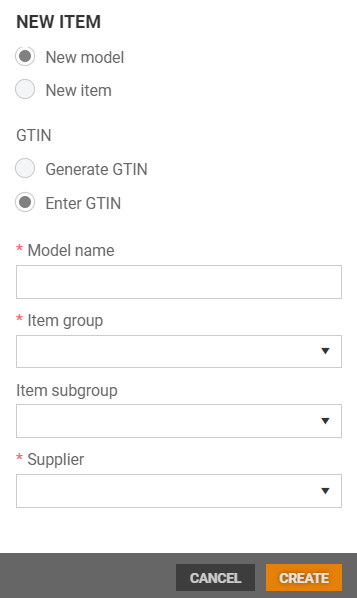
To create a new item/model, click on the button marked New item. The “New item” dialog opens.
Select whether you want to generate a GTIN automatically when the item is created or to enter the GTIN manually.
The fields displayed depend on your selections.
Mandatory fields are marked with *.
The subsequent registration process for the item varies, depending on whether it is an item or a model item.
If you want to create new item (without both colors and sizes), choose New item and see Create new item over for details.
New model
The screen used to create a model consists of a wizard containing three steps: Colors, Sizes, and Items.

Model items with both color and sizes
Step 1 - Colors
Define the colors for the model here. To create the colors, enter the “Primary color”, “Secondary color” and “Display color”. You can also enter the supplier’s color code.
The only mandatory field is the “Display color” field!
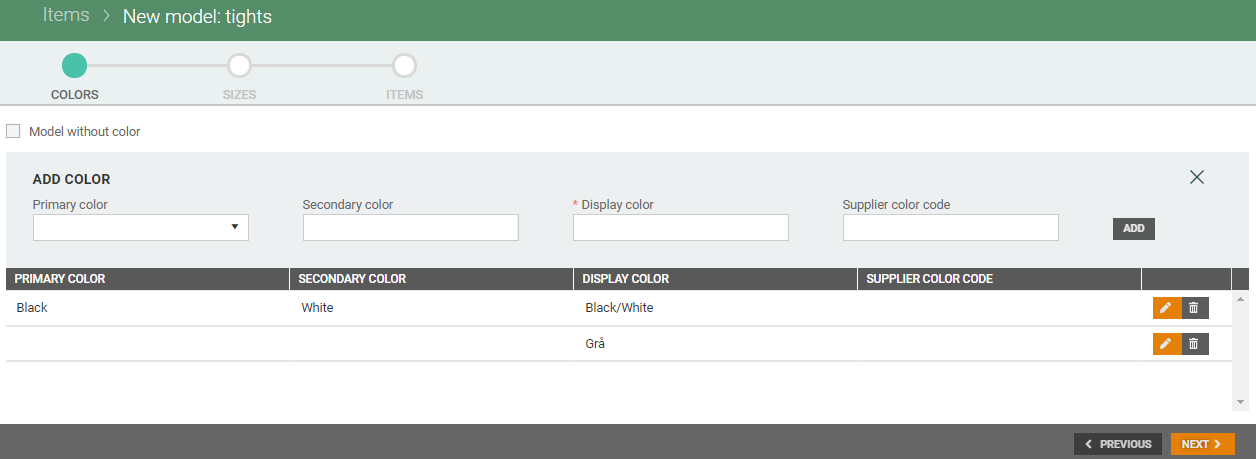
Primary color – Select a color from the drop-down list or start typing the name of the color and suggestions will be displayed automatically.
Secondary color – You can add further colors as secondary colors. To remove colors entered in this field, click on the cross after the color name.
Display color – This field is mandatory. Enter the Display color here. If you enter a primary color and/or a secondary color, the value in the display color field is populated as you select the primary/secondary color. You can overwrite the display color and enter a different value.
Supplier color code – Where applicable, you can enter the supplier’s color code here.
If you choose a color name that contains spaces, a message is displayed stating that spaces are not permitted before or after the text. To create a new model item, you must remove the spaces from the color text in the “Display color” field.
Examples
Unchanged display color (the display color consists of the selections made for the primary and secondary colors):

Only display color specified:

Click on Add to add the color.
Once added, colors can be edited or deleted from the table. Click on the “pencil” icon to edit the color or on the “bin” icon to delete the color.
Click on Next > to continue to the next step: Sizes.
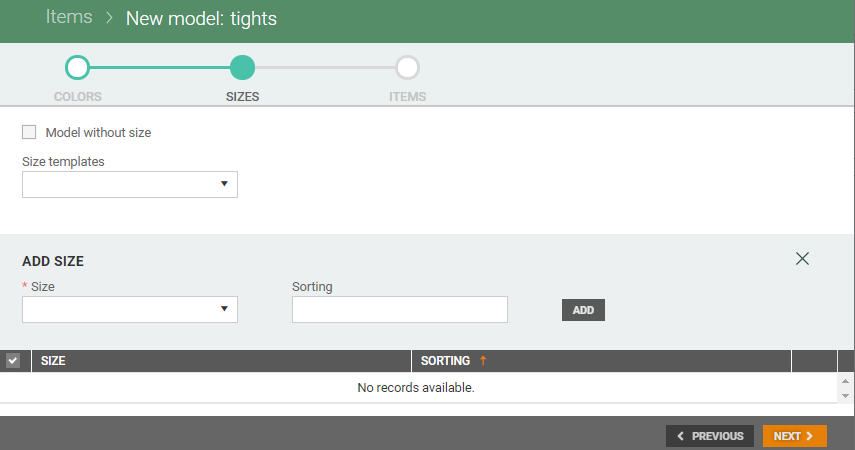
Step 2 - Sizes
Define the sizes for the model here.
Size templates
Select one of the “Size templates”. The sizes from the size template are entered in the table. You can untick those sizes that you do not want to include in the model.
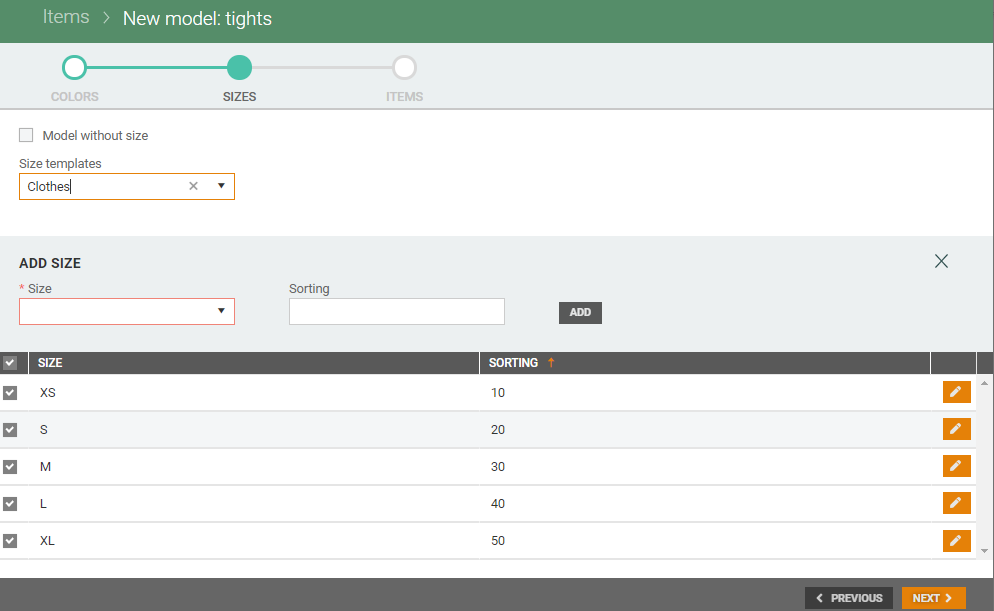
Add sizes
You can also add sizes (in addition to those defined in the size template). To do this, you can either start typing the size or select a size from the drop-down list.
Click on Add to add the size. The size will be added to the table.
Click on Next > to continue to the next step: Items.
Step 3 - Items
Here you will see a list of the colors and sizes that have been added to the model. You can untick variants that you do not want to be created.
The screenshot below shows what step 3 looks like when the GTIN is set to be generated automatically when the model is created.
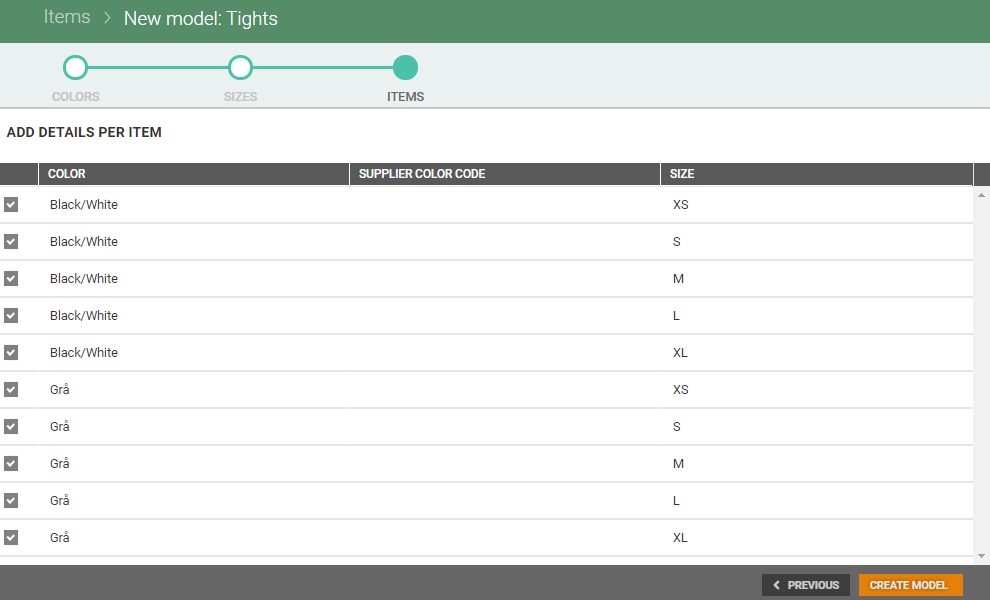
If you select “Enter GTIN”, there will be an additional column where you can enter the GTIN manually.
Click on the Create model button to create the new model.
Model items with color but without sizes
Step 1 - Colors
Same as in Model items with sizes and colors over.
Step 2 - Sizes
Tick the box for “Model without size”. The fields for adding sizes are then removed.

Click on Next > to continue to the last step: Items.
Step 3 - Items
Same as in Model items with sizes and colors over.
Model items with sizes but without colors
Step 1 - Colors
Tick the box for “Model without color”. The fields for adding colors are then removed.
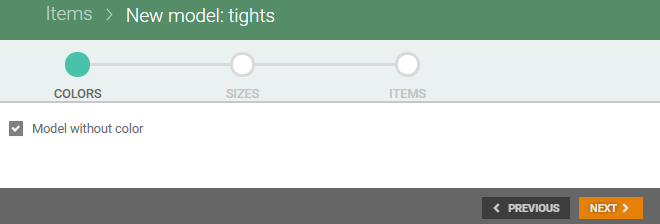
Click on Next > to continue to the next step: Sizes.
Step 2 - Sizes
Same as in Model items with sizes and colors over.
Step 3 - Items
Same as in Model items with sizes and colors over.
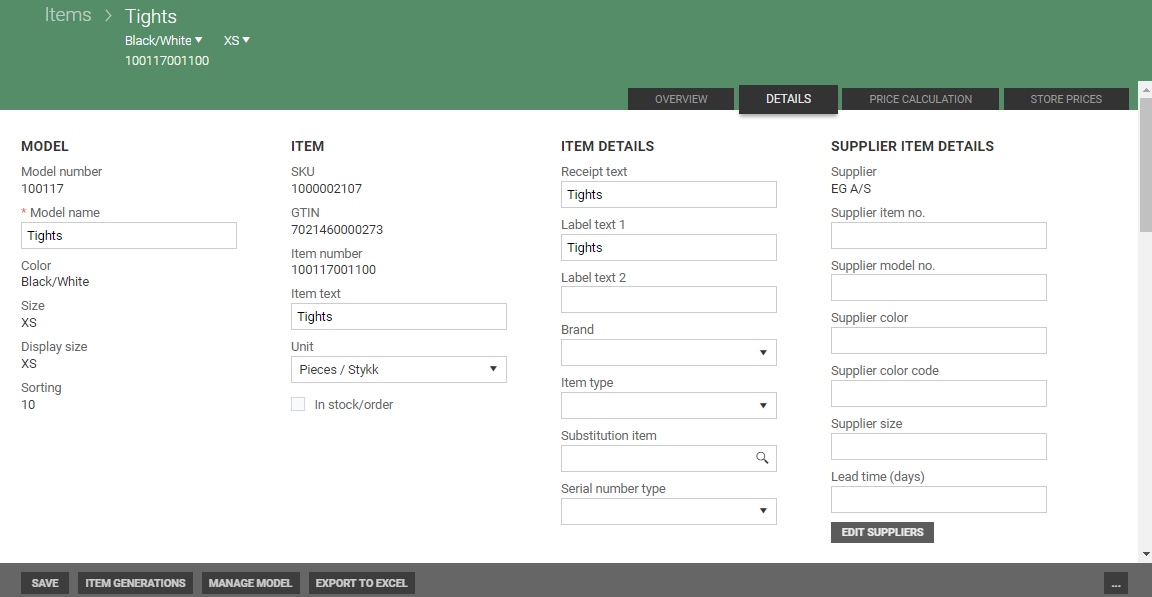
Once you have completed all the steps to create a model, the item details screen for the model is displayed. You can add more information about the model here.
Enter details in the fields that apply to the item. Some fields may already contain a default value. You can edit these default values.
For more information on item detail, see Item details.
Click on Save to save your changes.
The “Save changes” dialog opens.
Choose whether to copy the changes to all items within the model or only to the variant (same color).
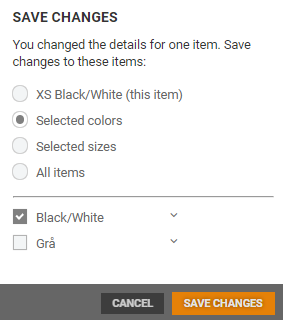
Select which items your changes are to be saved for and click on Save changes.
Draft items
When you create new items, they get status Draft. It is displayed behind the item name in brackets (see example).

The item keep status Draft until Store prices is added to the item. When price is set for the item, the status changes to Active.
For more information on how to add Store prices, see Manage prices: Create new store price