Stock adjustment changes the recorded stock of an item to match reality. Unlike breakage (which only removes stock), a stock adjustment can be positive (stock found) or negative (stock missing) - each adjustment carries a reason code and an action code.
You reach the Stock adjustment flow from the Create tab → Inventory → Stock adjustment.
Stock adjustment pages share the general transaction layout, header, more menu, discard, finish, and done described on Transaction basics. This page covers only what is specific to stock adjustment.
The start page
The Stock adjustment start page has no options to pick from - you simply begin by picking an item.
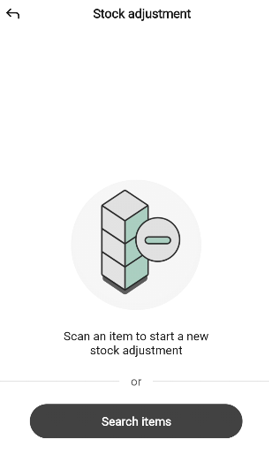
The page shows an illustration of boxes with a minus sign, the message “Scan an item to start a new stock adjustment”, or separator, and a Search items button.
Start the transaction in one of two ways:
Scan an item - point the device at the item’s barcode. A new stock adjustment opens with that item’s reason/action dialog ready to fill in.
Tap Search items - open the search sheet to find the item by name or number. Tapping a row adds the item; tapping the info (i) icon opens the item preview.
To leave the start page without starting an adjustment, tap the back arrow in the top-left.
The stock adjustment page
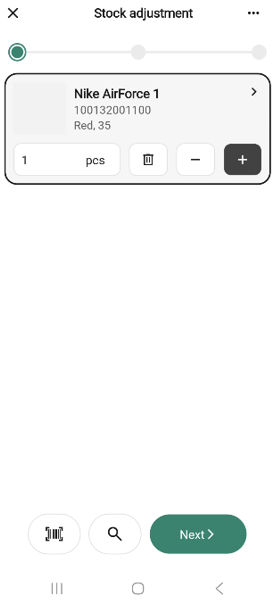
The page uses the standard transaction layout, with a Total row below the progress bar that shows the item count and the net adjustment value.
When there are no items on the adjustment, the main area shows the + icon and “Scan or use search to start adding items” - the same empty state shown before the first item and after you remove the last item.
The bottom bar has a Scan icon, a Search icon, and a Next button. Next is disabled until at least one item is on the adjustment.
Adding an item - reason, action and adjustment
Each item you add (by scan or by search) opens a dialog for the reason code, action code, and adjustment quantity before it is saved to the transaction.
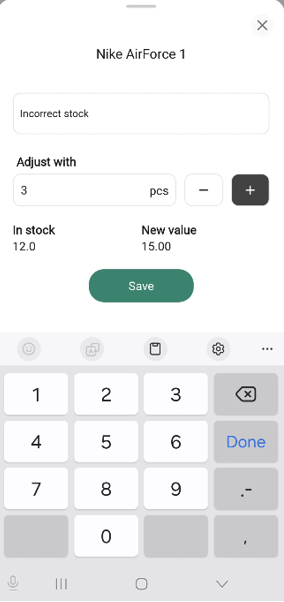
The dialog shows the item name at the top and the following controls:
A Reason code dropdown (for example, Damaged item, Expired item, Damaged packaging, Theft, Visible waste).
An Action code drop-down (for example, Return to central warehouse).
An Adjust with field where you enter the adjustment in pieces. Unlike other transactions, this field is signed - it renders the value with a + or − and accepts negative numbers. Use + to add stock (for example, items found on a shelf that were not in the system) and − to remove stock (for example, items that are missing or damaged). The dialog has step buttons − and + to nudge the value; there is no trash icon in the dialog (rows on the adjustment page have a trash icon for removal).
Below the field, a read-only pair of labels shows In stock (the current recorded quantity) and New value (what the recorded quantity will become after the adjustment).
The first item you adjust in a session starts with both dropdowns empty — you must pick both before saving. From the second item onwards, both dropdowns are pre-filled with the codes you used on the previous item; change them when needed.
Enter the adjustment quantity (positive or negative). Save becomes active once you have entered a number; tap it to add the item to the adjustment. Tap the X to close the dialog without saving.
On the adjustment page, the row then shows the signed adjustment on its quantity field (for example, +2 pcs, −5 pcs). Tapping the chevron on the row reopens the reason/action dialog so you can change its codes or value.
Invalid item while editing
If you are editing an item in the reason/action dialog and scan a different item, the Invalid item popup opens: “The scanned item does not match the item that you are editing.”
Removing an item
Removing an item on stock adjustment follows the shared Removing an item pattern. Tap the trash icon on a row to open the Remove item? confirmation popup, then tap Remove item to confirm or Cancel to go back.
The more menu
The “More (…)” button in the header opens the Stock adjustment options bottom sheet.
The menu has only Add quick action, Hide total, and Discard transaction. A stock adjustment cannot be put on hold - Put on hold is not listed.
The finish page
Tap Next on the Stock adjustment page to open the finish page.
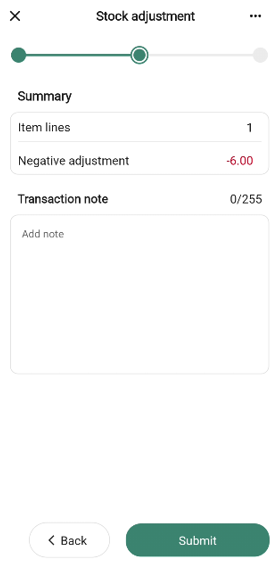
The summary has these rows:
No. of items - number of distinct items on the adjustment.
Positive adjustment - total quantity added to stock across all items, shown with a leading +.
Negative adjustment - total quantity removed from stock across all items, shown as a negative number.
The free-text field is labelled Transaction note with the placeholder “Add note”.
Tap Submit to register the adjustment, or Back to return to the adjustment page.
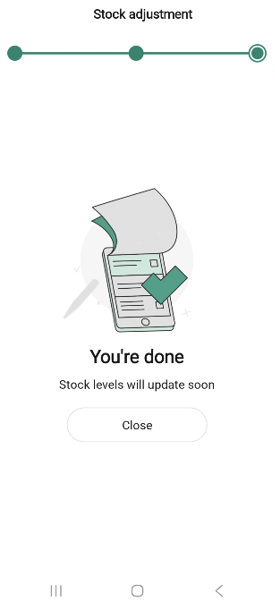
The done page
After you submit, the done page confirms the adjustment has been sent. The message reads “Stock levels will update soon” - the change may take a moment to reflect in stock figures elsewhere in the app.
How the submission is processed
When you tap Submit, the adjustment is queued for delivery to the Inventory Service - the system that tracks stock and stock movements across your store. The hand-off happens in the background, which is why the done page reads “Stock levels will update soon” rather than showing the new values immediately.