A stocktaking is a physical count of stock in the store. You can count against a count group prepared by back-office (a pre-defined list of items expected at a location), or against random items you scan on the spot.
You reach the Stocktaking flow from the Create tab → Inventory → Stocktaking. Stocktaking pages share the general transaction layout, header, more menu, put-on-hold, and discard behavior described on Transaction basics. This page covers only what is specific to stocktaking.
The start page
The Stocktaking start page asks what kind of count you want to run.
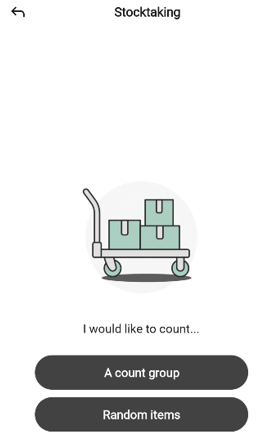
The page shows a box-on-trolley illustration, the message “I would like to count…”, and two buttons:
A count group — count items on a count group prepared by back-office. Tap to open the Select count group sheet.
Random items — count any items you scan, without a pre-defined list. Tap to go straight to the counting page.
To leave the start page, tap the back arrow in the top-left.
If a stocktaking is already paused, the app asks whether to resume it before the start page. See Resuming a paused transaction.
Selecting a count group
Tapping the A count group button opens the Select count group bottom sheet.
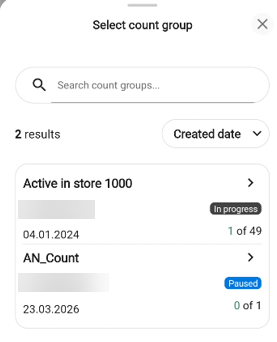
Type in Search count groups… to narrow the list. The result count appears below (for example, 28 results).
Tap the sort drop-down (default Created date) to change the sort order.
Each row shows the group name, its creation date, its current count (for example, 0 of 50), and a status badge:
The new group has not started.
In progress — someone has already started counting this group. The status is visible so you can see which groups are in use before picking one.
Paused — someone started counting and then paused it.
Tap a group to start counting it. The sheet closes and the count group page opens.
Tap the X to close the sheet without choosing. You return to the start page.
Taking over a count group from another user
If you choose a count group that another user has in progress, the Take over count group? popup opens before the counting page.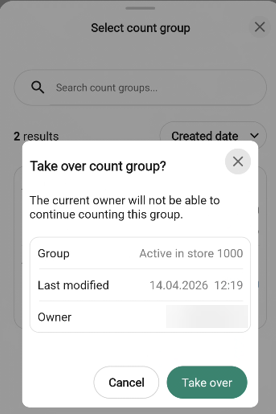
The popup warns “The current owner will not be able to continue counting this group.” and shows the Group name, the Last modified timestamp, and the current Owner.
Tap Take over to claim the group and continue or Cancel to go back to the select sheet and pick a different group.
Random items
Choosing Random items on the start page skips the Select count group sheet and opens the counting page directly. The counting page works the same as for a count group with one structural difference:
It has no Not counted / Counted / All tabs. Every item you add appears in a single list.
Everything else - scanning, searching, focused rows, multi-location items, the confirm-to-count flow, editing a counted item, scan warnings, the more menu, discard, finish, and done - behaves the same as the count group flow described below.
The count group page
The count group page has a few differences from the standard transaction layout:
The header shows the name of the count group (for example, Torg/Pall 3200, Home) rather than the transaction name.
Three tabs below the progress bar filter the item list:
Not counted (n) - items that still need counting. This is the tab the page opens on.
Counted (n) - items you have confirmed a count for in this session. Empty when you start a new group.
All (n) - every item in the count group.
The bottom bar has a scan icon, a search icon, and a Next button. Next is disabled until every item in the group has been counted.
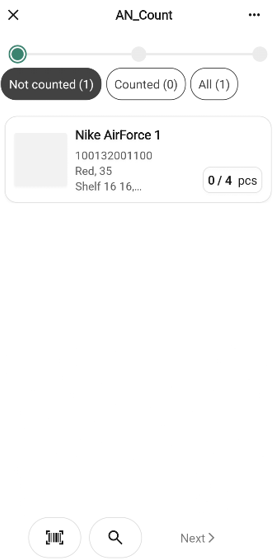
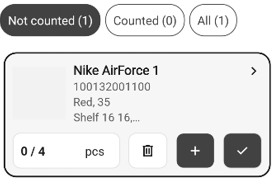
Each item row shows the item’s thumbnail, name, item number, its main shelf location (followed by (+n) if there are additional locations), and a count badge on the right showing / (for example, 0 / 4).
On a new count group the page shows a + icon and “Scan or use search to start counting items”. Once every item in the group has been counted, the Not counted tab is empty and shows a success illustration with “No items” / “You have no items left to count”. Next becomes enabled at that point.
Counting items
Counting differs from other transactions because each item’s quantity must be confirmed before the item moves to the Counted tab.
Single-location items
If the item has only one shelf location, it is focused on the count group page in the same way as in quantity rows elsewhere — the row expands with a quantity field and step buttons — with one addition: a confirm (check) button on the far right.
Type the counted quantity into the field or tap + to step up.
Tap the confirm (check) button, or tap Done on the keyboard, to commit the count. The item moves to the Counted tab.
Items with multiple locations
If the item is stored at more than one shelf location, a bottom sheet opens so you can record a quantity per location.
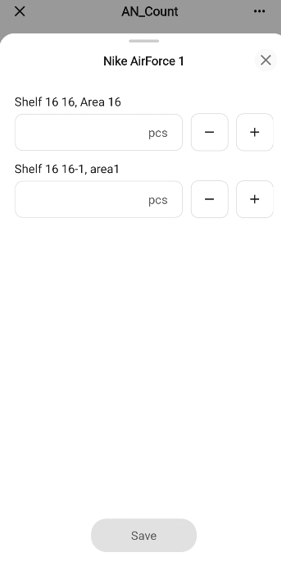
Each row corresponds to a shelf location and has a quantity field with − and + step buttons. Locations are sorted with the lowest shelf number on top.
Enter the quantity counted at each location. If there is no stock at a shelf, tap − on that row to set the field to 0 — unlike the quantity-row pattern elsewhere, − in this sheet always decrements (it never becomes a trash icon).
Tap Save to commit the counts and close the sheet. Save stays disabled until every row has a value - an empty field is treated as “not yet counted”, not as zero.
Tap the X to close the sheet without saving.
The same multi-location pattern is used for count groups and count lists.
Ingredient items
Ingredient items are counted through a dedicated bottom sheet instead of the inline focus row, so you can enter the supplier-pack count and the loose inner-unit count separately.
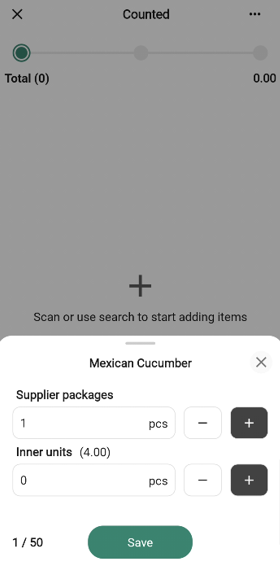
Tap or scan an ingredient item. A bottom sheet opens with the item name at the top and two quantity fields - Supplier packages and Inner units - each with − / + step buttons. The Inner units label shows the pack breakdown in parentheses (for example, “Inner units (12 x Hot dog bun sesame)”).
Below the fields, a combined counted / expected total is shown in supplier-package units (for example, 4,75 / 8 — four packs plus three loose units of a twelve-per-pack item).
Fill one or both fields. Save becomes active once either field has a value. Tap Save to commit the count and close the sheet - the item moves to the Counted tab, where its row shows the same combined decimal.
Tap the X to close the sheet without saving.
Editing a counted ingredient item from the Counted tab opens the same dual-field sheet so you can change either quantity.
Editing or resetting av counted item
Once an item is on the Counted tab, tapping its row opens an action sheet rather than focusing it directly.
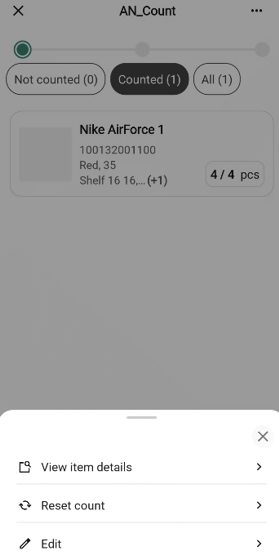
Edit — re-opens the item for counting.
For a single-location item the row focuses so you can change the value.
For a multi-location item, the sheet opens again with the first shelf row pre-selected.
Reset count — opens a Reset count? confirmation popup that reads “‘<item name>’ will be set back to ‘Not counted’.” Tap Reset count to return that one item to Not counted or Cancel to go back.
This single-item reset is different from Reset count group in the more menu, which clears every count in the group.
Adding items not in the count group
Items not listed on the count group can still be added - for example, if you find stock of an item on the shelf that the prepared group did not anticipate. Searching for such an item and tapping it opens the Add to count group? popup: “‘<item name>’ is not part of the selected count group.”
Tap Add item to add the item to the group - it is then counted like any other item in the group — or Cancel to go back.
Scan warnings
A few scan actions show a warning popup instead of updating a count.
Scanning an already-counted item.
The Count item again? popup opens: “‘<item name>’ was already counted.” Tap Count again to re-open the item for a new countor Cancel to keep the existing count.
Scanning a different item while a multi-location sheet is open
The Incomplete count popup opens: “You need to finish counting the selected item before scanning another one.” Tap Close and either save or dismiss the open sheet before scanning a new item.
Scanning the same multi-location item with no shelf row selected
Scanning the open item increments the quantity on the currently selected shelf row; if no row is selected, the Select shelf location popup opens: “You need to select a shelf location in order to increase quantity by scanning.” Tap Close, tap into the shelf row you want to count, then scan again.
The more menu
The “More (… )” button in the header opens the stocktaking options bottom sheet.
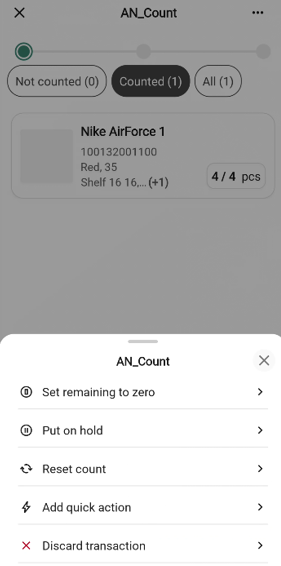
Along with the standard transaction options — Add quick action, Put on hold, and Discard transaction - stocktaking has two options of its own:
Set remaining to zero - marks every item still on Not counted as out of stock. See below.
Reset count group - clears every count you have entered in this session and returns the group to its Not counted state so you can start over.
Stocktaking does not include Hide total or Edit name.
Set remaining to zero
Use Set remaining to zero when you have physically finished counting and are sure any items still on Not counted are not in the store.
Choose Set remaining to zero from the more menu. A confirmation popup opens.
The popup reads “<n> items will be registered as out of stock.”
Tap Confirm to mark the remaining items as out of stock and move them to the Counted tab or Cancel to go back.
Reset count group
Reset count group is like Discard but keeps you in the flow. It clears every count you have made and returns the group to its Not counted state.
Choose Reset count group from the more menu. A confirmation popup opens.
The popup reads “All items will be marked as ‘Not counted’.”
Tap Reset count to clear your counts or Cancel to go back.
Discarding a stocktaking
Discarding a stocktaking leaves the count group itself in place - you will still find it in the Select count group sheet afterwards — but clears any counts you have made during this session.
Choose Discard transaction from the more menu.” Tap Discard to confirm and leave the page or Cancel to stay. See the generic Discarding a transaction pattern for how this fits in with other transactions.
The finish page
Tap Next once every item has been counted to open the finish page. The header continues to show the count group name.
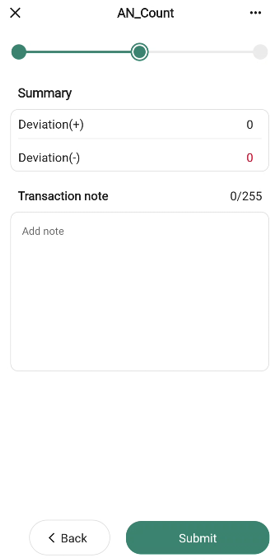
The summary has these rows, all read-only:
Deviation (+) - total count over the expected quantity, in green.
Deviation (−) - total count under the expected quantity, in red.
The free-text field is labelled Transaction note with the placeholder “Add note”.
Tap Submit to complete the stocktaking, or Back to return to the count group page.
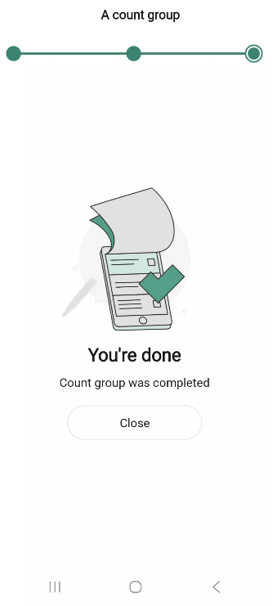
The done page
After you submit, the done page confirms the stocktaking is finished. The header keeps the count group name, and the message reads “Count group was completed”.
How the submission is processed
When you tap Submit, the counts are queued for delivery to the Inventory Service — the system that tracks stock and stock movements across your store.
The hand-off happens in the background, so the done page appears right away; stock figures elsewhere in the app