Receive goods registers items arriving at the store against a purchase order, a delivery package, or — a manual receival.
You reach the Receive goods flow from the Create tab → Procurement → Receive goods. Receive goods pages share the general transaction layout, header, more menu, and put-on-hold described on Transaction basics. This page covers only what is specific to receive goods.
The start page
The Receive goods start page asks how you want to find or start the receival.
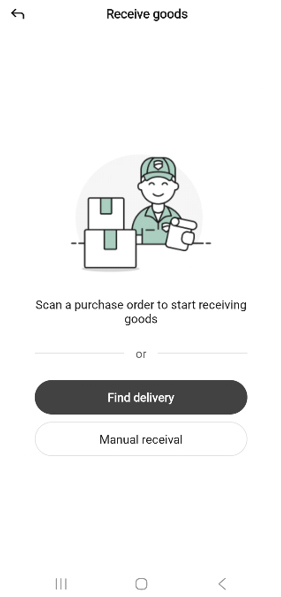
The page shows a delivery-person illustration, the message “Scan a purchase order to start receiving goods”, or separator, and two buttons:
Find delivery - pick an existing order or delivery package. Tap to open the Find delivery sheet (see below).
Manual receival — start an empty receival for goods that arrive without a matching order; add items by scan or search as they arrive.
You can also scan a printed purchase order or package barcode from this page — a recognized barcode opens the matching delivery directly.
To leave the start page, tap the back arrow in the top-left.
If a receival is already paused, the app asks whether to resume it before the start page. See Resuming a paused transaction.
Finding a delivery
Tapping Find delivery opens a bottom sheet that lists both orders and packages, with a tab control to switch between them.
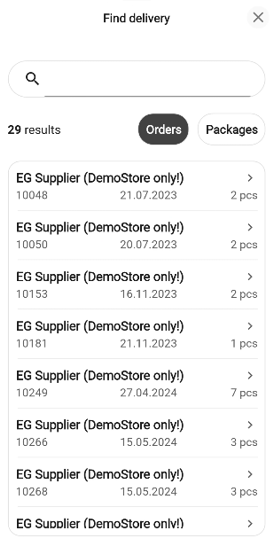
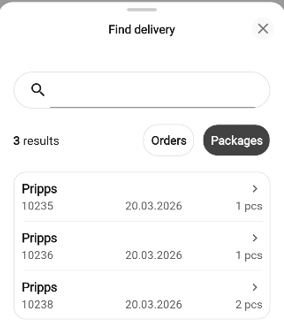
Use the Orders / Packages tab switch at the top-right of the list to change the view.
Orders shows open purchase orders;
Packages shows pending delivery packages.
Each row shows the supplier (for orders) or package label, the order or package number, the expected number of items, and the expected delivery date.
Type in the search field (Search orders… or Search packages…) to narrow the list - the list starts with all entries and filters as you type. The result count appears below the field.
Tap a row to open the receive goods page for that order or package.
Tap the X to close the sheet without choosing. You return to the start page.
Taking over from another user
If you open a delivery that another user has already started, the Take over goods receipt? popup opens.
The popup warns “The current owner will not be able to continue receiving goods.” and shows the Order no., Last modified timestamp, and current Owner.
Tap Take over to claim the receival and continue or Cancel to go back.
Manual receival
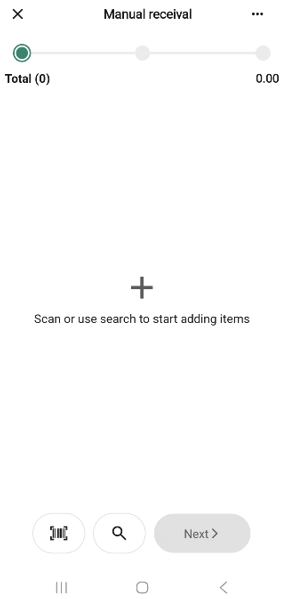
Choosing Manual receival on the start page opens an empty receive goods page with no order or package loaded. It is a lightweight “add items and confirm” flow for goods that arrive without matching paperwork.
The flow differs from the order/package flow (described below) in a few ways:
The header reads Receive goods - no order or package number.
There is no supplier row; the receival is not tied to a specific supplier.
The page starts empty. Items are added by scan or search and use the shared quantity-row pattern. The “Scan or use search to start adding items” empty state is shown again if you later remove every item.
The bottom bar has Scan, Search, and Next only. There is no Check all because there are no pre-populated rows.
The more menu has only Add quick action, Put on hold, and Discard transaction. Reset count is not included (there is no list to reset), and the discard option is labelled Discard transaction (not Cancel receive goods).
The finish-page summary has only No. of items and Quantity - no supplier, package count, or deviation value.
The done-page message reads “Receive goods was completed”.
The Receive goods page
The receive goods page layout depends on which entry point you choose.
For an order, the header reads Order # (for example, Order #123456).
For a package, the header reads Package Package #<number>.
For a manual receival, the header reads Receive goods.
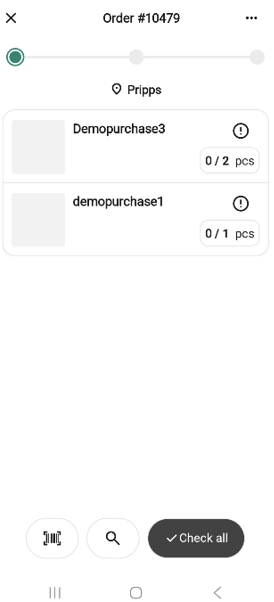
Below the progress bar, a supplier row with a location pin  shows the supplier (for example, Hoka Norge AS).
Items from the order or package are listed below, each row showing the item’s thumbnail, name, item number, variant details, and a count badge on the right showing <received> / <ordered>(for example, 0 / 4). All rows start collapsed; there is no focused row when the page opens.
The bottom bar has a Scan icon, a Search icon, and one of two right-hand buttons:
Check all - shown only while no item has been received. See Receiving everything at once.
Next - replaces Check all as soon as any item has been confirmed. Next is enabled at that point; tap it to continue to the finish step.
Receiving items
Focused row
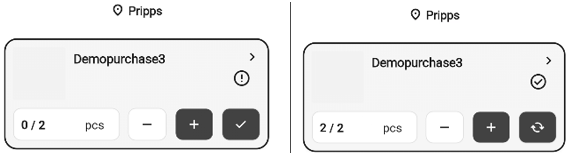
Tap or scan an item to focus its row. A focused row expands to show a quantity field (received / ordered, for example 0 / 4 pcs), − and + step buttons, and a confirm (check) button on the far right.
Tapping another row focuses that row and collapses the one that was focused before.
Confirming a row
Tap the confirm (check) button — or tap Done on the keyboard — to mark the item as received at the current quantity. The row collapses and shows a check icon in its header to mark it confirmed. Its counts badge updates (for example, from 0 / 4 to 4 / 4).
You can also adjust the quantity by pressing + / − or by tapping the input field to open the numeric keyboard. The value is saved when you press Done or close the keyboard — you do not have to use the check button.
Re-focusing a confirmed row shows a reset (circular arrow) button in place of the check button. Tap it to set the row back to 0 / <ordered> and return it to the not-counted state.
Under- or over-received items
If the received quantity differs from the ordered quantity:
Less than ordered - the row is marked with a warning (!) icon on the right to flag the shortfall. The item still counts as confirmed and the row behaves the same as any other confirmed row. Reducing the quantity on a confirmed row (even after using Check all) also changes the row’s icon to the warning icon.
More than ordered - you can enter a higher value than the quantity ordered. The row is treated as received and the extra is tracked as a positive deviation, shown in green on the finish page.
Adding items not in the order
You can also scan or search for items that are not part of the selected order or package. When you pick an unexpected item, an Add item? popup asks “‘<item name>’ is not part of the selected order.”
Tap Add item to add the item to the receival as an extra line or Cancel to go back.
Receiving everything at once
While the page is still pristine - no item has been confirmed yet - the bottom bar shows a Check all button in place of Next.
Tap Check all to mark every item on the order as fully received. Every row collapses with its check icon and a full count badge.
Once pressed, Check all is replaced by Next. If you then change a row, you can use the row’s own check and reset controls.
Customer order alerts (package receivals only)
Customer order alerts only appear when you receive a delivery package. Manual and order-based receivals do not show these alerts.
If an item on the delivery package has one or more pending customer orders - customers waiting for stock to arrive - the app flags this in two places.
When you scan. Scanning an item tided to a customer order opens an inline Customer order dialog on the receive page.
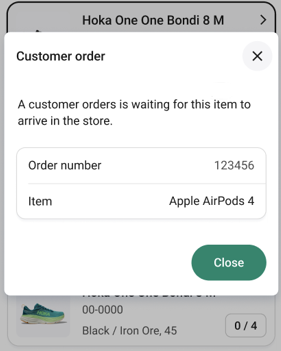
The dialog reads “A customer order is waiting for this item to arrive in the store.” (pluralized when more than one) and lists each order’s number and item. Tap Close to dismiss and continue receiving.
This per-item dialog is not shown when you use Check all - it only appears when you scan or tap a single row.
On the finish page
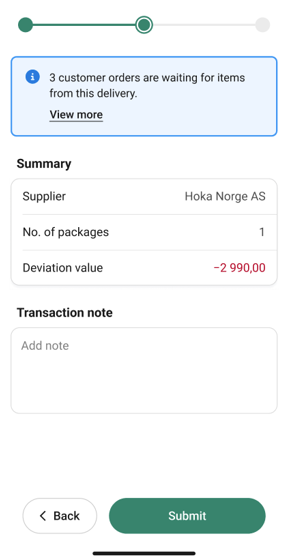
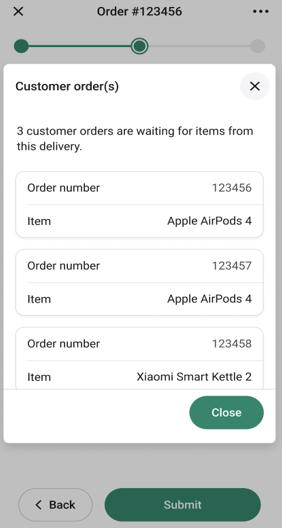
If the package contains any customer orders, a blue banner appears above the summary on the finish page (“<n> customer orders are waiting for items from this delivery.”) with a View more link.
Tapping View more opens the Customer order(s) dialog listing every pending order with its order number and item; tap Close to dismiss.
The more menu
The “More …” button in the header opens the receive goods options bottom sheet. The sheet’s title matches the page header (for example, Order #12345).
The menu has these options:
Add quick action - adds this transaction to the Quick actions section on the Home screen. See Customizing Quick actions.
Reset count - returns every row on the receival to 0 / and clears any confirmations you have made in this session.
Put on hold - pauses the receival so you can resume it later. See Putting a transaction on hold.
Cancel receive goods - ends the receival. Opens the standard Discard transaction? popup “This action cannot be undone.” - see Discarding a transaction.
Receive goods does not have Hide total.
Reset count
Reset count clears every confirmation without leaving the flow - useful if you want to re-count from scratch.
Choose Reset count from the more menu. A confirmation popup opens.
The popup reads “All items will be marked as ‘Not counted’.”
Tap Reset count to clear every row or Cancel to go back.
The finish page
Tap Next on the receive page to open the finish page. The header continues to show the order, package, or Receive goods title.
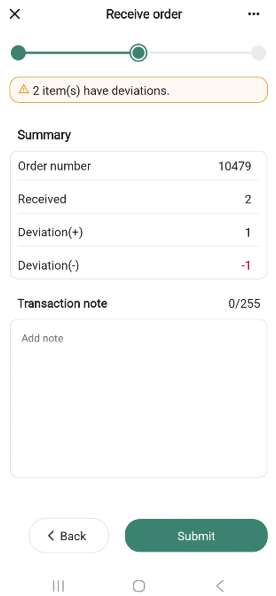
The free-text field is labelled Transaction note with the placeholder “Add note”.
On a package receival with pending customer orders, a customer order banner appears above the summary (the banner is not shown on manual or order receivals).
Tap Submit to register the receival, or Back to return to the receive page.
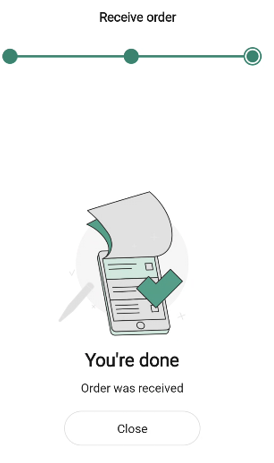
The done page
After you submit, the done page confirms the receival. The message reads “Order was received” (or “Package was received” for packages).
How the submission is processed
When you tap Submit, the receival is queued for delivery to the Procurement Service - the system that handles ordering, supplier communication, and goods-receipt reconciliation across your store chain. The hand-off happens in the background, so the done page appears right away; the Procurement Service picks up the receival a short time later.
Manual, order-based, and package-based receivals are all submitted the same way - only the header and summary rows differ.